David Herron
Tags: Docker »»»» Docker MAMP »»»» Docker MySQL »»»» MySQL »»»»
Sometimes our applications need multiple database, but with a single database server instance. The typical recommendation is for each Docker container to serve a single application. For databases, that means one database server for each application. That's the result of following a theoretical best practice, but isn't there another best practice to avoid excess processes and overhead? MySQL, like most other database servers, can support multiple databases, multiple user identities, and has an extensive system for controlling access on IP address, user names, and passwords. The MySQL container for Docker is easy to use, but supports only a single database instance per server container. In this article let's learn how to go ahead and configure the MySQL container for Docker to support multiple databases each with their own user ID.
Suppose you have five applications to host on a server, each with a separate database? Theoretically the best practice is for each Docker container to serve a single well defined purpose. That means five (or more) containers for the applications, but what about the database server? Do you host five database server containers, each holding a single database? Or do you host a single database server container, holding five databases?
The default way to configure the MySQL Docker container is with environment variables. Those environment variables support creating one user ID and one database.
The case I faced which inspired this tutorial is that I have three websites, two using Drupal, the third using Wordpress, to deploy to a single VPS. Following the best practice that would mean three separate MySQL container instances. Using MySQL in the default fashion would result in three containers. But it seemed to me excess overhead to follow that practice, especially since MySQL can easily support multiple databases per server.
In the old days we'd configure The Database Server (or servers), storing all data from a long list of applications. As a result MySQL is quite capable of storing multiple databases in each server instance, along with multiple user ID's. These features are hold-overs from the old days.
What I chose was to work out how to reconfigure a Docker-based MySQL instance to support multiple user ID's and multiple databases. To maintain separation between the databases for each application, we define separate user ID's with separate access rights. Each application will therefore only have access to its own data, and not to the data of other applications.
Configuring MySQL to support multiple databases and multiple user ID's is not unique to a Docker deployment.
Configuring the MySQL Docker container to support multiple databases and multiple user ID's starts with the configuration of a single database and single user ID. Once the database is running you can use SQL commands (or PHPMyAdmin) to create additional databases and user ID's. There is one user ID per database, and each user ID only has access rights for its database.
Setting up a MySQL database server, in Docker, to serve multiple applications
What I'll do is to describe a setup similar to what I developed on my server. Previously the three websites had been hosted on a VPS rented from a web hosting provider, using a MySQL server also rented from that provider. The change was to rent a single VPS where I had the freedom to install Docker (Docker Swarm) and to host a self-managed database.
This article is focused on configuring the MySQL server for this purpose.
With that in mind, let's look a simplified Docker Compose file derived from what's running on my server:
version: '3.8'

services:

    db:
        image: "mysql/mysql-server:5.7"
        container_name: db
        networks:
           - dbnet
        volumes:
           - /opt/db/data:/var/lib/mysql
           - /opt/db:/db
        restart: always
        environment:
           MYSQL_ROOT_PASSWORD: "ROOT PASSWORD"
           MYSQL_ROOT_HOST: "10.28.5.%"
           MYSQL_USER: USER-NAME
           MYSQL_PASSWORD: PASSWORD
           MYSQL_DATABASE: DATABASE-NAME

    phpmyadmin:
        image: phpmyadmin/phpmyadmin
        networks:
            - dbnet
            - servernet
        environment:
            PMA_ARBITRARY: 1
            PHP_UPLOAD_MAX_FILESIZE: 1G
            PHP_MAX_INPUT_VARS: 1G
        ports:
            - "8001:80"

networks:
    dbnet:
        external: true
    servernet:
        external: true
This sets up a MySQL server, along with a PHPMyAdmin instance that could be used for administering the database.
The MySQL instance is configured using the typical fashion. A directory is mounted onto /var/lib/mysql which will hold the database files, and persist them outside the container. To learn more about MySQL setup see Set up MySQL using Docker on your laptop and Deploying MySQL to get started using a Docker Compose file
The environment variables specify a password for root, and allows access to that ID from the 10.28.5.% network. Since the root ID has full privileges to the database the MySQL container normally limits access using root to the given container. But, we want to use PHPMyAdmin to administer the database, requiring access to the root ID. Using MYSQL_ROOT_HOST as shown here instructs the MySQL container to create a second root ID to access the database, limiting access to IP addresses matching 10.28.5.%.
We therefore configure the dbnet virtual network to match this IP range. Because it's specified as an externally defined network, we can run docker commands to setup dbnet:
$ docker network create \
    --driver=bridge \
    --subnet=10.28.5.0/24 \
    dbnet
This is an example of creating a network in Docker, while controlling the IP address range used in the network. The dbnet network will allocate IP addresses from 10.28.5.0/24, matching the address mask we configured into the MySQL server. Any application requiring database access must also use the dbnet network.
The bridge driver is used for regular Docker deployments. If you're using Docker Swarm, then you must use the overlay driver instead.
The PHPMyAdmin container is also connected to the dbnet network to have access to the database. It is also connected to servernet which could be used for the public facing website services. By using PMA_ARBITRARY=1, PHPMyAdmin will always prompt for database access particulars. It has a published port, 8001, so we can access it from our laptop.
We another network to create, servernet:
$ docker network create --driver=bridge servernet
We won't do much with this network in this tutorial. On my server there is a NGINX-based remote proxy used for implementing HTTPS for the websites. The reverse proxy and the application containers all attach to servernet. The database container is not connected servernet which is meant to keep the database insulated from the public Internet.
Defining an example service that uses the database
We aren't going to discuss the services that use the database. We know that there will be multiple such services, so let's talk about an example service:
version: '3.8'

services:

    wp:
        image: wordpress:php7.4-apache
        container_name: wp
        networks:
            - dbnet
            - servernet
        restart: always
        ports:
            - '80:80'
        volumes:
            - /opt/wp/logs:/var/log/apache2:rw
            - /opt/wp/docroot:/var/www/html:rw

networks:
    dbnet:
        external: true
    servernet:
        external: true
This is derived from a companion article Wordpress local development environment with Docker and Docker Compose on your laptop
It uses the standard wordpress container to manage a Wordpress instance. Some directories are mounted into the container to persist their content.
In production use, it's strongly recommended to implement HTTPS. While HTTPS can be implemented in this container, I use NGINX-Proxy-Manager to do so. This is a reverse proxy built around NGINX, and uses Lets Encrypt to procure SSL certificates. This container therefore only needs to export port 80 because NGINX-Proxy-Manager takes care of HTTPS.
For most applications (Drupal, Gogs, Jenkins, Kanboard, etc) it's only been necessary to expose port 80 and let NGINX-Proxy-Manager handle HTTPS and the redirect from port 80 to port 443. But Wordpress is finicky about implementing HTTPS, and it was necessary to install the Really Simple SSL plugin.
The virtual host name for the container is determined by the service name and/or the container_name attribute. This is important when it comes to configuring a reverse proxy as just discussed. The reverse proxy must know to which virtual host name to forward the HTTP traffic.
Structuring directories to hold database plus multiple application containers
Let's talk about a practical consideration - the directory structures required to hold data related to the database and application containers.
On my server I declared the /opt directory as the place to store data about each container. Maybe that's not technically the correct place, but that directory was conveniently empty when the server was created.
This meant that the MySQL container has a directory /opt/db containing:
/opt/db/docker-compose.yml- The Compose file defining the service/opt/db/data- Data files for the database- Consider adding a mount to export
/var/log/mysqld.logso you can easily see logs - Consider adding a configuration setting to change the MySQL socket so it's not visible in the data directory
For each application a similar structure is followed. Namely, there is a directory to contain a docker-compose.yml plus any data files.
For the Wordpress example this was:
/opt/wp/logs- Exposes the log files for easy viewing/opt/wp/docroot- Persists the Wordpress files
All this handles the setup, so let's now talk about the MySQL configuration to support multiple applications.
Connecting as root to a MySQL database from other containers
In the docker-compose.yml we showed for MySQL, we included a PHPMyAdmin container. This is a popular tool for managing MySQL servers. For full effect it is best if PHPMyAdmin is connected to a MySQL account that has ALL privileges to the server. For the mysql/mysql-server container, that fully privileged account has the name root.
Let's start by learning how we enable accessing the root ID from containers other than the database container. By default the MySQL container only allows root connections only from the local host. But to support this PHPMyAdmin container, we need to support connections from other hosts. Remember that in Docker each container instance acts like its own host machine.
As we already discussed, by default the MySQL container restricts connections to the root user ID to the MySQL container itself. By configuring the MYSQL_ROOT_HOST variable the MySQL container will configure access to the root ID appropriately. But we'll learn something by studying how this works.
In MySQL, an account is created by adding an entry to the mysql.user table. One way to do that is with the CREATE USER command in SQL. The
MySQL documentation on adding accounts and assigning privileges is worth your time to read.
Using solely MYSQL_ROOT_PASSWORD is equivalent to the following SQL:
CREATE USER 'root'@'localhost'
    IDENTIFIED BY 'PASSWORD';
GRANT ALL
    ON *.*
    TO 'root'@'localhost';
This creates a user ID root that is matched to connections from localhost. In Docker containers, localhost is the container itself.
We went over lots of details about user ID's in MySQL in: Understanding MySQL the Access Denied error in or outside a Docker container But summary is that for any incoming connection to MySQL, it matches connection attributes against entries in the mysql.user table.
The GRANT command then determines the level of access the identified account has. Because it is the root user, we use GRANT ALL to give the account full access to every last everything. The access options available in the GRANT command are:
| Option | Description |
|---|---|
| ALL | This will allow a mysql user the complete access to the specified database or full access to all databases |
| SELECT | Allow user to select data from tables |
| INSERT | Allow user to insert data into tables |
| UPDATE | Allow user to update data in tables |
| DELETE | Allow user to delete rows in tables |
| CREATE | Allow user to create new database and tables |
| DROP | Allow user to delete databases and tables |
| ALTER | Allow user to alter the structure of a table or to create triggers on a table. |
| GRANT OPTION | Allow user to grant or remove other user privileges |
To test this, in docker-compose.yml comment out the MYSQL_ROOT_HOST setting, then run docker-compose up to launch the containers. After the database starts, in your web browser visit http://localhost:9001 and you should find PHPMyAdmin. Enter these login particulars:
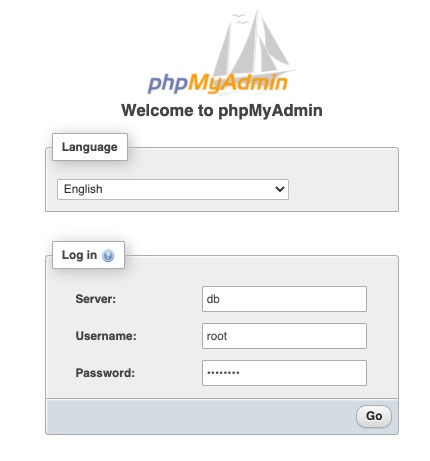
On clicking the Go button you should see an error. With no MYSQL_ROOT_HOST setting the root user ID can only be accessed from inside the MySQL container.
Another test is to login using these credentials:
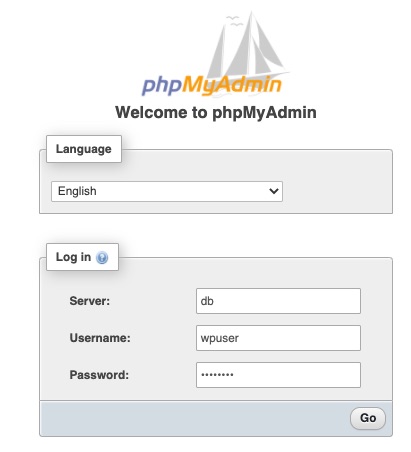
You should be able to readily login using the wpuser ID. Your only access will be to the wpdb database.
The MYSQL_ROOT_HOST variable is how we support fully privileged access from another host. This variable changes things so the following SQL is executed:
CREATE USER 'root'@'MYSQL_ROOT_HOST'
    IDENTIFIED BY 'PASSWORD';
GRANT ALL
    ON *.*
    TO 'root'@'MYSQL_ROOT_HOST'
    WITH GRANT OPTION;
The first command is clear, it creates a user ID root, that is allowed to access the database from IP addresses matching the content of MYSQL_ROOT_HOST, using the given password. The second command allows this user ID all privileges on all databases and all tables. Additionally, because of the GRANT OPTION setting, this user ID can create other user ID's and grant privileges to those ID's.
Then, what value do we supply in the MYSQL_ROOT_HOST variable to get the desired effect? Here's a few examples:
| Type | Sample | Discussion |
|---|---|---|
| Fully qualified domain name | foo.example.com |
The incoming connection can only come from the named host |
| Fully qualified IP address | 172.20.3.5 | The incoming connection can only come from the named IP address |
| Wildcard domain name | %.example.com, %.example.% |
The incoming connection can come from any host that matches the domain name |
| Wildcard IP address | 172.%, 198.51.100.0/255.255.255.0 | The incoming connection can come from any host with a matching IP address |
| Wildcard | % | Any host name or IP address will match |
In the example above we specified 10.28.5.% as the wildcard IP address in MYSQL_ROOT_HOST. However under the current instructions the database was initialized without using that variable, meaning we were unable to login as root from PHPMyAdmin. The wildcard IP address was chosen to match the subnet assigned to the dbnet network.
We could reconfigure the database by changing MYSQL_ROOT_HOST in the Compose file. But instead, let's do it manually.
$ docker exec -it db mysql -u root -p
Enter password:
Welcome to the MySQL monitor.  Commands end with ; or \g.
Your MySQL connection id is 5
Server version: 5.7.33 MySQL Community Server (GPL)
...

mysql> use mysql;
Reading table information for completion of table and column names
You can turn off this feature to get a quicker startup with -A

Database changed
mysql> CREATE USER 'root'@'10.28.5.%' IDENTIFIED BY 'r00tr00t';
Query OK, 0 rows affected (0.03 sec)

mysql> GRANT ALL ON *.* TO 'root'@'10.28.5.%' WITH GRANT OPTION;
Query OK, 0 rows affected (0.01 sec)

mysql> FLUSH PRIVILEGES;
Query OK, 0 rows affected (0.01 sec)

mysql>
This connects directly to the MySQL container to login to the database server. This works because the mysql command is executing in the same container as the database, and therefore the connection attempt comes from localhost. We then run the SQL commands required to add a new instance of the root user ID, this time with 10.28.5.% as the host name. It gets the required privileges, then we run FLUSH PRIVILEGES to ensure the server is properly updated.
Having run this you can now login using PHPMyAdmin using root from the phpmyadmin container.
What this does is prove that we can add additional user ID's using simple SQL commands.
Connecting to the database using the first user ID
So far we've set up the database and PHPMyAdmin containers, then we set up a root user ID so we can use PHPMyAdmin to administer the database. We'll also use PHPMyAdmin to test access using different user ID's.
When the database was created, we specified a user ID wpuser, and a database wpdb. You may have already tested access to this database by logging in using these credentials. If not, log out of PHPMyAdmin, and login again:
You should be able to readily login using the wpuser ID. Your only access will be to the wpdb and information_schema databases.
In other words, we've verified that wpuser is suitably limited in what it can do. We can verify this by looking at the GRANTS for wpuser:
mysql> SHOW GRANTS FOR wpuser;
+--------------------------------------------------+
| Grants for wpuser@%                              |
+--------------------------------------------------+
| GRANT USAGE ON *.* TO 'wpuser'@'%'               |
| GRANT ALL PRIVILEGES ON `wpdb`.* TO 'wpuser'@'%' |
+--------------------------------------------------+
2 rows in set (0.00 sec)

mysql>
This user ID has ALL privileges to wpdb but nothing else.
Adding additional databases and user ID's to the MySQL database
Here's where we get to the meat and learn how to set up multiple databases, and multiple user ID's, in a MySQL database. Refer back to the previous section on the root ID, and ponder the commands we ran. Namely, by running CREATE USER we created a second instance of the root user ID. The first instance was root@localhost, the second was root@10.28.5.%. The two are separate entries in the mysql.user table, and could easily have different access privileges.
To see this, in PHPMyAdmin, logged in to the root account, you can run the query SELECT host, user FROM user and see this:
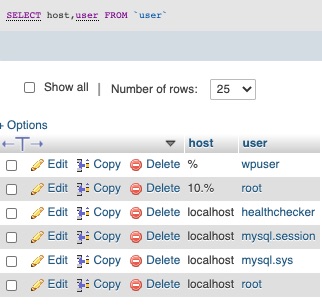
Notice there are two rows where user is equal to root. That's all that happens when we create another user ID in MySQL.
Another thing to notice is that the wpuser user ID is allowed to access from %. Do you think that's too permissive? Consider that the % host matches not only the hosts containing your application, but the hosts used by any miscreant script kiddie looking to break into databases.
Modifying an existing MySQL user ID
To fix that, let's run these commands:
CREATE USER 'wpuser'@'10.%'
    IDENTIFIED BY 'w0rdw0rd';
GRANT ALL
    ON wpdb.*
    TO 'wpuser'@'10.%';
DROP USER 'wpuser'@'%';
This creates a new user ID, wpuser@10.%, that has the same level of control over wpdb that wpuser@% had. We then delete the old user ID. Re-run SELECT host, user FROM user and you'll see the change has been made. And, you should still be able to login to PHPMyAdmin using wpuser.
There is an ALTER USER command, but it doesn't seem capable of changing wpuser@% to wpuser@10.%. That led us to this series of commands in which we create a new user ID and delete the old.
Creating a new database in MySQL, and matching user ID
We can now talk about creating a new database, and assigning a user ID.
Creating a database first requires logging in as root, then running this command:
CREATE DATABASE appdb;
This does not create any tables, just the database.
Best practices say to create a user ID to go along with this database. That user ID is to be granted access solely to this database, just as we see above with the wpuser account. The corollary best practice is for the application to use that account to access the database, to ensure the application cannot step on databases owned by other applications.
We can easily extrapolate from the root and wpuser accounts we just created, and see what to do:
CREATE USER 'appuser'@'10.%'
    IDENTIFIED BY 'PASSWORD';
GRANT ALL
    ON appdb.*
    TO 'appuser'@'10.%';
FLUSH PRIVILEGES;
This is a good start, because it limits access to a specific table. But there are several other possible GRANT settings to use besides ALL.
For example a more common arrangement might be:
CREATE USER 'appuser'@'10.%'
    IDENTIFIED BY 'PASSWORD';
GRANT ALTER, CREATE, DELETE, DROP, INDEX, INSERT, SELECT, UPDATE
    ON database.*
    TO 'appuser'@'10.%';
FLUSH PRIVILEGES;
This allows for typical application operations (create, read, update, delete) on database table rows, as well as the ability to create and delete tables.
Go ahead and create a user ID appuser as shown here, with access to the appdb database. You can inspect the mysql.user table to ensure the users were set up as you expect.
We can also inspect the details using this command:
mysql> SHOW GRANTS FOR `appuser`@`10.%`;
+-------------------------------------------------------+
| Grants for appuser@10.%                               |
+-------------------------------------------------------+
| GRANT USAGE ON *.* TO 'appuser'@'10.%'                |
| GRANT ALL PRIVILEGES ON `appdb`.* TO 'appuser'@'10.%' |
+-------------------------------------------------------+
2 rows in set (0.00 sec)
The SHOW GRANTS FOR command does what it sounds like, it shows the access grants assigned to the specified user ID.
Having verified that the databases and user ID's have been created as expected, go back to PHPMyAdmin and log out. You can then login using the wpuser and appuser ID's, as well as any other ID you may have created. You should verify that for each user ID only the expected databases are visible.
Summary
In this tutorial we've learned that even though the MySQL Docker container only supports the root user ID and one other user ID, we can go ahead and create multiple databases and user ID's. All it takes is to use the SQL commands to create databases, user ID's, and grant access rights.
That is, we first investigated what the MySQL container does to create the initial user ID and database. We then used the same pattern to create another database and user ID, assigning it similar privileges.
What we've learned is that we can create any combination of databases, user ID's and access permissions, using simple SQL statements.
CREATE USER 'USER-NAME'@'%'
    IDENTIFIED BY 'PASSWORD';
CREATE DATABASE newdb;
GRANT ALL
    ON newdb.*
    TO 'USER-NAME'@'%';
FLUSH PRIVILEGES;
These are the commands which are required, feel free to mix and match as you wish.
Even though the MySQL container doesn't directly support multiple users and databases, a few simple SQL commands lets us configure the database server to our liking.


