David Herron
Tags: Docker »»»» Docker MAMP »»»» Docker Wordpress »»»» Wordpress »»»»
We normally install Wordpress on a public Internet server, and installation on your local machine is normally limited to developing or testing a Wordpress feature or theme. The development loop is a lot shorter when you can directly edit Wordpress files on your machine, as opposed to working out a method to edit remote files. While it's convenient, it's not always clear how to create a website hosting environment on your laptop. In the past we would use MAMP (or the Windows equivalent), which is a macOS-native environment for running Apache/MySQL/PHP stacks. But today we have a different tool, Docker, that is easily able to run that stack, as well as any other stack. Docker easily runs on a laptop, so let's take a look at using it to run a local Wordpress development environment.
In this post we'll discuss a simple Wordpress deployment in Docker that could be used on a production server, but is meant to be used for local MySQL development. It will use three Docker containers, with MySQL as the database, PHPMyAdmin for database administration, and Wordpress as the application. It will give you full control over the Wordpress tree, and not rely on a Wordpress instance built in to a Docker image.
Docker is a popular and powerful tool for deploying services on computers as small as the Raspberry Pi up to the largest mainframes. Docker supports running Containerized applications, meaning that the application setup is distributed as a Docker Image containing a Linux instance configured with some software. For more about Docker, including an installation guide: Installing Docker Engine or Desktop on Ubuntu, macOS or Windows
Since a Wordpress site requires a MySQL database, a Docker Wordpress deployment requires a companion MySQL instance. Using Docker Compose, how do we set up Wordpress? Additionally, how do we use Docker on our laptop to support Wordpress development?
Deploying Wordpress with a single Docker Compose file requires at least two containers. First is a MySQL database instance, with the data directory mounted into the container for persistence. Next is the Wordpress container, configured to access the MySQL database.
Optionally you can launch other services like Redis or Nginx, depending on your needs. Those are also easy to configure in a Docker Compose file. But those two, MySQL and Wordpress, are key.
Wordpress development on Docker requires a database administration tool, like PHPMyAdmin, and the ability to edit the Wordpress files with a programmers editor. To edit the files simply requires mounting a host directory into the Docker container at /var/lib/html.
This post focuses not only on Wordpress deployment using Docker, but a few hints about setting it up for development. For that purpose we'll go over mounting a host directory into the Wordpress container, and how to configure PHPMyAdmin alongside the MySQL instance.
To proceed further, you will need both Docker and Docker Compose installed on your computer. For advice, see: Installing Docker Engine or Desktop on Ubuntu, macOS or Windows
This builds on a previous tutorial in which we used docker run commands to launch Wordpress, PHPMyAdmin, and MySQL. See: Set up PHPMyAdmin and Wordpress Docker containers using existing MySQL In this tutorial we will revisit those services, but instead use a Compose file.
Let's start by creating a directory to work in. For example create a blank directory named wordpress-local. In that directory create a file named docker-compose.yml. As the file name implies, it is a YAML file, so it's best to use a programmers editor that knows about YAML.
There is also a Github workspace containing the Compose file shown in this tutorial:
https://github.com/robogeek/docker-wordpress-local-development.
Launching MySQL with a Docker Compose file
The best way to learn this is to dive right in, so let's start with the simplest part, configuring a database server, MySQL, and an administrative application, PHPMyAdmin. Fortunately we already went over deploying MySQL in Deploying MySQL to get started using a Docker Compose file
That left us with this Compose file:
version: '3.8'

services:

    mysql:
        image: "mysql/mysql-server:8.0.21"
        container_name: mysql
        command: [ "mysqld",
                    "--character-set-server=utf8mb4",
                    "--collation-server=utf8mb4_unicode_ci",
                    "--bind-address=0.0.0.0",
                    "--default_authentication_plugin=mysql_native_password" ]
        # ports:
        #     - "3306:3306"
        networks:
            - wpnet
        volumes:
            - type: bind
              source: ./database
              target: /var/lib/mysql
        restart: always
        environment:
           MYSQL_ROOT_PASSWORD: "r00tr00t"
           # MYSQL_ROOT_HOST: "%"
           MYSQL_USER: wpuser
           MYSQL_PASSWORD: w0rdw0rd
           MYSQL_DATABASE: wpdb

networks:
    wpnet:
        driver: bridge
This defines a running containers for the MySQL server. We'll add the other containers to this file later.
The version declaration says to use the latest version of the Docker Compose specification. You'll find documentation for this file at:
https://docs.docker.com/compose/compose-file/
The services section is where we declare the containers to be run. The networks section is where the virtual networks that will be used are declared.
The service is named mysql, and is built from the Docker Image named mysql/mysql-server:8.0.21 which is pulled from Docker Hub.
The command attribute overrides how the MySQL daemon is started. We've done this so we can specify desired MySQL configuration settings. This is a way to override whatever settings exist in the MySQL config file that's baked into the server.
The available settings that can be used with MySQL are documented at
https://dev.mysql.com/doc/refman/8.0/en/server-system-variables.html
The default_authentication_plugin option forces MySQL to use the older style MySQL passwords rather than the newer caching_sha2_password algorithm. Without this option, Wordpress will fail with the errors:
[24-Sep-2020 19:20:56 UTC] PHP Warning:  mysqli_real_connect(): The server requested authentication method unknown to the client [caching_sha2_password] in /var/www/html/wp-includes/wp-db.php on line 1635
[24-Sep-2020 19:20:56 UTC] PHP Warning:  mysqli_real_connect(): (HY000/2054): The server requested authentication method unknown to the client in /var/www/html/wp-includes/wp-db.php on line 1635
Even seeing this error is difficult, because Wordpress tries to be so user friendly that many errors are suppressed. The observed behavior was that running the Wordpress setup, the installer would inscrutably give an error: Error establishing a database connection. To diagnose the error, we had to edit wp-admin/setup-config.php, changing the call to error_reporting to error_reporting( -1 ). That will cause errors to be logged in /var/log/apache2/error.log. Once you do this, the above error messages will appear. The MySQL options shown earlier fix this error.
The networks attribute specifies any Docker networks the container will use. These networks must be declared either in the Docker Compose file or via the docker network create command. Such networks are virtual communication channels that are useful between Docker containers.
The volumes attribute is how we can mount a directory, or a file, into a container. In this case we need to ensure the data stored in the database will continue existing when we destroy and recreate the container. Any data created inside a container will vaporize when the container is destroyed. Obviously the data of a database must therefore be stored outside the container.
In this case we have mounted a local directory, ./database, into the container at /var/lib/mysql. That directory is the default location where MySQL stores its database. Therefore the ./database directory will end up holding the files of the database.
The restart attribute says that if the main process in the container dies, to restart the container.
The environment attribute lets us define environment variables inside the container. The MySQL container uses these environment variables while initializing the database.
The MYSQL_ROOT_PASSWORD variables controls the creation of a MySQL user ID called root which has full access to everything in the server. Since the root account has so much power we limit access to software running inside the container. If desired, the MYSQL_ROOT_HOST variable lets us specify a pattern match string for which hosts are allowed to connect to the root user. In this case the pattern, %, says to allow connection to the root user from any host machine anywhere. That is not a best practice, and is flatly not what anyone should do in a production deployment.
The other environment variables concern creating a database (wpdb), a user ID (dbuser) and that users password.
Launching PHPMyAdmin alongside MySQL in a Compose file
PHPMyAdmin is an excellent tool for administering MySQL databases. This makes it an excellent companion for Wordpress deployment, to better administer the whole system.
To do so, add this to the Compose file following where the mysql service is defined.
    phpmyadmin:
        image: phpmyadmin/phpmyadmin
        container_name: phpmyadmin
        networks:
            - wpnet
        environment:
            PMA_ARBITRARY: 1
            # PMA_HOST: mysql
            # PMA_USER: root
            # PMA_PASSWORD: r00tr00t
            # PHP_UPLOAD_MAX_FILESIZE: 1G
            # PHP_MAX_INPUT_VARS: 1G
        ports:
            - "8001:80"
The PHPMyAdmin container is configured from environment variables as shown here. With PMA_ARBITRARY set like this, we'll be asked to supply database particulars on a login screen. But it can also be configured with PMA_HOST, PMA_USER and PMA_PASSWORD to preconfigure it to connect to a specific server.
To successfully login using the root user ID, then the MySQL container must be initialized with the MYSQL_ROOT_HOST variable shown earlier.
Starting the database container, and kicking the tires
With the Docker Compose file in hand, we simply run the docker-compose command to launch what's in the file.
$ docker-compose up
phpmyadmin is up-to-date
Creating mysql ... done
Attaching to phpmyadmin, mysql
mysql         | [Entrypoint] MySQL Docker Image 8.0.21-1.1.17
phpmyadmin    | AH00558: apache2: Could not reliably determine the server's fully qualified domain name, using 172.27.0.2. Set the 'ServerName' directive globally to suppress this message
phpmyadmin    | AH00558: apache2: Could not reliably determine the server's fully qualified domain name, using 172.27.0.2. Set the 'ServerName' directive globally to suppress this message
phpmyadmin    | [Thu Sep 24 02:40:03.673959 2020] [mpm_prefork:notice] [pid 1] AH00163: Apache/2.4.38 (Debian) PHP/7.4.9 configured -- resuming normal operations
phpmyadmin    | [Thu Sep 24 02:40:03.674075 2020] [core:notice] [pid 1] AH00094: Command line: 'apache2 -D FOREGROUND'
mysql         | [Entrypoint] Initializing database
...
There's a LOT more output to come due to what the MySQL container does to initialize the data directory. But, launching the database is that simple. Unless, that is, you instead get an error message like this:
$ docker-compose up
Creating network "wordpress-local_wpnet" with driver "bridge"
Creating phpmyadmin ...
Creating mysql         ... error

Creating phpmyadmin ... done: bind source path does not exist: /Volumes/Extra/docker/wordpress-local/database

ERROR: for mysql  Cannot create container for service mysql: invalid mount config for type "bind": bind source path does not exist: /Volumes/Extra/docker/wordpress-local/database
ERROR: Encountered errors while bringing up the project.
As error messages from MySQL go this one is fairly easy to understand. Maybe that's because it's not a MySQL error, but a Docker error. In any case the message means the directory we named in the Compose File does not exist. If that's the case simply run this:
$ mkdir database
That will create an empty directory and the MySQL container will proceed to initialize database files in that directory.
There is another consideration regarding this directory. Suppose you want to try different parameters when creating the database directory? If the MySQL container see's a data directory when it launches, it will not initialize the data directory because obviously it shouldn't initialize a directory which already contains database files. But if you're experimenting with new settings, you need the data directory to be initialized. Therefore, if that's what you need, then you must first delete the data directory, and create an empty directory, so that the MySQL container will go ahead and do its initialization.
The next thing is to inspect what's been created:
$ docker-compose ps
   Name                 Command                  State              Ports
---------------------------------------------------------------------------------
mysql        /entrypoint.sh mysqld --ch ...   Up (healthy)   3306/tcp, 33060/tcp
phpmyadmin   /docker-entrypoint.sh apac ...   Up             0.0.0.0:8001->80/tcp

$ docker ps
CONTAINER ID  IMAGE                      COMMAND                 CREATED        STATUS                  PORTS                 NAMES
56f4b5ea1f52  phpmyadmin/phpmyadmin      "/docker-entrypoint.…"  3 minutes ago  Up 2 minutes            0.0.0.0:8001->80/tcp  phpmyadmin
1e0f5e21c074  mysql/mysql-server:8.0.21  "/entrypoint.sh mysq…"  23 hours ago   Up 2 minutes (healthy)  3306/tcp, 33060/tcp   mysql
We can use both the docker-compose ps and docker ps commands to inspect the system that's been deployed. Both docker-compse and docker have many commands for inspecting and managing Docker systems. The presentation is a little different, and it seems that over the medium term functionality from the docker-compose command is being migrated into the docker command.
The docker ps command lists the running containers, and we see our two containers are running. It shows the port mappings that were declared in the Compose file. And the last column shows you the name for the container.
The next thing is to launch a command shell inside the container either with this command:
$ docker exec -it mysql bash
Or, we can use this command:
$ docker-compose exec mysql bash
The exec command executes a process inside the container. In this case we're executing bash which is the typical command-line shell for Linux, which will let us run commands inside the container. Again we can use either the docker or docker-compose command to do this.
The -it flag executes that process on an interactive terminal. The mysql argument is the container name. The last part of the command line is where we specify the command to execute, in this case bash so that we get a command shell.
Once inside the container we can run this:
bash-4.2# mysql -u root -p
Enter password:
Welcome to the MySQL monitor.  Commands end with ; or \g.
Your MySQL connection id is 11
Server version: 8.0.21 MySQL Community Server - GPL
This is executed inside the container. We launch the mysql CLI tool, telling it to login with the root user. After specifying the password we end up at the MySQL command prompt.
mysql> show databases;
+--------------------+
| Database           |
+--------------------+
| information_schema |
| mysql              |
| performance_schema |
| sys                |
| wpdb               |
+--------------------+
5 rows in set (0.02 sec)

mysql> ^DBye
bash-4.2# mysql -u wpuser -p
Enter password:
Welcome to the MySQL monitor.  Commands end with ; or \g.
Type 'help;' or '\h' for help. Type '\c' to clear the current input statement.

mysql> show databases;
+--------------------+
| Database           |
+--------------------+
| information_schema |
| wpdb               |
+--------------------+
2 rows in set (0.00 sec)

mysql>
We have a whole world of SQL commands we can type at this prompt. With this one we can see that our wpdb database has been created.
Another useful thing to do is to visit http://localhost:8001 to use PHPMyAdmin to inspect the database.
With this we've proved we have a functioning database server. What's next is to set up the Wordpress container.
To shut down the database service, run: docker-compose down
Launching a Docker container for executing Wordpress
So far we've set up a database layer useful for software development. We have both a MySQL server and a powerful administrative tool, PHPMyAdmin. Wordpress uses MySQL to store content, and our next step in this project is to configure a Docker container to host a Wordpress instance, and tell that instance to use the database we created.
The typical directions to install Wordpress is to download the tarball from wordpress.org, unpack it into a web server directory, and then run the Wordpress installation in your browser. But with Docker, we can simply add a new container to the Compose file.
In docker-compose.yml, add this section:
    wp:
        image: wordpress:php7.4-apache
        container_name: wp
        networks:
            - wpnet
        restart: always
        ports:
            - '4080:80'
        environment:
            PATH: "/usr/local/sbin:/usr/local/mybin:/usr/local/bin:/usr/sbin:/usr/bin:/sbin:/bin"
        volumes:
            - ./logs:/var/log/apache2:rw
            - ./docroot:/var/www/html:rw
            # - ./sites-enabled:/etc/apache2/sites-enabled:rw
            - ./mybin:/usr/local/mybin
On Docker Hub you'll find there is a Docker image named wordpress. The particular variant chosen here is configured to have PHP v7.4 installed, and to use Apache as the web server. Feel free to select a different PHP version. But for the purpose of this project, keep the -apache portion.
Most of this should be straight-forward to understand. For example, we've mapped the HTTP port so it appears on port 4080.
Setting the PATH environment variable is set so we can add our own commands to run in the container. The most interesting is to install the WP-CLI command-line tool available, since it is so useful for Wordpress development.
The logs directory is mounted to /var/log/apache2 to make it easy to view the logs.
The docroot directory is mounted as /var/www/html. When the Wordpress container is launched, it will unpack the Wordpress distribution into this directory.
The Wordpress container has Apache configured with a default virtual host based on the /var/www/html directory. When this container launches, it looks for a Wordpress installation in that directory. If there is no Wordpress installed there, it will copy a set of pristine Wordpress sources to that directory.
It is possible to unpack a Wordpress distribution into this directory yourself. If so, the Wordpress container will not install Wordpress, but respect the distribution you installed.
By ensuring the /var/www/html directory is exported to a host filesystem directory, we are fully in control of the content of the Wordpress code being used. We can install any plugin, or any theme, and the files will be persisted to the docroot directory. If we're developing a custom theme, or custom plugin, we can directly plop the source into docroot/wp-content because we're in control. Further we can edit any other file in that directory hierarchy, as well.
There is an option here, commented out, which is to override the built-in sites-enabled directory. This directory is used by Apache to hold configuration files for virtual hosts. The Wordpress container has a default config file in that directory which is good enough for us. But you may want to override this behavior, to change the config file, or to have multiple virtual hosts. If that's what you want to do, the first step is to mount this directory, and then to put your desired configuration files there. What you do beyond that is up to you.
But many say the best practice with Docker is for each container to serve a single purpose. That would mean each Wordpress site would be served by its own container. But you may feel it is duplicative to host multiple containers to host multiple sites.
Starting the Wordpress container, and kicking the tires
We have everything set up to launch Wordpress along with the MySQL instance we launched earlier. Since we've added another service to the Compose file, we need to relaunch the system.
If you haven't already done so, make sure the system is shut down. As noted earlier you can run docker-compose down, and the services will stop. Since we've already initialized the MySQL instance, we can leave the database directory alone.
To restart the system:
$ mkdir logs docroot mybin

$ docker-compose up
Creating network "compose_wpnet" with driver "bridge"
Pulling wp (wordpress:php7.4-apache)...
php7.4-apache: Pulling from library/wordpress
Digest: sha256:73cfcbf1e511d760d9fc6c4864aeba1f8c856ba2be333a7d342fd76935055e9d
Status: Downloaded newer image for wordpress:php7.4-apache
Creating phpmyadmin ... done
Creating mysql      ... done
Creating wp         ... done
Attaching to mysql, phpmyadmin, wp
This ensures the required directories have been created, then launches the MySQL, PHPMyAdmin, and Wordpress services.
In the logging output you should see this:
wp | WordPress not found in /var/www/html - copying now...
This is where the Wordpress container detects there are no Wordpress files, and downloads the current release.
After it starts up again, rerun this:
$ docker-compose ps
   Name                 Command                  State              Ports
---------------------------------------------------------------------------------
mysql        /entrypoint.sh mysqld --ch ...   Up (healthy)   3306/tcp, 33060/tcp
phpmyadmin   /docker-entrypoint.sh apac ...   Up             0.0.0.0:8001->80/tcp
wp           docker-entrypoint.sh apach ...   Up             0.0.0.0:4080->80/tcp
You'll see a wp container running alongside the mysql and phpmyadmin containers. The other thing to notice is port 4080 is exposed, just like it says in the Compose file.
Eventually you'll see this message:
wp | Complete! WordPress has been successfully copied to /var/www/html
This verifies that the Wordpress distribution has been downloaded and unpacked.
The moment of truth is to open http://localhost:4080 in your browser. With the current Wordpress setup experience, you'll first be listed with a set of languages to use, then you'll see this explanation:
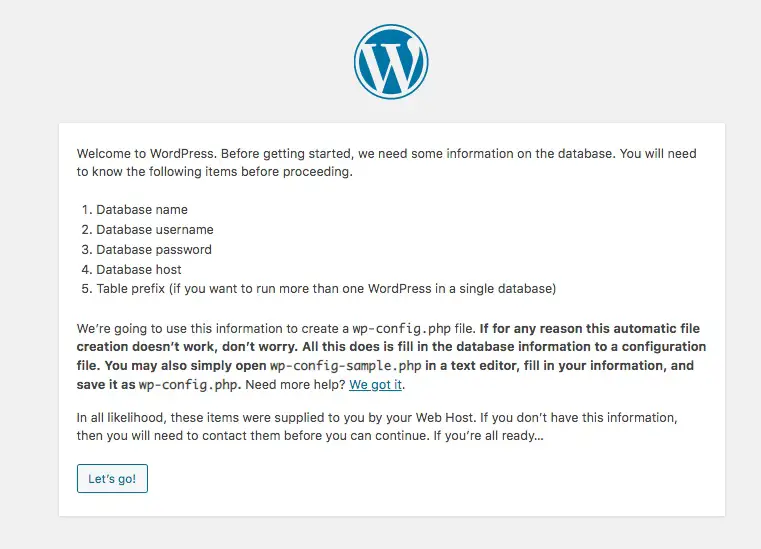
This explains that Wordpress needs to know your database particulars.

This is where we enter the database particulars. The values are what we entered in the Docker Compose file.
Ideally when you click the Submit button you'll be shown messages about the database tables being set up and so on. However it is possible you'll instead see an error screen headed with the message Error establishing a database connection.
Earlier in this post we talked about one rather inscrutable cause for that error. We already went over how to avoid that error, which is to initialize the data directory. Since we've already verified the database is working, that won't be the problem. The more common reason for getting that error is if the database particulars were wrong. This is where you carefully double-check you entered the correct values.
Another common issue is that the database is unreachable. If your Compose file matches what was shown above that won't be the case. But let's discuss how to debug the database connection anyway.
First task is to use PHPMyAdmin and inspect the database server. You can easily use it to verify whether the database access particulars are working.
The second is to start a command shell inside the Wordpress container:
$ docker exec -it wp bash
There is a world of things which can be done, with installing WP-CLI being the most useful.
root@7e4834091a33:/var/www/html# curl -O https://raw.githubusercontent.com/wp-cli/builds/gh-pages/phar/wp-cli.phar
root@7e4834091a33:/var/www/html# chmod +x wp-cli.phar
root@7e4834091a33:/var/www/html# mv wp-cli.phar /usr/local/mybin/wp
This downloads wp-cli.phar from a well known location on Github, makes it executable, and installs that file into a directory that appears in the PATH variable. That means we can now run the wp command to inspect the Wordpress installation.
root@7e4834091a33:/var/www/html# wp --allow-root --info
OS:     Linux 4.19.121-linuxkit #1 SMP Thu Jan 21 15:36:34 UTC 2021 x86_64
Shell:
PHP binary:     /usr/local/bin/php
PHP version:    7.4.16
php.ini used:
WP-CLI root dir:        phar://wp-cli.phar/vendor/wp-cli/wp-cli
WP-CLI vendor dir:      phar://wp-cli.phar/vendor
WP_CLI phar path:       /var/www/html
WP-CLI packages dir:
WP-CLI global config:
WP-CLI project config:
WP-CLI version: 2.4.0
This particular command simply tells you a bit of status information. What we really need to do is verify that the Wordpress container can access the database in the MySQL container.
In theory we would simply do this:
root@7e4834091a33:/var/www/html# wp --allow-root db cli
/usr/bin/env: 'mysql': No such file or directory
But as you can see, it relies on the mysql command which isn't installed. Fortunately we can easily remedy this by installing a Debian package.
root@7e4834091a33:/var/www/html# apt-get update
...
root@7e4834091a33:/var/www/html# apt-get install mariadb-client
...
root@7e4834091a33:/var/www/html# wp --allow-root db cli
Welcome to the MariaDB monitor.  Commands end with ; or \g.
Your MySQL connection id is 576
Server version: 8.0.21 MySQL Community Server - GPL

Copyright (c) 2000, 2018, Oracle, MariaDB Corporation Ab and others.

Type 'help;' or '\h' for help. Type '\c' to clear the current input statement.

MySQL [wpdb]> show tables;
Empty set (0.004 sec)

MySQL [wpdb]>
The Wordpress container is derived from Debian Linux, so therefore we have access to their large library of packages. There is not a mysql-client package, but the MariaDB database is plug-and-play compatible with MySQL. Therefore the mariadb-client package provides a compatible version of the mysql tool.
With the mysql command installed, we can verify access to the database using the user ID and password we configured.
There are no database tables shown because we've not yet run the Wordpress installer.
Another test is to use ping to see if packets can reach the mysql container:
root@7e4834091a33:/var/www/html# ping mysql
bash: ping: command not found
root@7e4834091a33:/var/www/html# apt-get install inetutils-ping
...
root@7e4834091a33:/var/www/html# ping mysql
PING mysql (192.168.16.3): 56 data bytes
64 bytes from 192.168.16.3: icmp_seq=0 ttl=64 time=1.266 ms
64 bytes from 192.168.16.3: icmp_seq=1 ttl=64 time=0.371 ms
...
Like the mysql command, this package is not installed by default, but is easy to bring in. Once installed, we can ping the database container and see that indeed it is there.
Once you've successfully gotten Wordpress to connect with the database, we'll see this screen.
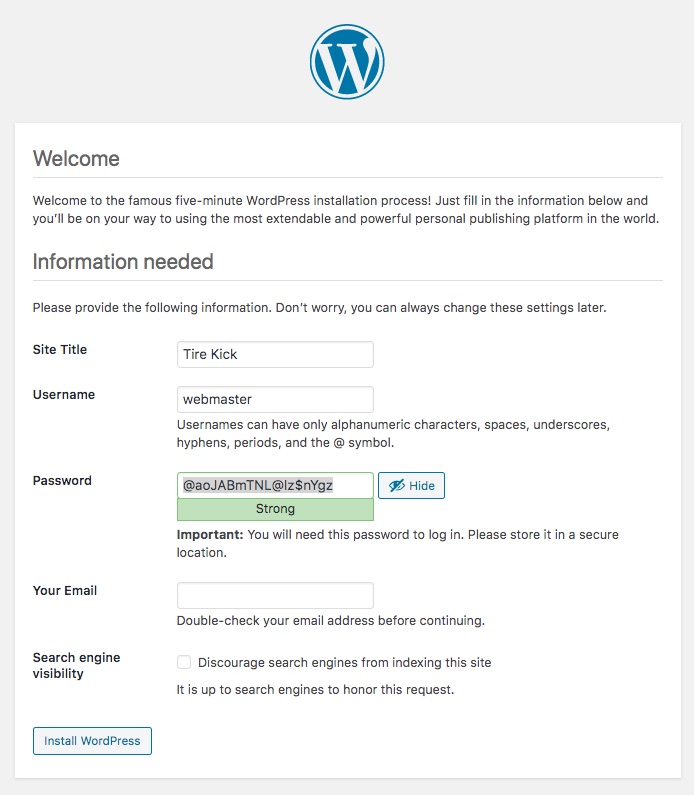
This does some final setup, after which you'll be brought to the login form. After logging in, you'll be in the Wordpress dashboard area. If you've read this far, you probably already know what to do in the Wordpress dashboard.
One thing you'll find is that now that the installer has run, the database tables have been created.
Given that you probably know what to do with Wordpress, there's no need to talk about what you can do. However, you might install a plugin or a theme, and verify that the corresponding code is added to the docroot directory. Instead, let's talk about how to shut down the system and remove all traces.
Shutting down the Wordpress installation, deleting the database
We've already seen how to stop the deployed services:
$ docker-compose down
Stopping wp         ... done
Stopping mysql      ... done
Stopping phpmyadmin ... done
Removing wp         ... done
Removing mysql      ... done
Removing phpmyadmin ... done
Removing network wordpress-local_wpnet
This stops and removes the containers, and even removes the virtual network which was created.
Maybe it's useful verify the ability to delete and recreate the Wordpress deployment, reusing the configuration that was already created. Running docker-compose down deletes the containers, but there is also Wordpress images that exist in a local cache.
$ docker rmi wordpress
$ docker rmi wordpress:php7.4-apache
We've removed traces of the Wordpress container, other than the files remaining in the docroot directory.
$ docker-compose up
Creating network "compose_wpnet" with driver "bridge"
Pulling wp (wordpress:php7.4-apache)...
php7.4-apache: Pulling from library/wordpress
45b42c59be33: Pull complete
...
Digest: sha256:73cfcbf1e511d760d9fc6c4864aeba1f8c856ba2be333a7d342fd76935055e9d
Status: Downloaded newer image for wordpress:php7.4-apache
Creating wp         ... done
Creating phpmyadmin ... done
Creating mysql      ... done
Attaching to mysql, phpmyadmin, wp
Because we'd deleted the Wordpress container, a new copy had to be downloaded before it could be launched. But this time watch the output, and you won't see it download Wordpress. Further, visit http://localhost:4080 in your browser you'll go right back into Wordpress. Any plugins you installed, or customizations you made, will be retained.
That's easy, but there's still a database and other things taking up disk space.
$ du -sk *
194024  database
4       docker-compose.yml
56652   docroot
36      logs
5440    mybin
In other words, if you want to dispose of the database or other things then delete them.
Summary
In this article we learned how to create a Docker Compose file to deploy a Wordpress site. This requires at least a MySQL database instance, but we also showed using PHPMyAdmin under the theory that it's an excellent database administration tool.
We showed everything contained in one Compose file, but is that the best approach? It might be better to use two Compose files, one for the database, and the other for the Wordpress instance. The rationale for that choice is that a database should be kept running rather than routinely bringing it down. Where we can easily see bringing down and restarting the Wordpress instance.
To split it into two files, create two directories one for each file. The Compose file in one directory manages the database and the PHPMyAdmin instance, while the other manages the Wordpress service. The wpnet network must be declared at the command line, and then in each Compose file that network must be declared external.


