David Herron
Tags: Node.JS »»»» Front-end Development »»»» Bootstrap »»»»
In this article series we've developed a Todo application using Node.js 14.x, Express, Bootstrap v5, Socket.IO, and using Sequelize for the database layer. It was developed to explore some of the new features in Node.js, and to explore the post-jQuery world that Bootstrap v5 offers.
This is the fourth part of a four part article series, meaning this part is where we put the finished application through its paces. For an overview of the project, and index of the articles, see: Single page multi-user application with Express, Bootstrap v5, Socket.IO, Sequelize
We have set up the project directory, then implemented a database layer, and created a mobile-responsive multi-user application. So far we haven't seen the application run, which is what we'll do in this tutorial.
To summarize the application is based on the following:
- Node.js 14.x, the platform for executing JavaScript code outside web browsers for purposes such as server-side applications
- ExpressJS, a very popular application framework for Node.js
- Bootstrap v5, a very popular front end application framework. In v5 (that just entered Alpha) the big headline change is to drop the requirement for jQuery.
- Socket.IO, a very popular framework for pseudo-real-time communication between a browser-based client and a Node.js back-end
- Sequelize, a very popular Object Relations Manager (ORM) for Node.js that supports a long list of SQL database engines
If you haven't already done so, it is worth your while to at least skim the articles that go over how the application is constructed. In this article we'll focus solely on executing and testing the application.
To start this you must have the Todo application source code and set up the project correctly. This means you either created your own source code from the other articles in this series, or else you cloned the Github repository at
https://github.com/robogeek/nodejs-express-todo-demo.
Either way you will have a directory with a package.json that is set up as a Node.js project. To get started run this:
$ npm install
An additional optional step is to make sure the SQLite3 CLI tools are installed on your laptop. For that purpose go to the
SQLite3 Website and follow the directions. If your laptop has a package management system (MacPorts, HomeBrew Chocolatey, Ubuntu/Debian, etc) then SQLite3 might be as simple as
sudo apt-get install -y sqlite3.
Once you've followed those steps, you'll have an application which can be run. Let's take it for a spin and see how it works.
In package.json add a scripts section containing this:
"scripts": {
    "start": "node app.mjs"
},
This is simple enough, simply run app.mjs. But there is a little bit of configuration required before this will run correctly. Later in the tutorial we'll go over a couple ways to handle configuration settings.
In the database interface article we introduced a simple YAML configuration file for describing database connections, and an environment variable for specifying its file name. The article includes a configuration file for using SQLite3. To run TODO using that file, try this:
$ PORT=4000 DEBUG=todos:* \
            SEQUELIZE_CONNECT=models/sequelize-sqlite.yaml \
            npm start
This tells the application to connect to port 4000, and turns on debugging output. The SEQUELIZE_CONNECT variable references the database configuration file just mentioned.
The syntax for that is correct if you're using the Bash shell on a Unix/Linux/macOS system. The purpose is to set those environment variables, and then to run the command npm start. On other command shells, like PowerShell, you must set the environment variables in a different way.
After running this command you'll see output like this on the terminal:
> nodejs-express-todo-demo@1.0.0 start /Volumes/Extra/nodejs/nodejs-express-todo-demo
> node app.mjs

  todos:debug Listening on port 4000 +0ms
  todos:seqlz connectDB {
  todos:seqlz   dbname: 'todo',
  todos:seqlz   username: null,
  todos:seqlz   password: null,
  todos:seqlz   params: { dialect: 'sqlite', storage: 'todo.sqlite3' }
  todos:seqlz } +36ms
  todos:seqlz connectDB connected +2s
Executing (default): SELECT 1+1 AS result
  todos:seqlz connectDB authenticated +142ms
Executing (default): CREATE TABLE IF NOT EXISTS `SQTodos` (`id` INTEGER PRIMARY KEY AUTOINCREMENT, `title` VARCHAR(255), `body` TEXT, `precedence` INTEGER, `createdAt` DATETIME NOT NULL, `updatedAt` DATETIME NOT NULL);
Executing (default): PRAGMA INDEX_LIST(`SQTodos`)
  todos:home socketio connection on /home +3s
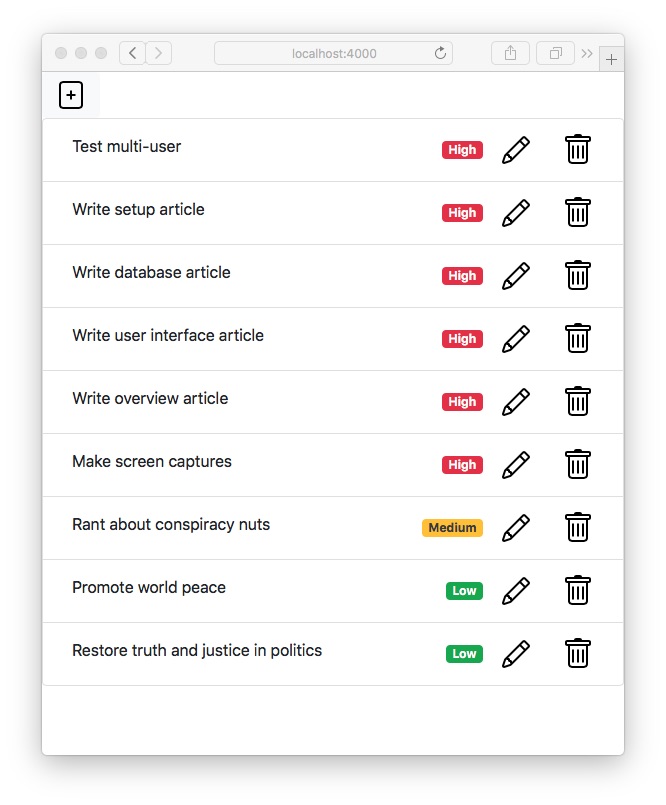
After running the application, and adding a few TODO items, it could look like the image shown at the top of this article. The problem with my life is that so many things are high priority.
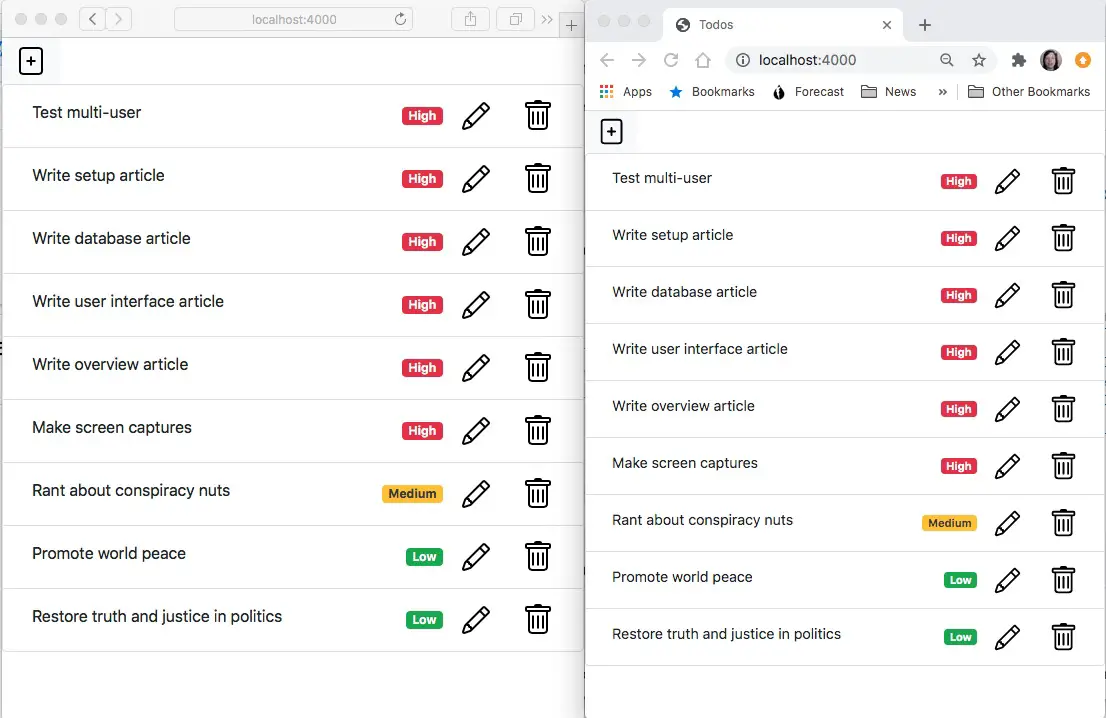
A very cool thing is to open up multiple browser windows to the app and see the multi-user support working so cleanly. This is Safari and Chrome running side-by-side. You can also pull out a mobile device like your smart phone and connect to the application just as easily.
The icons are thanks to the Bootstrap Icons project. While there are a ton of free icon collections available for web applications, and while I've used Feathers extensively, the Bootstrap Icons library is very nice and easy to use.
To use the application the "+" application at the top launches an Add TODO Modal window.

It could look like this while adding a TODO.
You might wonder afterwards, what happens to the long description since it is not visible in the user interface. The TODO Title is actually a button, and this button controls a Bootstrap collapsible thingy.
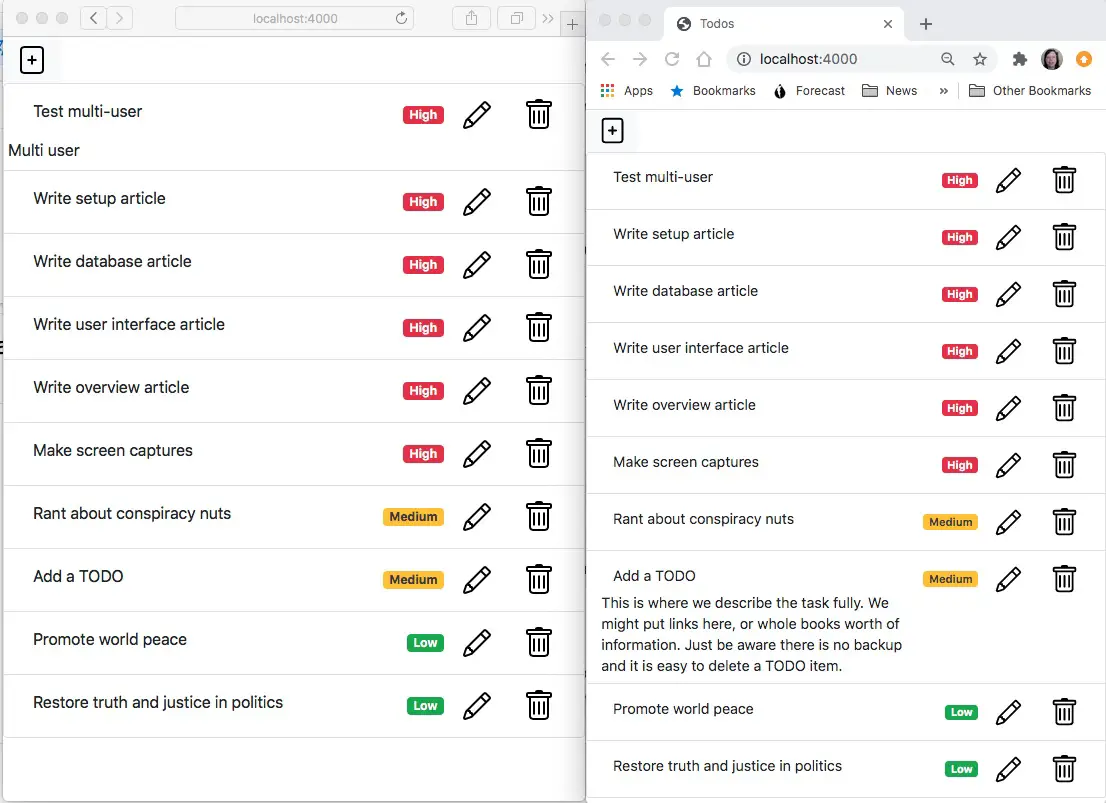
Showing the descriptions looks something like this. Click on the title and the description appears, click on the title again and the description disappears.
The user experience could be a little better by having some indication to help users discover that it works this way. But once one gets the hang of it it's nice.
The priorities determine the sort order of the display. The user experience might be improved by having a way of filtering the TODO items, and sorting them in different ways.
The last user interface element is the Delete button, represented by the trash can icon. Click on it, and the TODO item will simply go away with no verification.
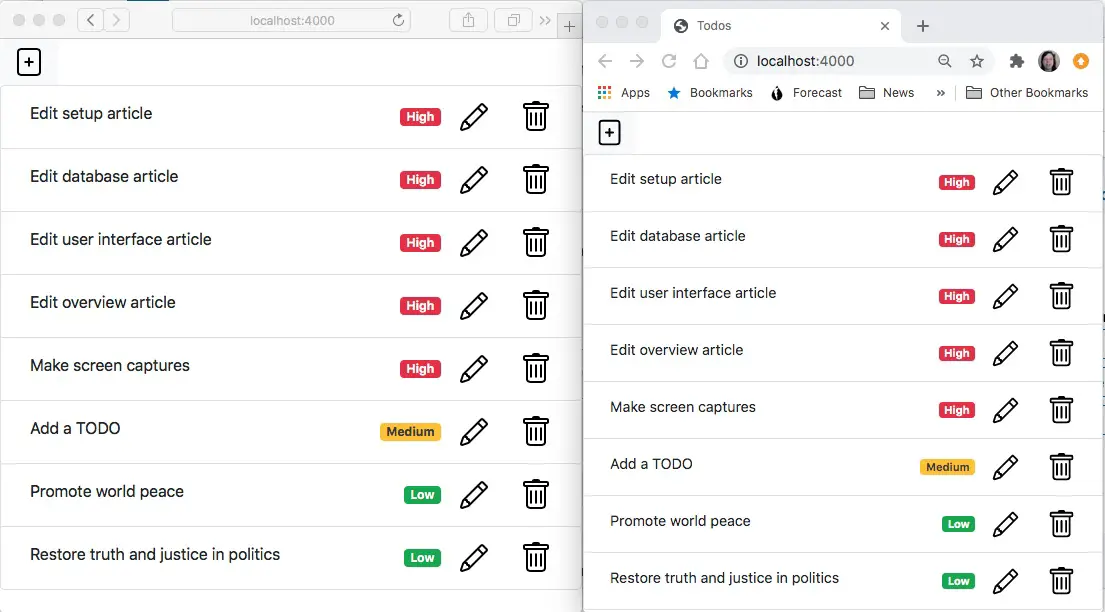
After a few fast changes, the TODO list might look like this.
Automating process startup
The method for starting the Todo application leaves a little to be desired. It is a best practice to fully automate such administrative details so that all you have to remember is npm start. If you come back to this project in six months will you remember what to do?
That means in package.json add a scripts section could be this:
"scripts": {
    "start": "PORT=4000 SEQUELIZE_CONNECT=models/sequelize-sqlite.yaml node app.mjs",
    "debug": "DEBUG=todos:* npm start"
},
This takes the execution process shown earlier, and engraves it into package.json. There, done, we've recorded how to run the thing so that our future self will thank our current self for thinking ahead. We even recorded how to run this with debugging enabled.
But these commands won't work on Windows because it is a Bash-specific syntax. To get around that, we installed a package in during the project setup which handles running commands on Windows using Bash syntax.
Namely, the cross-env package takes care of converting a Bash-style command that sets environment variables into the appropriate command for other platforms like Windows. Since cross-env is already installed, all we have to do is this:
"scripts": {
    "start": "cross-env PORT=4000 SEQUELIZE_CONNECT=models/sequelize-sqlite.yaml node app.mjs",
    "debug": "cross-env DEBUG=todos:* npm start"
},
There, all you Windows users can stop screaming at me. I keep a Windows laptop on my desk and even turn it on a couple times a year.
The last thing to do is make this more configurable. In How to use npm/yarn/Node.js package.json scripts as your build tool we noted it is possible to add a config section to a package.json to hold values like the port number and config file path.
In package.json add this section:
"config": {
    "port": "4000",
    "dbconfig": "models/sequelize-sqlite.yaml"
},
This holds the configuration settings just mentioned. Those settings will be added to the environment variables of any script in package.json.
To see what this means change the scripts section to this:
"scripts": {
    "env": "env",
    "start": "cross-env PORT=${npm_package_config_port} SEQUELIZE_CONNECT=${npm_package_config_dbconfig} node app.mjs"
},
The env script lets us inspect the environment variables. Run npm run env and you'll get a very long list of environment variables. But instead run this command:
$ npm run env | grep package_config
...
npm_package_config_port=4000
npm_package_config_dbconfig=models/sequelize-sqlite.yaml
We see that the two config values we created show up in the environment with the prefix npm_package_config_. We've also modified the start script to use those variables. Then if we run this:
$ DEBUG=todos:* npm start

> nodejs-express-todo-demo@1.0.0 start /Users/David/nodejs/nodejs-express-todo-demo
> cross-env PORT=${npm_package_config_port} SEQUELIZE_CONNECT=${npm_package_config_dbconfig} node app.mjs
We see the command that's executed has changed, and going to the browser we see that it works as expected.
Then, to experiment with changing the config value, run this:
$ npm config set nodejs-express-todo-demo:port 5000
$ npm run env | grep package_config
...
npm_package_config_port=5000
npm_package_config_dbconfig=models/sequelize-sqlite.yaml
The config set command sets this configuration variable, overriding what's in the package.json. The prefix nodejs-express-todo-demo: is required in order to override the value in package.json, and if we do not use the prefix it instead creates a completely different environment variable. Using the prefix ensures it overrides the variable npm_package_config_port.
Then when we're done with the changed configuration setting, run this:
$ npm config delete nodejs-express-todo-demo:port
$ npm run env | grep package_config
npm_package_config_port=4000
npm_package_config_dbconfig=models/sequelize-sqlite.yaml
The variable is back to the value set in package.json.
Note that while the application looks for these settings in the PORT and SEQUELIZE_CONNECT variables, it could be rewritten to first look at npm_package_config_port and npm_package_config_dbconfig. That way the start script would not need to set PORT and SEQUELIZE_CONNECT.
Using another SQL database - MySQL in Docker
We said in the database interface tutorial that running Todo against another database is just a matter of configuration, and installing the required database driver. To test that assertion let's run it against MySQL.
The simplest way to install MySQL is by running the Docker image. Of course the following requires that you have Docker installed on your laptop. If you need instructions for that, see Installing Docker Engine or Desktop on Ubuntu, macOS or Windows
To start MySQL v8 in Docker, try this:
$ docker run \
    --detach --name db-todo \
    --env MYSQL_USER=todo \
    --env MYSQL_PASSWORD=todo1234 \
    --env MYSQL_DATABASE=todo \
    -p 3306:3306 \
    --env MYSQL_ROOT_PASSWORD=w0rdw0rd \
    mysql/mysql-server:8.0 --bind_address=0.0.0.0
Unable to find image 'mysql/mysql-server:8.0' locally
8.0: Pulling from mysql/mysql-server
e945e9180309: Pull complete
c854b862275e: Pull complete
331a4f2ecf4b: Pull complete
d92ed785684c: Pull complete
Digest: sha256:342d3eefe147620bafd0d276491e11c8ed29e4bb712612cb955815b3aa910a19
Status: Downloaded newer image for mysql/mysql-server:8.0
f2c4f2ab9810d2830670c57da63b18195892b620101eb52a837b8e7263b9d278
This command pre-configures a database instance with a user name, password, and database name. It is a very easy, fast, and light-weight way to install services that previously required the services of a specialist.
Once that is started we can verify the database exists and is running like so:
$ docker exec -it db-todo mysql -u root -p
Enter password:
Welcome to the MySQL monitor.  Commands end with ; or \g.
Your MySQL connection id is 9
Server version: 8.0.21 MySQL Community Server - GPL
...
mysql> show databases;
+--------------------+
| Database           |
+--------------------+
| information_schema |
| mysql              |
| performance_schema |
| sys                |
| todo               |
+--------------------+
5 rows in set (0.01 sec)

mysql> use todo;
Database changed
mysql> show tables;
Empty set (0.01 sec)

mysql>
This command executes the MySQL command-line tool inside the db-todo container. We then use the CLI to run MySQL commands and inspect the databases and tables within the todo database. At the moment there are no tables since the Todo application has not been run against the database. As soon as we do run it, a SQTodo table will appear.
Then we must install the MySQL driver for Node.js:
$ npm install mysql2 --save
This installs the MySQL driver for Node.js which is preferred by Sequelize.
Then create a new configuration file, models/sequelize-mysql-docker.yaml containing:
dbname: todo
username: todo
password: todo1234
params:
    host: localhost
    port: 3306
    dialect: mysql
The host value in this case is localhost because MySQL is running inside Docker on the local machine. With the -p 3306:3306 option, the MySQL port is exposed into this computer. Therefore we connect to it using that port on localhost. If your MySQL server is elsewhere, then adjust these values.
Finally, we run the application like so:
$ npm config set nodejs-express-todo-demo:dbconfig models/sequelize-mysql-docker.yaml
$ DEBUG=todos:* npm start
This is just as before, overriding the configuration with a new configuration file. After making a few Todo items, the database might have these entries:
mysql> use todo;
Reading table information for completion of table and column names
You can turn off this feature to get a quicker startup with -A

Database changed
mysql> show tables;
+----------------+
| Tables_in_todo |
+----------------+
| SQTodos        |
+----------------+
1 row in set (0.01 sec)

mysql> select id,title,body,precedence from SQTodos;
+----+---------------------+------+------------+
| id | title               | body | precedence |
+----+---------------------+------+------------+
|  1 | Install mysql2      |      |          3 |
|  2 | Create Config YAML  |      |          3 |
|  3 | Run with new config |      |          3 |
+----+---------------------+------+------------+
3 rows in set (0.00 sec)
Very nice, with the right setup in the code making a drastic change like switching databases is very simple.
Because this is a different database, it does not have the entries you might have made in the SQLite3 database. To test that run the following:
$ sqlite3 todo.sqlite3
SQLite version 3.33.0 2020-08-14 13:23:32
Enter ".help" for usage hints.
sqlite> select id,title,body,precedence from SQTodos;
17|Edit setup article||3
18|Edit database article||3
19|Edit user interface article||3
20|Edit overview article||3
21|Make screen captures||3
22|Promote world peace||1
23|Restore truth and justice in politics||1
It's a different database, so of course it's a different set of values. As it stands, you could have multiple Todo lists by having multiple databases, switching between them simply by switching configuration files.
Summary
This wraps up the Todo application development and testing. Through this article series we've learned not only about setting up an Express application with pseudo-real-time multi-user support, but we learned about life after jQuery, and using Sequelize to simplify interfacing with an SQL database.
To learn about the project setup: Project setup for Node.js 14, Express, Bootstrap v5, Socket.IO application
To learn about the database setup: Using Sequelize for the database layer in an Express Node.js 14 application
To learn about the Bootstrap user interface: Using Bootstrap and Socket.IO for the user interface in an Express Node.js 14 application
To return to the project overview: Single page multi-user application with Express, Bootstrap v5, Socket.IO, Sequelize

Books by David Herron


(Sponsored)


