David Herron
Tags: Node.JS »»»» Electron »»»»
Using Vue.js in an Electron app means dealing with using Webpack to build/package the components and other assets. The most effective way to put this together is the Electron-Vue package, which builds itself as "Boilerplate for making electron applications built with Vue.js". What that means is Electron-Vue is a pre-built application template and build infrastructure to simplify running Electron/Vue applications in development mode, and to package Electron/Vue applications for distribution.
This article is part of a series on kicking the tires of Electron application development. See:
- Quickly start a new Electron software project
- Quickly start a new Electron and Vue.js application project, (this article)
- Use Electron-Vue to build Electron/Vue.js application with Bootstrap v4 -- DISRECOMMENDED
Vue.js is a highly performant lightweight framework for managing client-side data and communications between portions of an application. It is very popular, though it is overshadowed by React (of course). It does not contain any user interface components. For that, in this article we'll turn to the venerable Bootstrap library. As we're just kicking the tires, the UI won't be very much, just enough to show that Vue is doing things with components, and that Bootstrap is up and functioning.
Bootstrap is a highly popular CSS+JavaScript framework for user facing niceness. It contains a bunch of prebaked well defined well tested compnents for building HTML and JavaScript user interfaces. Bootstrap includes an advanced responsive web page framework based on Flexbox. While there are plenty of alternative web UI frameworks, Bootstrap is a good choice.
It's possible to avoid using the Electron-Vue application template -- if you want to spend the time to learn Webpack and Babel sufficiently to set up your own build framework. Before turning to Electron-Vue I tried to roll my own, and while I got quite a ways a couple stumpers had me turn to Electron-Vue for the pragmatic choice of just getting something working.
WARNING WARNING WARNING WARNING WARNING
Turns out that it's strongly recommended to NOT use Bootstrap or jQuery with Vue.js.
The problem is that Vue.js wants to be in control of the DOM manipulations. Bootstrap and jQuery both perform DOM manipulations.
With the following instructions it's clear one can easily get Bootstrap code running in a Vue.js app, but there are difficulties aplenty by proceeding very far in using Bootstrap with Vue.js.
QUICK START
To start, lets build the Electron-Vue demo application:
$ sudo npm install -g vue-cli
$ vue init simulatedgreg/electron-vue electron-vue-bootstrap
? Application Name electron-vue-bootstrap
? Project description An electron-vue project
? Select which Vue plugins to install vue-electron, vue-router
? Use linting with ESLint? No
? Set up unit testing with Karma + Mocha? No
? Set up end-to-end testing with Spectron + Mocha? No
? What build tool would you like to use? builder
? author David Herron <david@davidherron.com>
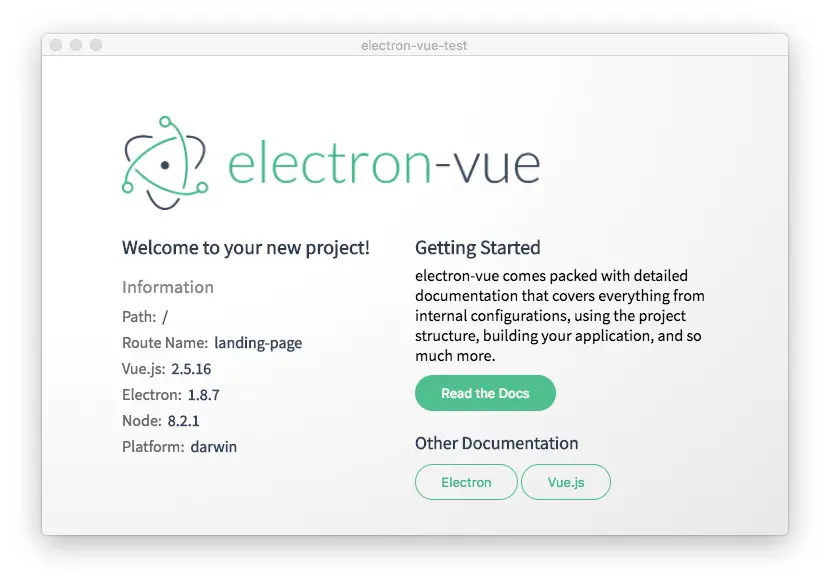
vue-cli · Generated "electron-vue-bootstrap".
---
All set. Welcome to your new electron-vue project!
Make sure to check out the documentation for this boilerplate at
https://simulatedgreg.gitbooks.io/electron-vue/content/.
Next Steps:
$ cd electron-vue-bootstrap
$ yarn (or `npm install`)
$ yarn run dev (or `npm run dev`)
The first step installs vue-cli which is a command-line tool for Vue development. The primary function it provides is the init command with which to download template applications. The lines with ? characters is an interactive dialog used by vue-cli to customize the application setup.
As it says, you then have three steps to perform.
$ cd electron-vue-bootstrap/
$ npm install
npm WARN deprecated babel-preset-babili@0.1.4: babili has been renamed to babel-minify. Please update to babel-preset-minify
$ npm run dev
Rebuilding the template application
We don't want to just run the demo app, we want to prove we can build a custom app using the Electron/Vue.js/Bootstrap toolchain. That means ripping out most of what we were given, replacing it all with a few simple bits of code.
In package.json add these three lines to the dependencies section.
"bootstrap": "^4.1.1",
"jquery": "^3.3.1",
"popper.js": "^1.12.9"
These three packages are the base required by Bootstrap v4, and the version numbers are more-or-less correct. Once you've made this change re-run npm install to install the dependencies.
You may want to look at .babelrc and perhaps adjust some things. I'm concerned about this:
"presets": [
  ["env", {
    "targets": { "node": 7 }
  }],
  "stage-0"
]
Wouldn't be better to target Node.js 8? That's where we get async/await functions and wouldn't it be best if our electron app directly used those functions rather than the transpiled equivalents?
Another directory to consult is .electron-vue since this is where the build tools are kept. But, where we need to turn our attention is the src directory.
You'll find this:
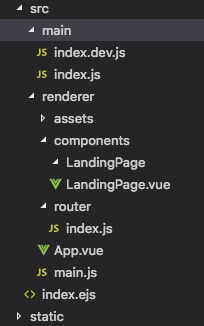
The directory src/main contains code for the Main process, while src/renderer contains code for the Renderer processes.
Recall that Electron has a multi-process model. The Main process manages the overall application and is a Node.js application with no visible user interface. Instead it sends messages back and forth with the Renderer windows. The Renderer processes wrap around Chromium browser windows, and are what contain client-side logic.
In src/renderer/assets you'll place things like image or CSS files. In src/renderer/components you'll place code for Vue components. Finally, index.ejs provides the HTML for the main window.
In src/renderer/main.js is the main JavaScript for the renderer windows, and by default the App component drives the main window.
In index.ejs the code <div id="app"></div> is where the main application lands.
Adding Bootstrap to the main window
The Bootstrap team has some excellent documentation, including the base structure for the HTML in your web pages. But, we have to do it a little differently because of how certain things work in the Electron environment.
In the <head> section of index.ejs add this:
<link rel="stylesheet"
    href="./node_modules/bootstrap/dist/css/bootstrap.css"
    crossorigin="anonymous">
<script>
    window.jQuery = window.$ = require('jquery');
</script>
The first element is the normal recommendation, to load bootstrap.css. However we are not loading from the Bootstrap CDN as recommended by the Bootstrap team.
We should strongly avoid loading code from external sources in Electron. There are potential security reasons for this, especially as Electron code runs with different privilege settings than regular browser code. In Electron JavaScript can directly access the file system and do other things that are locked out in browsers. The other reason to not use external dependencies is that we cannot assume the Electron app will always have Internet access.
Earlier when we added Bootstrap, jQuery and Popper dependencies in package.json we ensured that each library was installed in node_modules. Take a look in each package and you'll see each package has client-side code, and we can simply load these things in the HTML as shown here.
The initialization of jQuery in Electron must follow a different practice than normal. The issue is that the jQuery library detects it is being run in Node.js and does not initialize correctly for Electron. For details see Loading jQuery and Bootstrap in Electron app has a curious bug
At the bottom of index.ejs, just before the closing </body> tag, add these lines:
<!-- Optional JavaScript -->
<!-- jQuery first, then Popper.js, then Bootstrap JS -->
<!-- script src="./node_modules/jquery/dist/jquery.js" crossorigin="anonymous"></script -->
<script src="./node_modules/popper.js/dist/umd/popper.js" crossorigin="anonymous"></script>
<script src="./node_modules/bootstrap/dist/js/bootstrap.js" crossorigin="anonymous"></script>
We've commented out the recommended jQuery thing because of what we said earlier. The other two lines are directly from the Bootstrap documentation except for the insertion of umd into the path for popper.js.
At this point you can run the application again (npm run dev) but nothing will have changed. It's useful to ensure there are no errors at this point.
The next step is to replace the contents of src/renderer/components/LandingPage.vue with the folloiwng:
<template>
  <div id="wrapper" class="container-fluid">
    <nav class="navbar navbar-expand-lg navbar-light bg-light">
      <a class="navbar-brand" href="#">Navbar</a>
      <button class="navbar-toggler" type="button" data-toggle="collapse" data-target="#navbarSupportedContent" aria-controls="navbarSupportedContent" aria-expanded="false" aria-label="Toggle navigation">
        <span class="navbar-toggler-icon"></span>
      </button>

      <div class="collapse navbar-collapse" id="navbarSupportedContent">
        <ul class="navbar-nav mr-auto">
          <li class="nav-item active">
            <a class="nav-link" href="#">Home <span class="sr-only">(current)</span></a>
          </li>
          <li class="nav-item">
            <a class="nav-link" href="#">Link</a>
          </li>
          <li class="nav-item dropdown">
            <a class="nav-link dropdown-toggle" href="#" id="navbarDropdown" role="button" data-toggle="dropdown" aria-haspopup="true" aria-expanded="false">
              Dropdown
            </a>
            <div class="dropdown-menu" aria-labelledby="navbarDropdown">
              <a class="dropdown-item" href="#">Action</a>
              <a class="dropdown-item" href="#">Another action</a>
              <div class="dropdown-divider"></div>
              <a class="dropdown-item" href="#">Something else here</a>
            </div>
          </li>
          <li class="nav-item">
            <a class="nav-link disabled" href="#">Disabled</a>
          </li>
        </ul>
        <form class="form-inline my-2 my-lg-0">
          <input class="form-control mr-sm-2" type="search" placeholder="Search" aria-label="Search">
          <button class="btn btn-outline-success my-2 my-sm-0" type="submit">Search</button>
        </form>
      </div>
    </nav>
    <div class="row">
      <div class="col">
        <div class="jumbotron">
          {{ msg }}
        </div>
      </div>
    </div>
    <div class="row">
      <div class="col-sm">
        One of three columns
      </div>
      <div class="col-sm">
        One of three columns
      </div>
      <div class="col-sm">
        One of three columns
      </div>
    </div>
  </div>
</template>

<script>
  export default {
    name: 'landing-page',
    data () {
      return {
        msg: 'Welcome to Your Vue.js App'
      }
    }
  }
</script>

<style>
  @import url('https://fonts.googleapis.com/css?family=Source+Sans+Pro');
</style>
The <script></script> section simply sets up a data item, msg that we can display in the template. That will be enough to demonstrate Vue is functioning. If your home page had additional components, they'd be imported here.
The <template></template> section is simply some sample Bootstrap code I threw together. It doesn't include any actual functionality. I wanted to demonstrate Bootstrap layout, navigation bar, dropdowns, and that Vue works. This section is where your application HTML goes.
The <style></style> section is where CSS declarations go. The Google Fonts reference is inherited from the template Electron-Vue application.
Running the application in development mode
Running in development mode is this easy:
$ npm run dev

> electron-vue-bootstrap@0.0.0 dev /Volumes/Extra/sourcerer/004-electron/electron-vue-bootstrap
> node .electron-vue/dev-runner.js

         ___                      __
   __   /\_ \       __     ___   /\ \__    _ __    ___     ___              __  __  __  __     __
 / ,.`\ \//\ \    / ,.`\  /'___\ \ \ ,_\  /\` __\ / __`\ /' _ `\   _______ /\ \/\ \/\ \/\ \  / ,.`\
/\  __/   \_\ \_ /\  __/ /\ \__/  \ \ \/  \ \ \/ /\ \_\ \/\ \/\ \ /\______\\ \ \/ |\ \ \_\ \/\  __/
\ \____\  /\____\\ \____\\ \____\  \ \ \_  \ \_\ \ \____/\ \_\ \_\\/______/ \ \___/ \ \____/\ \____\
 \/____/  \/____/ \/____/ \/____/   \ \__\  \/_/  \/___/  \/_/\/_/           \/__/   \/___/  \/____/
                                     \/__/
  getting ready...

┏ Main Process ---------------

  compiling...

┗ ----------------------------
If all goes well you'll see this:
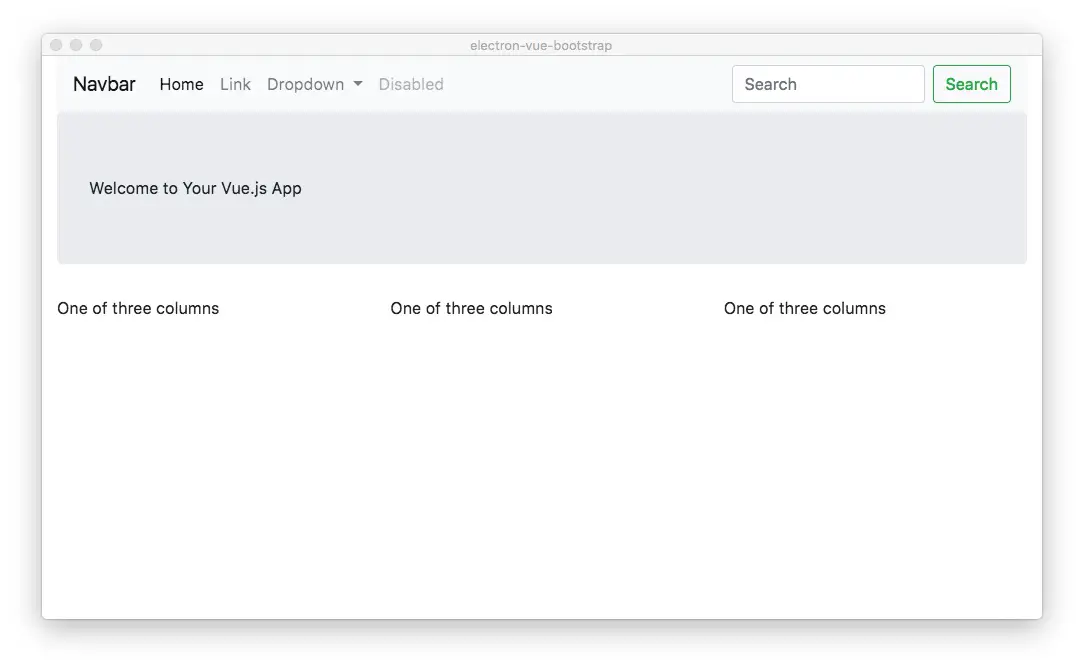
The dropdown will work etc. Because it is in development mode the View menu includes choices to open the Developer Tools, at which point you have the full power of the Chrome Dev Tools at your finger-tips. That's a key advantage to developing on Electron, the Dev Tools. No other GUI framework has this capability built in.
As I said earlier, nothing is attached to anything except you'll see the {{ msg }} section in the template got replaced by our message. That's where we prove Vue is functioning.
Building the application for distribution
The Electron-Vue bundles two methods to bundle the application. We initialized this using electron-builder and therefore we must consult this documentation:
https://simulatedgreg.gitbooks.io/electron-vue/content/en/using-electron-builder.html
You can instead initialize with electron-packager.
Build as so:
$ npm run build

> electron-vue-bootstrap@0.0.0 build /Volumes/Extra/sourcerer/004-electron/electron-vue-bootstrap
> node .electron-vue/build.js && electron-builder

 ___              __                        __                       ___       __
/\_ \       __   /\ \__     ____           /\ \       __  __   __   /\_ \     /\ \
\//\ \    / ,.`\ \ \ ,_\   / ,__\  _______ \ \ \____ /\ \/\ \ /\_\  \//\ \    \_\ \
  \_\ \_ /\  __/  \ \ \/  /\__, `\/\______\ \ \  ,. \\ \ \_\ \\/\ \   \_\ \_ /\ ,. \
  /\____\\ \____\  \ \ \_ \/\____/\/______/  \ \____/ \ \____/ \ \ \  /\____\\ \____\
  \/____/ \/____/   \ \__\ \/___/             \/___/   \/___/   \/_/  \/____/ \/___ /
                     \/__/

  ✔ building main process
  ✔ building renderer process

...


 OKAY  take it away `electron-builder`

  • electron-builder version=19.56.2
  • loaded configuration file=package.json ("build" field)
  • writing effective config file=build/electron-builder.yaml
  • no native production dependencies
  • packaging       platform=darwin arch=x64 electron=1.8.7 appOutDir=build/mac

...

  • building        target=macOS zip arch=x64 file=build/electron-vue-bootstrap-0.0.0-mac.zip
  • building        target=DMG arch=x64 file=build/electron-vue-bootstrap-0.0.0.dmg
  • building block map blockMapFile=build/electron-vue-bootstrap-0.0.0.dmg.blockmap
And you'll end up with this directory:
$ ls build/
electron-builder.yaml				electron-vue-bootstrap-0.0.0.dmg		icons
electron-vue-bootstrap-0.0.0-mac.zip		electron-vue-bootstrap-0.0.0.dmg.blockmap	mac
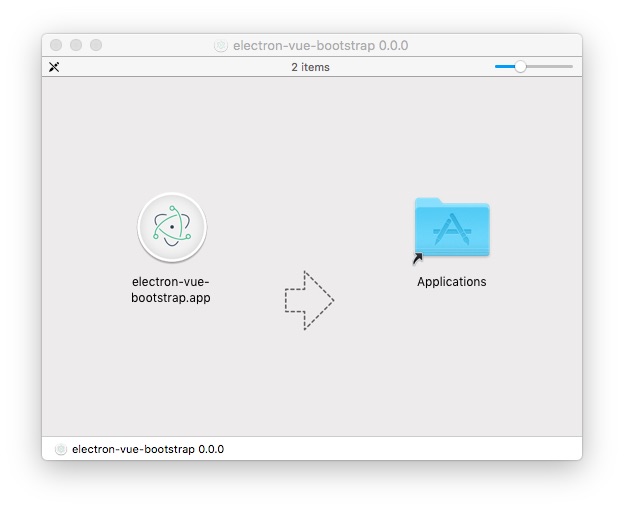
If you follow through with the installation, you end up with a familiar application icon in the Applications folder which you can double-click and run.

Books by David Herron

(Sponsored)


