David Herron
Tags: Docker »»»» Docker Swarm »»»» Docker Wordpress »»»» Wordpress »»»»
Hosting a Wordpress site in Docker is relatively easy, and is largely a matter of properly configuring three standard containers. It requires a MySQL database, NGINX, and the Wordpress PHP-FPM container, with simple configuration. Starting from a freshly provisioned virtual server, the process takes less than two hours to set up hosting with HTTPS support.
Needing to move my Wordpress-based blog to a new host, I looked around for a clear tutorial on what to do, and only found confusion. Why, oh why, do so many tutorials on hosting Wordpress in Docker make it look so difficult?
In this post we will study a production grade deployment for Wordpress using Docker. We'll use Docker Compose to describe the deployment, and we'll also talk about using it on Docker Swarm. It will use NGINX as the front end, and run Wordpress using PHP-FPM. We'll then implement HTTPS support using Lets Encrypt in a custom container called Cronginx.
An extremely similar deployment is currently in use for one of my websites. That server is running three websites, one of them being Wordpress and the other two being Drupal.
One question to ponder is why do we take this route? There are a ton of web hosting providers offering Wordpress hosting. For example
Dreamhost (sponsored) offers what sounds like an excellent deal, their Dreampress service starts at $25 per month and is a high performance Wordpress hosting solution. Several other hosting providers have a similar service, and of course there is the service at Wordpress.com. A few clicks of the mouse, and within minutes we'd have Wordpress ready to go.
By contrast what we're showing in this tutorial is a DIY hosting platform. You provision your own virtual server, set up your own Docker infrastructure, then deploy the required containers yourself. While the process is easy, it's not something you do with a few mouse clicks and the Wordpress instance is immediately ready to use. The hosted/managed Wordpress service providers offer us peace of mind, with automated backups, security monitoring, and more. But some of us like to have greater freedom and control than we get through those hosted/managed services. Another advantage is cost, because the hosting cost for one
Digital Ocean (sponsored) server is less than half the cost for the two VPS's required on Dreamhost.
What you will get from this tutorial is an example of an easy-to-implement solution for hosting Wordpress on Docker using Docker Compose. The commands shown are for Docker Swarm, but are using a Compose file which uses no special Swarm features.
A companion article shows deploying Wordpress on a local host for development.
A companion workspace is on Github:
https://github.com/robogeek/docker-wordpress-production
Using Swarm raises the possibility of having multiple servers. Swarm is a Container Orchestration system that is native to Docker. It automatically handles communication between services in a Docker Swarm Cluster, and handles distributing services across a Cluster. Unfortunately, Wordpress doesn't lend itself to such a deployment. This article only demonstrates deployment to a single server.
Setting up a virtual private server to run Docker and Docker Swarm
To provide our deployment infrastructure, let's set up a VPS (Virtual Private Server) on which to host Docker containers. There are plenty of ways to host Docker services, but this is one of the simplest routes. It is easy to set up Docker on your own system and get started right away. The cloud hosting providers do offer Docker and Kubernetes hosting, but they tend to add in proprietary this and complicated that, and it ends up being complex.
For the sake of example, lets set up a VPS on Digital Ocean, or what they call a Droplet.
These instructions can be used on any virtual server from any of dozens of providers, or you can even setup Docker Swarm on a virtual machine application like Multipass on your laptop. Feel free to use your preferred hosting provider. Digital Ocean is used in this tutorial because their service is very easy to use.
After logging into the Digital Ocean dashboard, notice the left hand sidebar contains a link named Droplets. What we want to do is to create a Droplet. There will be a button letting you do so.
The first step is to Choose an Image, meaning to choose which operating system to run, and to configure particulars about the VPS.
- This project is geared to Ubuntu 20.04, so choose that operating system.
- For the Droplet size, choose the Basic plan and 2GB of memory. At this writing this will cost $10/month. For a real production server, you will surely need more memory and disk space.
- Then choose a hosting location, and for a test project like this choose the location closest to you. For a production service it's better to choose a location closer to your audience.
- Then set up an SSH key since this is what will let you securely log-in to the VPS. If you do not have one configured with Digital Ocean, click the New SSH Key button and follow the instructions.
- Select 1 Droplet to create only one server
- Give it a rememberable host name like test-wp-deployment
- Click Create Droplet
The server will spin itself up in less than a minute, at which time you can do this:
$ ssh -l root 161.35.227.50
The authenticity of host '161.35.227.50 (161.35.227.50)' can't be established.
ECDSA key fingerprint is SHA256:5bhWTWpp7p8n6N8IawsjEvNiZK89+1g+yGu5PUQeQWA.
Are you sure you want to continue connecting (yes/no)? yes
Warning: Permanently added '161.35.227.50' (ECDSA) to the list of known hosts.
Welcome to Ubuntu 20.04.1 LTS (GNU/Linux 5.4.0-45-generic x86_64)

...

root@test-wp-deployment:~#
On Digital Ocean, they have you log in as root. This is probably against a best practice somewhere, but let's go with it. A better practice at this point is to create a user ID, enable SSH login for that user ID, then disable SSH login to the root account. But rather than go through that, let's set up Docker Swarm on the server.
Setting up Docker Swarm on a Virtual Private Server
We have a newly minted Ubuntu 20.04 instance, and we want to deploy a Docker-based service stack. It is very easy to install Docker Swarm and get on with deploying Docker services.
As you proceed through the tutorial, notice that as soon as we install Docker the details about Digital Ocean evaporate. That's the value Docker brings, which is to democratize service deployment.
Create a file named swarm.sh containing:
sudo apt-get update
sudo apt-get upgrade -y

sudo apt-get -y install \
    apt-transport-https \
    ca-certificates \
    curl \
    gnupg-agent \
    software-properties-common

curl -fsSL https://download.docker.com/linux/ubuntu/gpg | sudo apt-key add -

sudo apt-key fingerprint 0EBFCD88

sudo add-apt-repository \
    "deb [arch=amd64] https://download.docker.com/linux/ubuntu $(lsb_release -cs) stable"

sudo apt-get update
sudo apt-get upgrade -y
sudo apt-get install -y docker-ce docker-ce-cli containerd.io
sudo groupadd docker
# Do this if to set up a non-privileged user to run Docker
# sudo usermod -aG docker ubuntu
sudo systemctl enable docker

# On Digital Ocean this will give an error
docker swarm init
These commands are cobbled together from the official Docker documentation, and are what's required on Ubuntu 20.04 to install the current version of Docker.
On Digital Ocean the last command gives an error message:
Error response from daemon: could not choose an IP address to advertise since this system has multiple addresses on interface eth0 (161.35.227.50 and 10.48.0.5) - specify one with --advertise-addr
Fortunately this is easy to handle. There are two IP addresses, one is the public address and the other is a private address. It is by no means a safe or best practice to expose your Docker infrastructure to the public Internet. Therefore:
root@test-wp-deployment:~# docker swarm init --advertise-addr 10.48.0.5
Swarm initialized: current node (yo5pzh0b6zujxz09qlnge5fjm) is now a manager.

To add a worker to this swarm, run the following command:

    docker swarm join --token SWMTKN-1-1ld23xh8orjh95zfbpnrh0j40g7ivhb2ttvcktbux47g1p94x0-0m7hhskivpshkjerqd0agff6t 10.48.0.5:2377

To add a manager to this swarm, run 'docker swarm join-token manager' and follow the instructions.
We explicitly tell docker swarm init to initialize itself on the private IP address.
At this point we could configure a multiple VPS Docker Swarm Cluster for horizontal scaling. Doing so would complicate the project, so let's not do that. If it's what you want, then you'll go back to the VPS provider dashboard, create more VPS's, and on each one run this script. For these hosts you'd leave off the last line, and instead run the docker swarm join command.
For an example of configuring a Docker Swarm see Creating a Docker Swarm using Multipass and Ubuntu 20.04 on your laptop
Finally, to verify that your host is correctly running Docker, run this:
root@test-wp-deployment:~# docker run hello-world
Unable to find image 'hello-world:latest' locally
latest: Pulling from library/hello-world
0e03bdcc26d7: Pull complete
Digest: sha256:4cf9c47f86df71d48364001ede3a4fcd85ae80ce02ebad74156906caff5378bc
Status: Downloaded newer image for hello-world:latest

Hello from Docker!
This message shows that your installation appears to be working correctly.
...
We can configure our laptop to remotely control your Docker infrastructure. It's very easy, see: Using SSH to remotely control a Docker Engine or Docker Swarm in two easy steps
Assign a domain name to the virtual server
For a production Wordpress deployment you need a public domain name to use. Additionally we will enable HTTPS service using Lets Encrypt, which also requires a domain name.
This means you will need to have registered a domain name. For this example we will set up a subdomain of an existing domain that has an unrelated website on it.
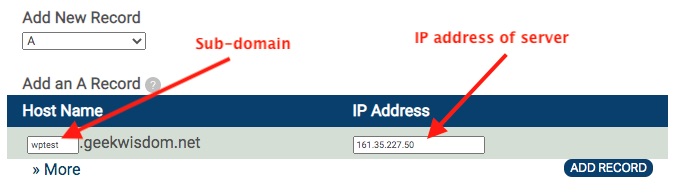
Different DNS providers will do this in different ways. Digital Ocean offers a way to host your domains and simplify this a bit. But we do not need to give Digital Ocean control over the domain. This domain is fully managed through the DNS Registrar website. What we do is add an A record for wptest.example.com that points to the IP address of the VPS we just provisioned. Then repeat the process for www.wptest.example.com.
At this point if you visit http://wptest.example.com you'll get an error message. There is no default web server installed on the machine, and we haven't installed anything yet.
Because Wordpress requires a MySQL instance, lets start with that.
Launching a MySQL database server using Docker Swarm
On this server, the /opt directory is empty except for something Docker created during installation. We can therefore use this directory to store the files related to the services we want to deploy.
root@test-wp-deployment:~# cd /opt
root@test-wp-deployment:/opt# ls
containerd
root@test-wp-deployment:/opt# mkdir db
root@test-wp-deployment:/opt# cd db
root@test-wp-deployment:/opt/db#
For the database let's create a directory, /opt/db, to store the database directory, a Docker Compose file, and any other configuration files.
In that directory create a file named docker-compose.yml containing:
version: '3.8'

services:

    db:
        image: "mysql/mysql-server:5.7"
        container_name: db
        command: [ "mysqld",
                    "--character-set-server=utf8mb4",
                    "--collation-server=utf8mb4_unicode_ci",
                    "--bind-address=0.0.0.0",
                    "--innodb_large_prefix=true",
                    "--innodb_file_format=barracuda",
                    "--innodb_file_per_table=true" ]
        # expose:
        #    - "3306"
        # ports:
        #     - "3306:3306"
        networks:
           - dbnet
        volumes:
           - /opt/db/db:/var/lib/mysql
           - /opt/db:/db
        restart: always
        environment:
           MYSQL_ROOT_PASSWORD: "w0rdw0rd"
           # MYSQL_ROOT_HOST: "10.%"
           MYSQL_USER: wptest
           MYSQL_PASSWORD: passw0rd
           MYSQL_DATABASE: wptest

#    phpmyadmin:
#        image: phpmyadmin/phpmyadmin
#        networks:
#            - dbnet
#        environment:
#            PMA_HOST: db
#            PMA_USER: root
#            PMA_PASSWORD: w0rdw0rd
#            PHP_UPLOAD_MAX_FILESIZE: 1G
#            PHP_MAX_INPUT_VARS: 1G
#        ports:
#            - "8001:80"

networks:
    dbnet:
        external: true
This creates a MySQL instance on a container named db. We're using mysql/mysql-server:5.7, which gives us MySQL v5.7. If you want to use MySQL 8.x there is a required workaround documented in: Wordpress local development environment with Docker and Docker Compose on your laptop
The MySQL container supports creating one database, in this case we're calling it wptest. If you want to run multiple databases in the one server, see: Using multiple databases and PHPMyAdmin in a single MySQL Docker instance
In the volumes section we declare that /opt/db/db is mounted from the server as /var/lib/mysql inside the container. What this does is ensure the database directory is persisted when the database container is destroyed and recreated.
There is an optional container here, PHPMyAdmin, that you may want to run for database administration. It is not required for this project, however.
The dbnet network is declared to be external. This is because we need to share this network between multiple Stacks on the Docker Swarm. For more info see How to share a Docker network between Stacks deployed to a Docker Swarm
To launch the database, run this:
root@test-wp-deployment:/opt/db# docker network create dbnet \
                                    --scope swarm --driver overlay
ak057kfcu1vn049a0ad0cp6m7
root@test-wp-deployment:/opt/db# mkdir db
root@test-wp-deployment:/opt/db# docker stack deploy \
                                    --compose-file docker-compose.yml db
...
Creating service db_db
We first create the dbnet network, then create the database directory, and then launch the Stack named db.
What we've done is to create a Docker Compose file, and to launch it on a Docker Swarm. Normally a Compose file would be launched using docker-compose up. Fortunately, Swarm lets us directly use Compose files like this to describe a Stack. There are some Swarm-specific options we could use, such as increasing the number of container instances being used. But for simplicity let's leave everything at their defaults.
To check the status:
root@test-wp-deployment:/opt/db# docker service ls
ID              NAME       MODE           REPLICAS      IMAGE                    PORTS
kp5zn1sbntco    db_db      replicated     1/1           mysql/mysql-server:5.7
This tells us the service was fully launched (replicated). Since we did not specify the number of instances, it defaulted to one instance, and currently there is one running instance (1/1).
root@test-wp-deployment:/opt/db# docker ps
CONTAINER ID   IMAGE                    COMMAND                  CREATED             STATUS                    PORTS                 NAMES
cf3ca3c937c0   mysql/mysql-server:5.7   "/entrypoint.sh mysq…"   10 minutes ago      Up 10 minutes (healthy)   3306/tcp, 33060/tcp   db_db.1.dmvuw3mjkxc231ml80hakq4sm
This gives us information about the actual containers comprising the Stack deployment. The last column is the actual container name.
root@test-wp-deployment:/opt/db# docker exec -it \
                db_db.1.dmvuw3mjkxc231ml80hakq4sm \
                mysql -u root -p
Enter password:
Welcome to the MySQL monitor.  Commands end with ; or \g.
Your MySQL connection id is 27
Server version: 5.7.31 MySQL Community Server (GPL)
To check that the database is properly configured, we can start the MySQL command-line client inside the container.
Importing the database for an existing Wordpress site
What if you have an existing Wordpress site to import? This tutorial is written around launching a blank Wordpress site, but with a couple simple tweaks you can easily import an existing site.
There are two things to consider: a) the SQL for the database of the existing Wordpress site; b) the file tree of the existing Wordpress site. In this section we'll deal with the SQL of the database, and in a later section we'll deal with the files.
The simplest way to migrate Wordpress is to copy the database from one server to another. On MySQL that means exporting the database as SQL, then importing the SQL into another datase.
Wordpress stores the database access particulars in wp-config.php. Suppose they are:
define( 'DB_NAME', 'wpnew' );
define( 'DB_USER', 'wpnew' );
define( 'DB_PASSWORD', 'w0rdw0rd' );
define( 'DB_HOST', 'db' );
In my case I used SSH to login to the webserver then ran this command:
$ mysqldump -h db -u wpnew -p wpnew >wp-2020-09-20.sql
The -h option gives the host-name, the -u option gives the user-name, the -p option tells mysqldump to ask for the password, and the final wpnew option tells it which database to dump.
You may instead have access to PHPMyAdmin, which also lets you take an SQL dump of the database. In either way you end up with a file containing the SQL for the database.
You then copy that SQL file to your new server. Notice that in the Compose file we mounted the /opt/db directory as /db inside the container. That was to make it easier to import SQL into the database server. Simply put the SQL dump into /opt/db then run the following:
root@test-wp-deployment:/opt/db# docker exec -it \
                db_db.1.dmvuw3mjkxc231ml80hakq4sm bash
bash-4.2# mysql -u root -p wptest < /db/wp-2020-09-20.sql
This imports an SQL file into a MySQL database. Later in this tutorial we'll launch the Wordpress instance. We'll show Wordpress initializing the site, but if instead the tables are already there Wordpress will instead just show the site.
At this point we have a working database server. The next step is to set up NGINX and Wordpress.
Setting up NGINX and Wordpress on a Docker Swarm
We have a database server running in a Docker Stack. We did this separately so that the database server can stay running, while we bring the Wordpress stack up and down. Our next step is to create a Stack that will handle Wordpress.
Create a directory /opt/server in which we'll be creating many things. Let's start with a Docker Compose file named docker-compose.yml:
version: '3.8'

services:

    nginx:
        image: robogeek/cronginx
        container_name: cronginx
        networks:
            - servernet
        volumes:
            - /opt/server/cronginx/etc-letsencrypt:/etc/letsencrypt
            - /opt/server/cronginx/webroots:/webroots
            - /opt/server/cronginx/logs:/var/log/nginx
            - /opt/server/cronginx/nginx-conf-d:/etc/nginx/conf.d
            - /opt/server/wp-fpm/roots:/var/wp-fpm:rw
        ports:
          - '80:80'
          - '443:443'

    wp-fpm:
        image: wordpress:php7.3-fpm
        container_name: wp-fpm
        networks:
            - servernet
            - dbnet
        restart: always
        environment:
            PATH: "/usr/local/sbin:/usr/local/mybin:/usr/local/bin:/usr/sbin:/usr/bin:/sbin:/bin"
        volumes:
            - /opt/server/wp-fpm/logs:/var/log/apache2:rw
            - /opt/server/wp-fpm/roots:/var/wp-fpm:rw
            - /opt/server/wp-fpm/mybin:/usr/local/mybin

networks:
    servernet:
        external:
            name: servernet
    dbnet:
        external:
            name: dbnet
What we've defined is a two-container service. The user-facing container runs NGINX, a very popular high performance web-server. We're using cronginx because it ads the Lets Encrypt tools to NGINX letting us easily set up HTTPS later on. The second container is geared to running a Wordpress instance using PHP-FPM. We can easily configure NGINX to interface with PHP-FPM.
We've specified a new network, servernet, that will contain these two services. The wp-fpm container is connected to dbnet so that it has access to the database server.
There are a number of directories mounted into these containers:
/opt/server/cronginx/etc-letsencryptThis will hold the Lets Encrypt configuration files, the most important of which is the SSL certificate we'll generate later./opt/server/cronginx/webrootsThis is used while provisioning the SSL certificate through Lets Encrypt/opt/server/cronginx/logsLog files will be written to this directory/opt/server/cronginx/nginx-conf-dNGINX configuration files go here, which is where we will tell NGINX how to host our Wordpress site/opt/server/wp-fpm/rootsThis is where we'll unpack the Wordpress distribution/opt/server/wp-fpm/logsLog files will be written to this directory/opt/server/wp-fpm/mybinWe can install scripts here automatically making them available in the PATH of any command-line shell we start.
To support all that run this:
root@test-wp-deployment:/opt/server# mkdir -p cronginx/etc-letsencrypt \
        cronginx/webroots \
        cronginx/logs \
        cronginx/nginx-conf-d \
        wp-fpm/roots \
        wp-fpm/logs \
        wp-fpm/mybin
root@test-wp-deployment:/opt/server# docker network create servernet \
        --scope swarm --driver overlay
tl6htzcqdby8aflh88x202p4b
This sets up required directories, and the required virtual network. We have a little more setup required to get this running.
Configuring NGINX to support Wordpress running on PHP-FPM
We are using NGINX as the webserver to run this website. The Cronginx container is derived from the normal NGINX container, which has a default built-in configuration. We don't need to modify that configuration, but we do need to know it will load any configuration file in the /etc/nginx/conf.d directory. That's why we've mounted cronginx/nginx-conf-d at that location.
Create a file named cronginx/nginx-conf-d/wptest.conf containing:
server { # simple redirect to remove the www subdomain
    # Enable HTTP/2
    listen 80;
    listen [::]:80;

    # Substitute here the domain name for the site
    server_name  www.wptest.geekwisdom.net;
    return 301 http://wptest.geekwisdom.net$request_uri;
}

server { # simple PHP-FPM proxy plus required stuff for Wordpress
    listen       80;
    server_name  wptest.geekwisdom.net;
    access_log   /var/log/nginx/wptest.geekwisdom.net.access.log  main;
    error_log    /var/log/nginx/wptest.geekwisdom.net.error.log  debug;

    index index.php;
    root /var/wp-fpm/wptest;

    location /.well-known/ {
        allow all;
        root /webroots/wptest.geekwisdom.net;
    }

    location / {
       try_files $uri $uri/ /index.php?$args;
    }

    location ~ \.(png|jpg|jpeg|gif|svg)$ {
       try_files $uri $uri/;
    }

    # Deny access to config.
    location = /wp-config.php {
        deny all;
    }

    # Deny access to htaccess.
    location ~ /\.htaccess {
        deny all;
    }
    # Directly allow access to /wp-admin/admin-ajax.php. This is necessary for
    # WordPress to function on the admin side.
    location ~* ^/wp-admin/admin-ajax.php$ {
        root /var/wp-fpm/wptest;
        try_files $uri =404;
        fastcgi_intercept_errors on;
        fastcgi_pass wp-fpm:9000;
        fastcgi_index index.php;
        fastcgi_param SCRIPT_FILENAME $document_root$fastcgi_script_name;
        include fastcgi_params;
    }

    # Allow access to all other PHP files.
    location ~ \.php$ {
        root /var/wp-fpm/wptest;
        try_files $uri =404;
        fastcgi_split_path_info ^(.+\.php)(/.+)$;
        fastcgi_pass wp-fpm:9000;
        fastcgi_index index.php;
        include fastcgi_params;
        fastcgi_param SCRIPT_FILENAME $document_root$fastcgi_script_name;
        fastcgi_param PATH_INFO $fastcgi_path_info;
    }

    location ~ /\.ht {
            deny all;
    }

    location = /favicon.ico {
            log_not_found off; access_log off;
    }
    location = /robots.txt {
            log_not_found off; access_log off; allow all;
    }
    location ~* \.(css|gif|ico|jpeg|jpg|js|png)$ {
            expires max;
            log_not_found off;
    }
}
These are Wordpress-specific configuration settings cobbled together from several sources. Many of the declarations tell NGINX how to handle specific parts of the Wordpress file tree.
One key is that inside the container the directory /var/wp-fpm/wptest is the path in which the Wordpress distribution is unpacked.
To set that up, run these commands:
root@test-wp-deployment:/opt/server# wget https://wordpress.org/latest.tar.gz
root@test-wp-deployment:/opt/server# tar xvfz latest.tar.gz
root@test-wp-deployment:/opt/server# mv wordpress/ wp-fpm/roots/wptest
root@test-wp-deployment:/opt/server# chown \
            -R www-data:www-data wp-fpm/roots/wptest
root@test-wp-deployment:/opt/server# mkdir cronginx/webroots/wptest.geekwisdom.net
root@test-wp-deployment:/opt/server# chown \
            -R www-data:www-data cronginx/webroots/wptest.geekwisdom.net
We can download Wordpress from the wordpress.org website. The URL shown here is literally the URL currently used on that site. We then unpack the Wordpress bundle and move it into the place that will then be mounted as /var/wp-fpm/wptest. We have to change the ownership to www-data So that the PHP process can correctly access the Wordpress tree.
Another key is this: fastcgi_pass wp-fpm:9000;
This sends all HTTP requests to the PHP-FPM back-end. This back-end is running inside the wp-fpm container.
Another key is this: server_name wptest.geekwisdom.net;
This tells NGINX to handle requests on that domain name. You'll of course need to substitute your own domain name here. There's another block which handles the www.wptest.geekwisdom.net domain name, causing any access to be redirected to wptest.geekwisdom.net.
You'll also notice this only handles port 80, HTTP. We'll start this site on the HTTP port, and later we'll transition to HTTPS (port 443).
Launching the Wordpress service on Docker
We're now ready to launch the Wordpress Stack and to configure Wordpress.
root@test-wp-deployment:/opt/server# docker stack deploy \
            --compose-file docker-compose.yml wptest
...
root@test-wp-deployment:/opt/server# docker service ls
ID             NAME           MODE        REPLICAS  IMAGE                      PORTS
kp5zn1sbntco   db_db          replicated  1/1       mysql/mysql-server:5.7
c4ixwhpun74f   wptest_nginx   replicated  1/1       robogeek/cronginx:latest   *:80->80/tcp, *:443->443/tcp
om9r0fqnazny   wptest_wp-fpm  replicated  1/1       wordpress:php7.2-fpm
After a couple moments these services will be fully launched. Once they are we can head over to the domain, such as http://wptest.geekwisdom.net. Since the Wordpress site is not configured, we'll see the Wordpress setup screens.
The Wordpress setup is famously simple, so here's some screen captures to guide you through:
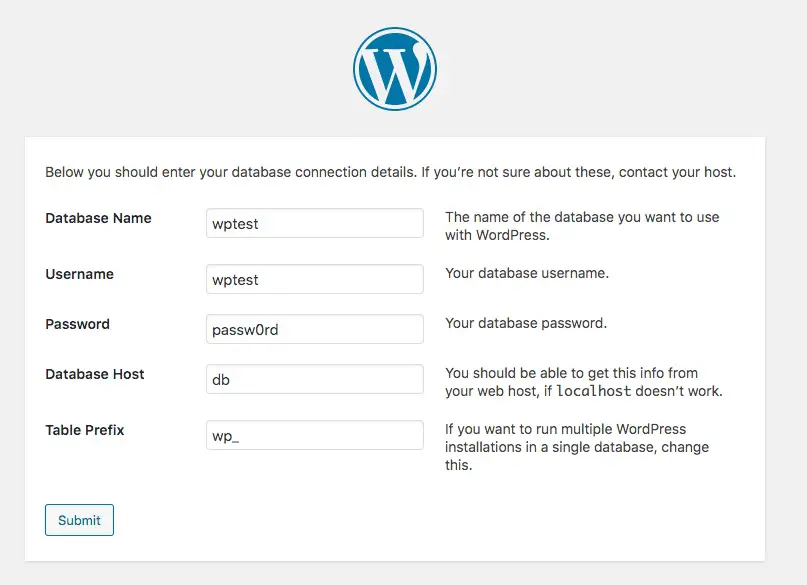
The database particulars match what we specified earlier when setting up the database.
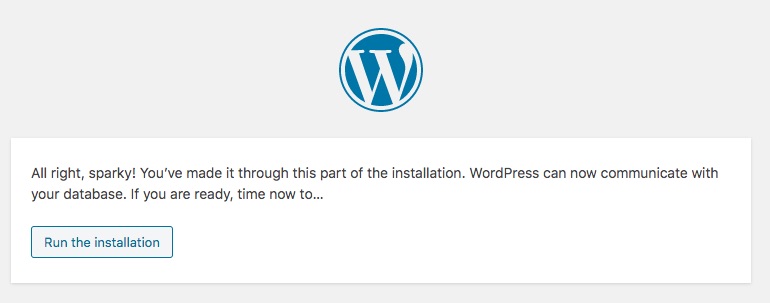
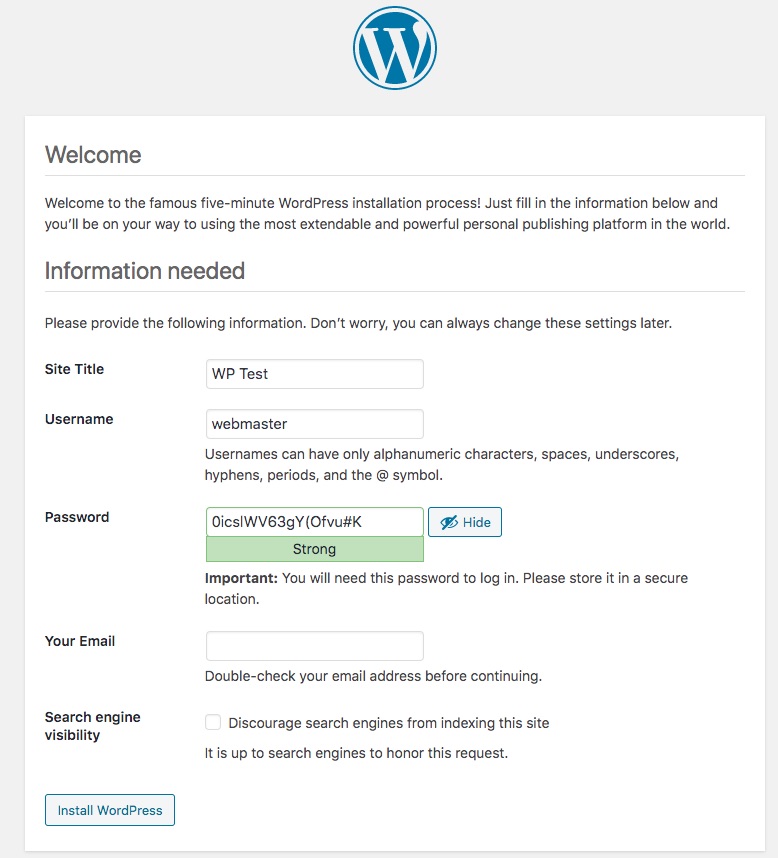
You'll need to select a better (more rememberable) password, and also supply your e-mail address.
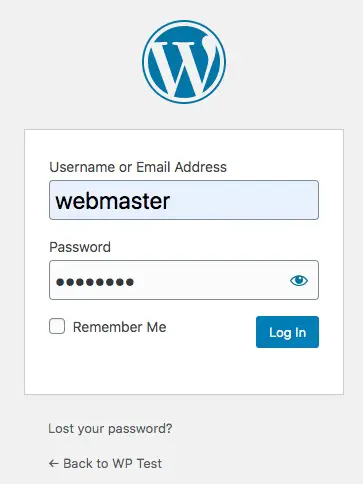
Once the setup is finished, you can login to the Wordpress admin dashboard.
It is assumed that anyone reading this blog post knows what to do in the Wordpress dashboard area. So we won't go over customizing Wordpress or creating any posts. You know what to do, so do that.
Before proceeding with setting up the HTTPS server, we need to discuss how to migrate an existing site.
Importing an existing Wordpress site, instead of launching a blank/new site
What if you have an existing Wordpress site to migrate? We discussed this earlier, and showed how to migrate the Wordpress database from one server to another by dumping the SQL of the existing database. The other aspect of migrating the site involves copying the files from the existing site to this new server.
Earlier we showed downloading https://wordpress.org/latest.tar.gz, unpacking it, and moving it to be wp-fpm/roots/wptest. In other words this directory must contain a Wordpress file tree. Instead of starting with a blank/default Wordpress setup, we can copy our existing Wordpress file tree to the same directory.
On your existing server you have such a tree of files. For example on Dreamhost, the path /home/USER-NAME/domain-name.com contains the Wordpress directory tree. The web hosting dashboard for your existing hosting provider may offer a way to download these files. For a hosting provider which offers SSH access, use SSH to login to your hosting account and type a command like:
$ tar cf SITE-NAME.tar ./domain-name.com
The tar command packages everything into one file named SITE-NAME.tar. The second option, ./domain-name.com, must be the path name of the home directory of your site.
Since different hosting providers implement this in different ways, we cannot show you exactly what to do. Instead, try to read between the lines of this and work with whatever your existing hosting provider uses.
Once you've bundled these files, copy the .tar file to your new server.
Like we did previously, you'll unpack that bundle like so:
root@test-wp-deployment:/opt/server# tar xvf SITE-NAME.tar
root@test-wp-deployment:/opt/server# mv DIRECTORY-NAME wp-fpm/roots/wptest
root@test-wp-deployment:/opt/server# chown \
            -R www-data:www-data wp-fpm/roots/wptest
The result is roughly the same as for the case of starting with a blank site. Instead of unpacking the default Wordpress distribution, you're unpacking the content of your existing Wordpress site.
The user experience of launching the Wordpress site changes. Instead of initializing a fresh site, you will instead go directly into the existing site.
One consideration is that your existing site may have this in wp-config.php:
define('FORCE_SSL', TRUE);
define('FORCE_SSL_ADMIN', TRUE);
This setting is useful to ensure a visitor automatically uses the HTTPS version of a site, versus the HTTP version. That is, if the visitor arrives using an http:// URL, Wordpress will automatically redirect the visitor to the https:// equivalent. But the configuration shown above does not support HTTPS, and you'll instead get error messages. If this is the case change those settings to:
define('FORCE_SSL', FALSE);
define('FORCE_SSL_ADMIN', FALSE);
This turns off the forced redirect to the HTTPS website. Further, this setting is no longer required, because the configuration we'll show in a minute handles the redirect from HTTP to HTTPS website in a different way.
There are some Wordpress plugins which offer a similar result. Before exporting the SQL from your original server, you'll need to disable any such plugin.
We can now proceed with setting up HTTPS on the server.
Configuring HTTPS support with Lets Encrypt and the Cronginx container
We have a working Wordpress installation that's hosted on a public domain on a regular webserver. It took less than an hour to go from having no server, to getting this set up. We could declare victory at this point, but there is an important task to take care of.
Nowadays every website needs to be secured with HTTPS. Using Lets Encrypt we can configure a free SSL certificate that lets us convert this site to HTTPS.
The Cronginx container incorporates a Cron instance, hence the name. The purpose is to run the background task required for automating renewal of Lets Encrypt SSL certificates. Those certificates are good for 90 days, making it important to regularly attempt a renewal. The Cronginx container comes prebaked with a Cron job for that purpose.
To learn more about Cronginx: Using NGINX, Lets Encrypt and Cron in Docker to manage HTTPS/SSL certificates for multiple domains
To configure HTTPS support for our Wordpress container requires doing two things:
- Running the Lets Encrypt tool,
certbot, to register a domain - Rewriting
wptest.confto support an HTTPS server alongside the HTTP server we already configured. The HTTP server needs to also force redirects to the HTTPS service.
To get started we need to find out the container name for the Cronginx container.
root@test-wp-deployment:/opt/server# docker ps
CONTAINER ID   IMAGE                      COMMAND                  CREATED      STATUS                 PORTS                 NAMES
56b6256e175f   robogeek/cronginx:latest   "sh -c 'cron && ngin…"   2 hours ago  Up 2 hours             80/tcp                wptest_nginx.1.4jigfq8h7nqsvuvvobjfqkmth
c064b21fefe2   wordpress:php7.2-fpm       "docker-entrypoint.s…"   2 hours ago  Up 2 hours             9000/tcp              wptest_wp-fpm.1.xrlxdl20xwzs1bo4n3ywvg1vi
cf3ca3c937c0   mysql/mysql-server:5.7     "/entrypoint.sh mysq…"   4 hours ago  Up 4 hours (healthy)   3306/tcp, 33060/tcp   db_db.1.dmvuw3mjkxc231ml80hakq4sm
The container name is the last column.
Next, we start a command shell inside the Cronginx container:
root@test-wp-deployment:/opt/server# docker exec -it \
            wptest_nginx.1.4jigfq8h7nqsvuvvobjfqkmth bash
root@56b6256e175f:/scripts# ls
register.sh  renew.sh
root@56b6256e175f:/scripts# ls /etc/nginx/conf.d/
wptest.conf
We are landed in the /scripts directory. The script important for this task is register.sh. The other script, renew.sh, is used when renewing SSL certificates.
That script contains the command line required to register one domain with Lets Encrypt using the HTTP-01 challenge. What that means is Certbot will be told by Lets Encrypt a special file to write into the /webroots/wptest.geekwisdom.net directory. Refer back to the configuration file and you'll see that directory is mounted by the configuration file to handle the http://wptest.geekwisdom.net/.well-known URL. The Lets Encrypt server will then try to retrieve the file from that URL, and by doing so they will have verified that we do indeed own the domain for which we are requesting an SSL certificate.
The purpose of this is for Lets Encrypt to verify that we own the domain in question. That is the task of any SSL provider, to verify authenticity. The purpose of SSL and HTTPS is to authenticate website ownership, and to encrypt Internet traffic to limit the ability of snoops to spy on what we're doing.
To register the domain, run this command:
root@56b6256e175f:/scripts# ./register.sh wptest.geekwisdom.net
Saving debug log to /var/log/letsencrypt/letsencrypt.log
Plugins selected: Authenticator webroot, Installer None
Enter email address (used for urgent renewal and security notices) (Enter 'c' to
cancel): YOUR-MAIL@ADDRESS.COM

...
Saving debug log to /var/log/letsencrypt/letsencrypt.log
Plugins selected: Authenticator webroot, Installer None
Obtaining a new certificate
Performing the following challenges:
http-01 challenge for wptest.geekwisdom.net
Using the webroot path /webroots/wptest.geekwisdom.net for all unmatched domains.
Waiting for verification...
Cleaning up challenges

IMPORTANT NOTES:
 - Congratulations! Your certificate and chain have been saved at:
   /etc/letsencrypt/live/wptest.geekwisdom.net/fullchain.pem
   Your key file has been saved at:
   /etc/letsencrypt/live/wptest.geekwisdom.net/privkey.pem
   Your cert will expire on 2020-12-24. To obtain a new or tweaked
   version of this certificate in the future, simply run certbot
   again. To non-interactively renew *all* of your certificates, run
   "certbot renew"
...
This successfully registered our domain with Lets Encrypt, and wrote a pair of PEM files into the locations shown here. Outside the Cronginx container, these files are persisted here:
root@test-wp-deployment:/opt/server# ls cronginx/etc-letsencrypt/live/
README  wptest.geekwisdom.net
That's great, but now we have a large task, which is to rewrite the configuration file to implement HTTPS. What we'll do is rework the existing configuration to listen on port 443 (HTTPS) while adding declarations for SSL, and then add new configuration listening on port 80 (HTTP) that redirects to the HTTPS server.
server { # simple redirect to HTTPS URL
    listen 80;
    listen [::]:80;

    # Substitute here the domain name for the site
    server_name  www.wptest.geekwisdom.net;
    return 301 https://wptest.geekwisdom.net$request_uri;
}

server { # simple redirect to HTTPS URL
    listen       80;
    server_name  wptest.geekwisdom.net;
    access_log   /var/log/nginx/wptest.geekwisdom.net.access.log  main;
    error_log    /var/log/nginx/wptest.geekwisdom.net.error.log  debug;

    location /.well-known/ {
         root /webroots/wptest.geekwisdom.net/;
    }

    return 301 https://wptest.geekwisdom.net$request_uri;
}


server { # simple redirect to remove the www subdomain

    listen 443 ssl http2;
    listen [::]:443 ssl http2;

    # Substitute here the domain name for the site
    server_name  www.wptest.geekwisdom.net;
    ssl_certificate     /etc/letsencrypt/live/wptest.geekwisdom.net/fullchain.pem;
    ssl_certificate_key /etc/letsencrypt/live/wptest.geekwisdom.net/privkey.pem;
    return 301 https://wptest.geekwisdom.net$request_uri;
}

server { # simple PHP-FPM proxy plus required stuff for Wordpress

    # Enable HTTP/2
    listen 443 ssl http2;
    listen [::]:443 ssl http2;

    server_name  wptest.geekwisdom.net;
    access_log   /var/log/nginx/wptest.geekwisdom.net.access.log  main;
    error_log    /var/log/nginx/wptest.geekwisdom.net.error.log  debug;

    # Use the Let’s Encrypt certificates
    # Substitute in the domain name
    ssl_certificate /etc/letsencrypt/live/wptest.geekwisdom.net/fullchain.pem;
    ssl_certificate_key /etc/letsencrypt/live/wptest.geekwisdom.net/privkey.pem;

    index index.php;
    root /var/wp-fpm/wptest;

    location /.well-known/ {
        allow all;
        root /webroots/wptest.geekwisdom.net;
    }

    location / {
       try_files $uri $uri/ /index.php?$args;
    }

    location ~ \.(png|jpg|jpeg|gif|svg)$ {
       try_files $uri $uri/;
    }

    # Deny access to config.
    location = /wp-config.php {
        deny all;
    }

    # Deny access to htaccess.
    location ~ /\.htaccess {
        deny all;
    }
    # Directly allow access to /wp-admin/admin-ajax.php. This is necessary for
    # WordPress to function on the admin side.
    location ~* ^/wp-admin/admin-ajax.php$ {
        root /var/wp-fpm/wptest;
        try_files $uri =404;
        fastcgi_intercept_errors on;
        fastcgi_pass wp-fpm:9000;
        fastcgi_index index.php;
        fastcgi_param SCRIPT_FILENAME $document_root$fastcgi_script_name;
        include fastcgi_params;
    }

    # Allow access to all other PHP files.
    location ~ \.php$ {
        root /var/wp-fpm/wptest;
        try_files $uri =404;
        fastcgi_split_path_info ^(.+\.php)(/.+)$;
        fastcgi_pass wp-fpm:9000;
        fastcgi_index index.php;
        include fastcgi_params;
        fastcgi_param SCRIPT_FILENAME $document_root$fastcgi_script_name;
        fastcgi_param PATH_INFO $fastcgi_path_info;
    }

    location ~ /\.ht {
            deny all;
    }

    location = /favicon.ico {
            log_not_found off; access_log off;
    }
    location = /robots.txt {
            log_not_found off; access_log off; allow all;
    }
    location ~* \.(css|gif|ico|jpeg|jpg|js|png)$ {
            expires max;
            log_not_found off;
    }
}
This results in four server instances. The first two listen on port 80, and have a primary purpose of redirecting to the HTTPS site. The port 80 server handling wptest.geekwisdom.net does have one additional task, which is to handle /.well-known requests to support certificate renewal.
The port 443 server listening to www.wptest.geekwisdom.net simply causes a redirect to https://wptest.geekwisdom.net. Every redirect in this configuration involves converting the domain name with www prefix to the non-www domain.
Clearly some people like the www prefix and others do not. It's a simple recoding of the configuration to force a redirect to the www domain if you prefer. To this author, the www prefix is a side effect of the earliest days of the Internet which should not be preserved in these modern times. The primary goal is to eliminate duplicate content - if your site were visible as both www.example.com and example.com, the situations would flag the site as being duplicated. To avoid that penalty we must choose one or the other, and redirect our visitors to match.
The wptest.geekwisdom.net server is largely the same as what we previously used for the HTTP server. Besides switching from port 80 to port 443, it includes the declarations required for SSL support.
With this configuration change made, it is necessary for NGINX to reload its configuration. One way to accomplish this is to shut down the services, and start them up again:
root@test-wp-deployment:/opt/server# docker stack down wptest
root@test-wp-deployment:/opt/server# docker stack deploy \
                --compose-file docker-compose.yml wptest
While this is simple, it is disruptive. What if you have multiple busy websites hosted through this server? You're going to interrupt all those sites for a simple configuration change?
There is another way:
root@test-wp-deployment:/opt/server# docker exec -it \
                wptest_nginx.1.w9rnv2vg5e0mbr9bb4amk2xmu bash
root@76761b938ca0:/scripts# service nginx reload
[ ok ] Reloading nginx: nginx.
Namely, the NGINX service is properly registered inside the container with the Debian service command. It means we can use the service nginx command to do any administrative task we wish.
root@76761b938ca0:/scripts# service --help
Usage: service < option > | --status-all | [ service_name [ command | --full-restart ] ]
This is a powerful tool that came along for free as a side effect of using the NGINX container. It is very much worth your time to learn how to use this command.
Another administrative task is to verify the NGINX configuration:
root@test-wp-deployment:/opt/server# docker exec -it \
        wptest_nginx.1.w9rnv2vg5e0mbr9bb4amk2xmu nginx -c /etc/nginx/nginx.conf -t
nginx: the configuration file /etc/nginx/nginx.conf syntax is ok
nginx: configuration file /etc/nginx/nginx.conf test is successful
This checks the configuration file, which is very useful to catch errors before restarting the container. Suppose you made a mistake in the configuration file, wouldn't you rather learn about the error and avoid upsetting your users by having unplanned downtime?
root@test-wp-deployment:/opt/server# docker exec -it \
        wptest_nginx.1.w9rnv2vg5e0mbr9bb4amk2xmu nginx -c /etc/nginx/nginx.conf -t
nginx: [emerg] cannot load certificate "/etc/letsencrypt/live/wptestt.geekwisdom.net/fullchain.pem": BIO_new_file() failed (SSL: error:02001002:system library:fopen:No such file or directory:fopen('/etc/letsencrypt/live/wptestt.geekwisdom.net/fullchain.pem','r') error:2006D080:BIO routines:BIO_new_file:no such file)
nginx: configuration file /etc/nginx/nginx.conf test failed
The nginx -c /etc/nginx/nginx.conf -t command says to run nginx, and test (-t) the configuration file specified in the -c option.
Stare at the error message carefully and you'll see the file name of the SSL certificate is wrong. I can't say much about the user friendliness of the error message, but at least it's clear what's wrong.
Isn't that an easy mistake to make? Don't your users deserve more uptime? Remember to test the config before restarting the server, please.
Summary
In this article we've shown how to get Wordpress running on a VPS onto which you've installed Docker Swarm. It's easy to get this going, and pretty quickly (within a couple hours) you'll have a server hosting Wordpress that's ready to go. But don't fool yourself into thinking your job is finished, because there are several things required to finish locking down the server.
One important step is to limit access to ports on the server. Since this example is on Digital Ocean, we can use their Firewall service to create a firewall which refuses any TCP traffic other than port 22 (SSH), port 80 (HTTP) and port 443 (HTTPS). This will automatically limit the attack surface on the server.
Another thing to consider is rather than hosting your own database, to use a database managed by the hosting provider. The managed database is probably safer, and probably includes automated backups and better scaling. One issue is that Wordpress doesn't work out of the box on MySQL 8. If your hosting provider supports that version (as Digitial Ocean does) you'll be stuck, except that there is a workaround discussed in our blog post on local Wordpress development.
What we've shown is immediately transferable to any Ubuntu or Debian installation. If you're using a different Linux, all you need to adjust is the method for installing Docker. Once Docker is installed, what you do inside the containers is the same.


