David Herron
Tags: Photography »»»» Infrared Photography »»»»
Digital camera sensors are often sensitive to infrared (IR) or ultraviolet (UV) light. The manufacturers add filters to cut out that unwanted light in order to have sharp images. But some of us want to do other kinds of photography. The DMC-ZS3 was at one time a top end point-and-shoot camera and is still very good and available at very low cost, making it a good platform for experimenting with IR Conversions of digital cameras.
Infrared photography is to take photographs of the infrared spectrum, and which use no or very little visible light. Humans see light in a range of frequencies we call the visual light spectrum. But, there is light with frequencies below that range, the ultraviolet spectrum, and above that range, the infrared spectrum, that human eyes cannot see.
The image sensor in most digital cameras can see the infrared spectrum, but the camera makers add what's called a Cut Filter to block non-visible light. Most photographers want that, because they desire to take pictures of visible things. Some of us want to take pictures of the invisible, such as infrared light.
The Panasonic Lumix ZS series of cameras are very easy to modify. Converting a Lumix ZS camera to be a full spectrum camera, meaning it can capture pictures with not just visible light, but a broader light spectrum, is very simple. But since the ZS series cameras, like all modern compact cameras, do not have filter threads allowing us to attach normal filters.
In this tutorial we discuss the process of converting a compact digital camera to take infrared photographs. We'll focus on the Lumix ZS3, but the general process will work for other digital cameras. Be warned, however, that not all digital cameras are as easy to modify as are the Lumix ZS series. For example I tried to convert a Canon Powershot 2500 to infrared, and ended up destroying the camera. My experience from taking apart Canon camera's is that they are finicky and difficult, and it's too risky to attempt to convert one to be a full spectrum camera.
The Lumix DMC-ZS3 is very easy to convert for full spectrum photography, and with a small bit of hackery can do IR photography. At the bottom of this we'll talk about how to add a filter mount to the front of the camera.
See also: DIY Convert Canon SX530 to full spectrum and infrared photography -- A failed conversion
See also: Extracting lens unit from Panasonic Lumix DMC-ZS19 - partial teardown -- Complete teardown of a Lumix ZS19
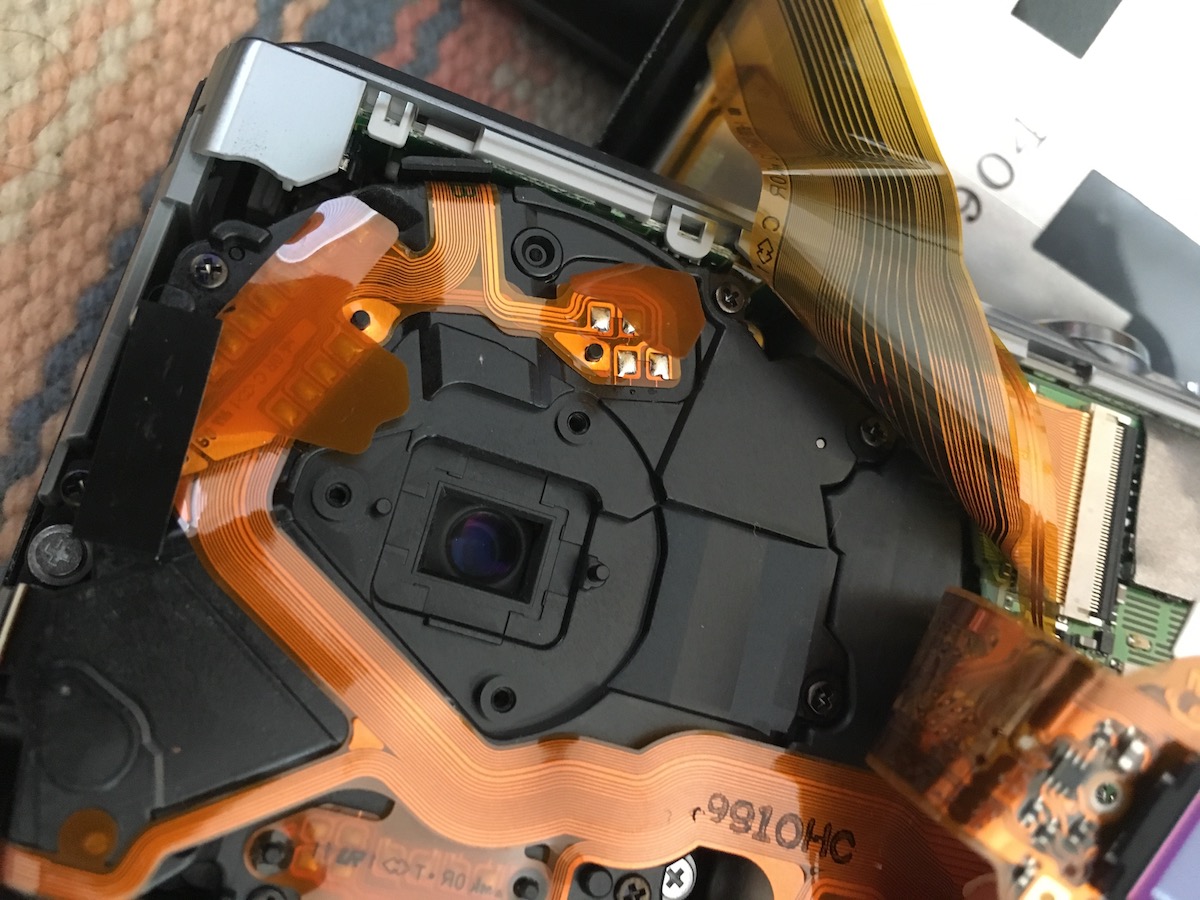
The conversion requires removing the back of the camera, accessing the image sensor, removing the filter behind the sensor. To remove the back there are several screws holding the back of the camera in place. Using a tiny Phillips head screwdriver, remove the screws carefully. The back will pop off readily.
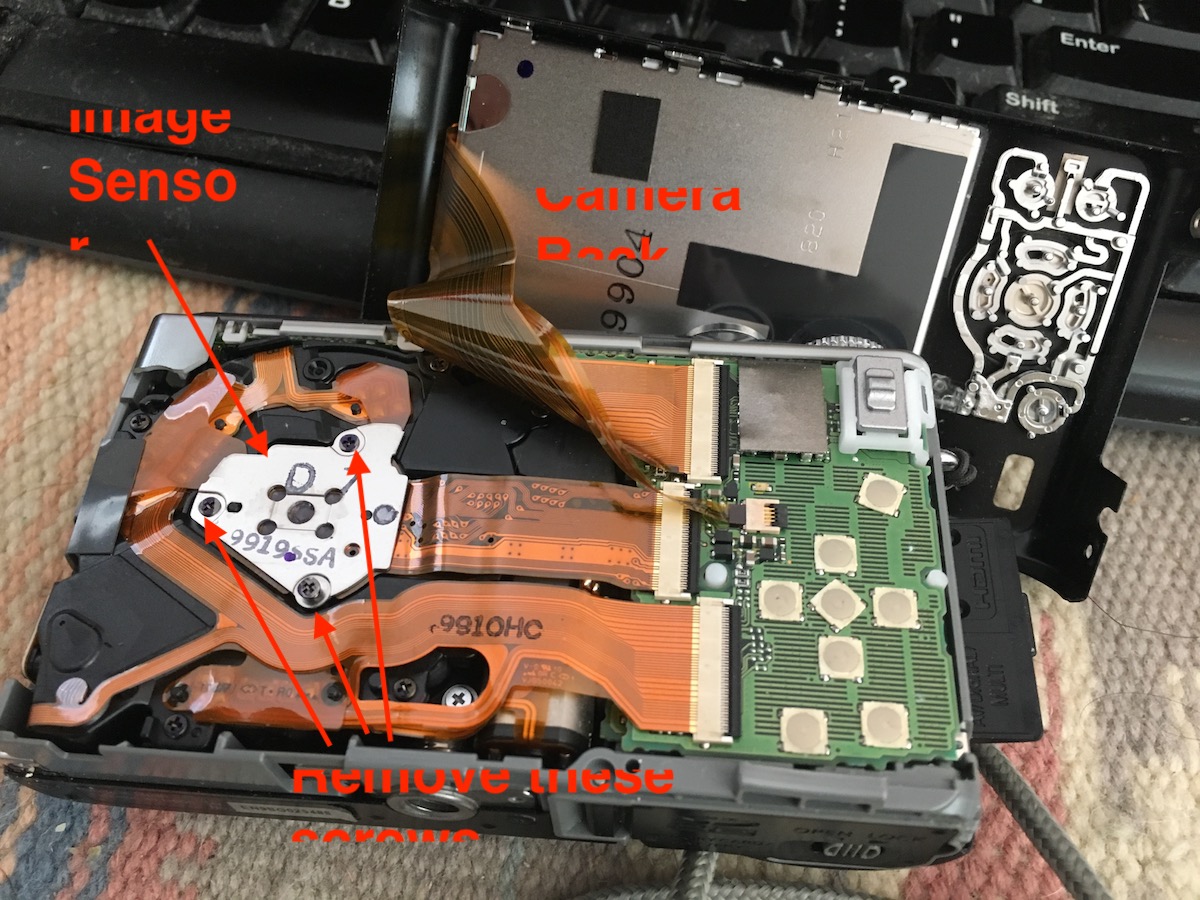
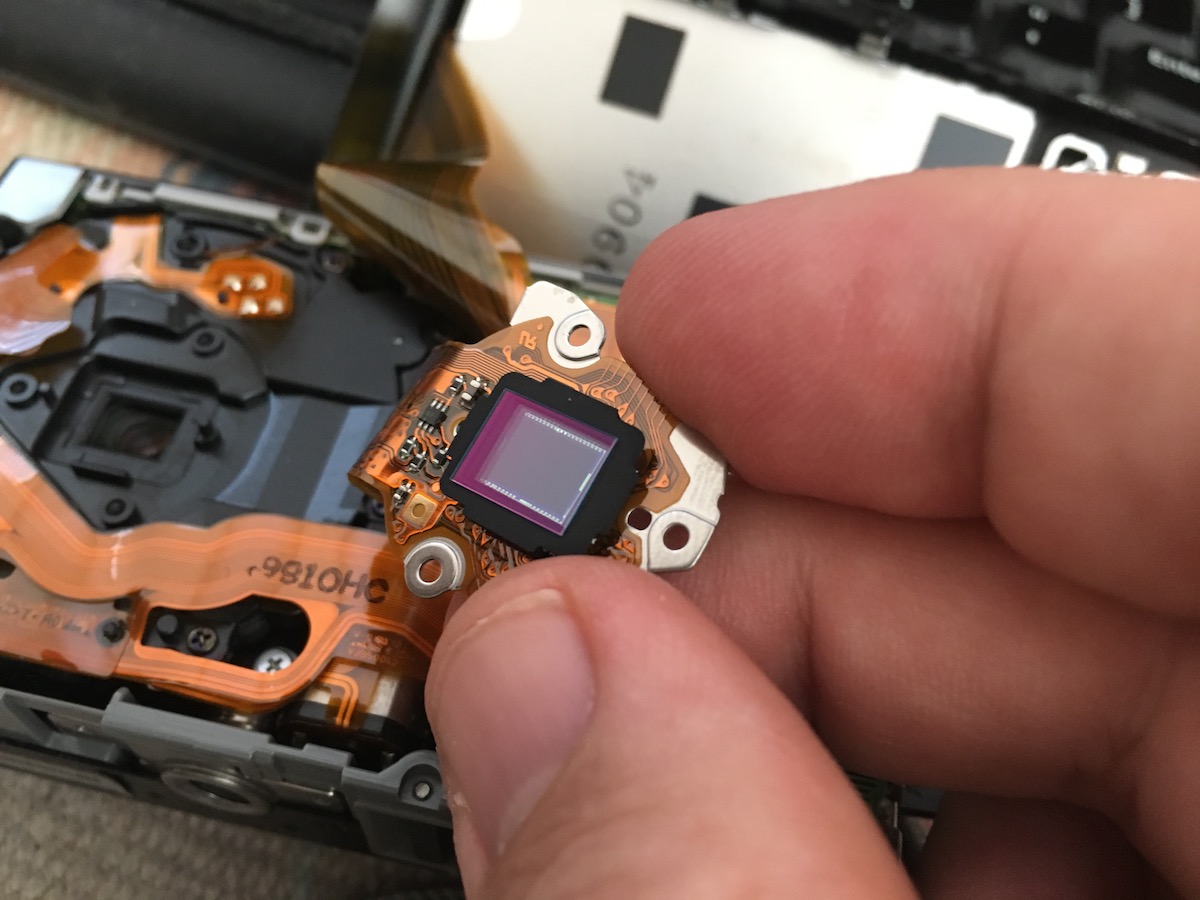
This is what the insides look like. To remove the image sensor, carefully remove these screws.
The rearmost focusing element of the lens - that is the back-end of the lens - is visible, since it is covered by the image sensor. Between the lens and the image sensor is the IR/UV blocking filter. Technically the name for this is IR/UV Cut Filter.
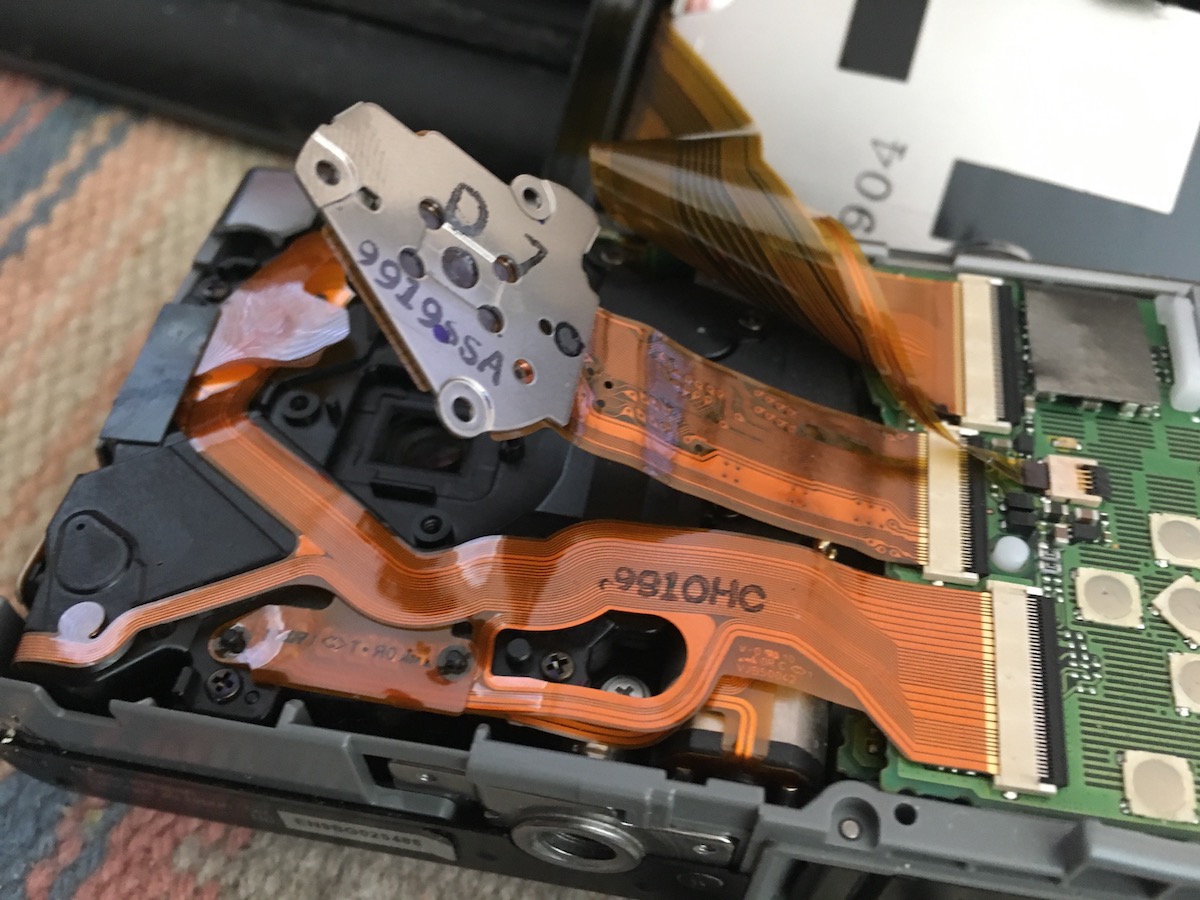
The filter is held in place using a small rubber boot.
In this case the the rubber boot stuck to the image sensor, so it was a matter of prying it loose from the sensor and setting the filter aside.
Our task now is to reassemble the camera.
Replace the rubber boot so it sits around where the lens is. Then re-seat the image sensor in place. All this will be easy because the image sensor cable will put it in the right place, then you just line up the holes.
Screw in the screws you removed earlier. At first don't tighten the screws all the way, but only part way. Then go back through and tighten the screws one at a time. The idea is to have the screws holding the image sensor evenly at all corners so the sensor is flat in relation to the lens.
After that you place the back on the camera.
Theory of DIY IR Conversion of Digital Cameras
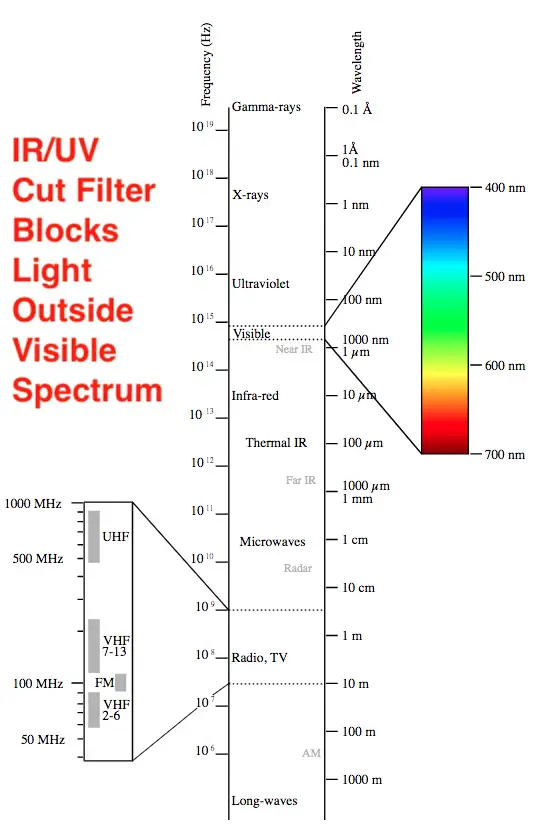
The visible light spectrum we see is a tiny sliver of the light effects in the world. The IR/UV cut filter we removed blocks light from outside the visible light spectrum.
By removing this filter the camera can now see a wider range of light.
Resulting pictures from full-spectrum conversion of Lumix DMC-ZS3
At this stage the camera is not a full-on infrared camera. Instead it is what's called a full spectrum conversion, meaning that this camera now images a broader spectrum of light. To finish the conversion requires adding a filter that blocks everything but infrared light.
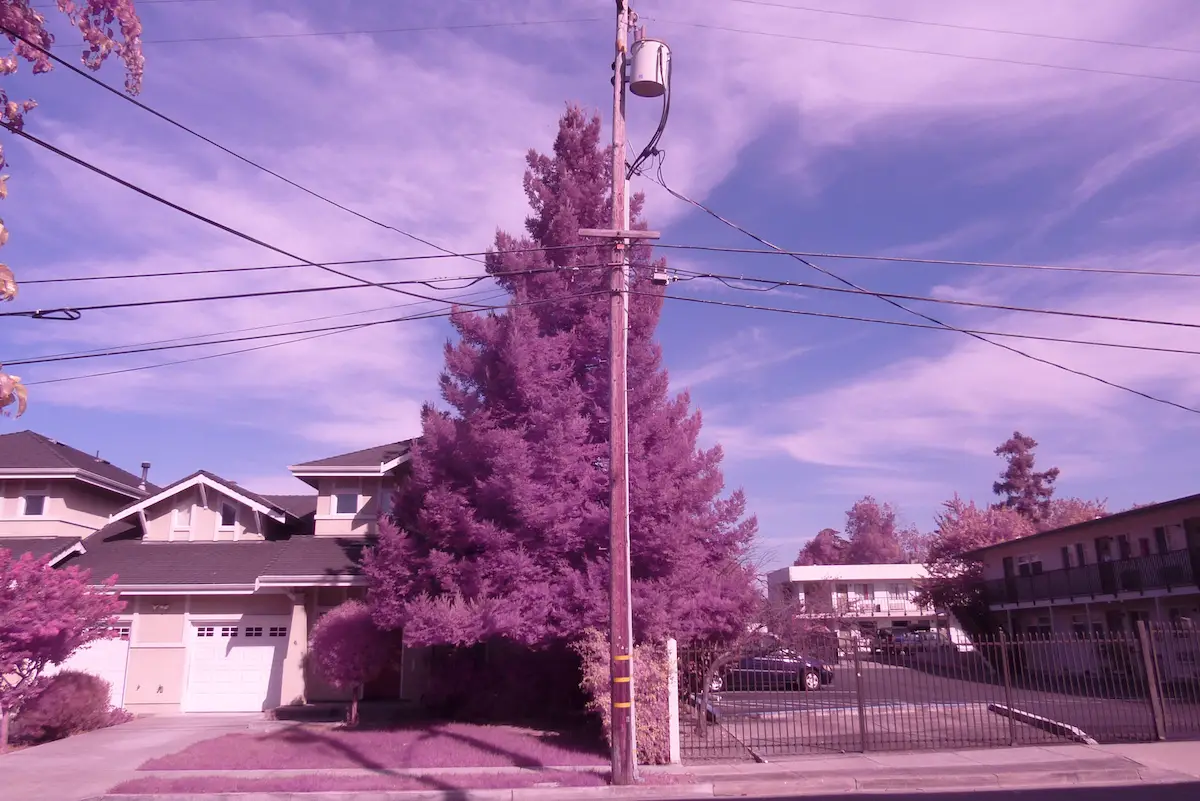
With that in mind here's a couple pictures I took with the camera immediately after removing the filter.
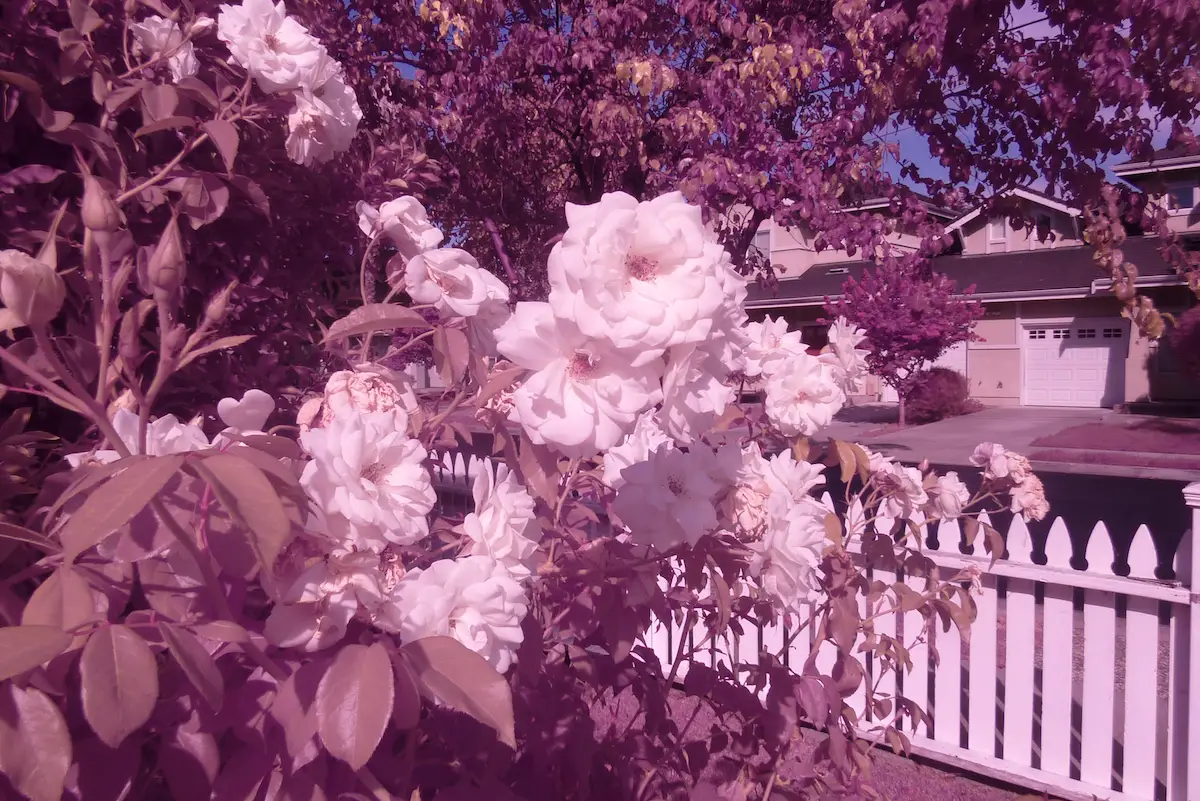

This is straight out of the camera with no processing other than resizing. Cool? Nifty? Keeno?
Adding a filter mount to the Lumix DMC-ZS3
What we did so far was a full spectrum conversion for the camera. As we saw in the previous pictures, full spectrum pictures look a little odd, because they're mostly visible light with some extra light that changes the color characteristics of plants.
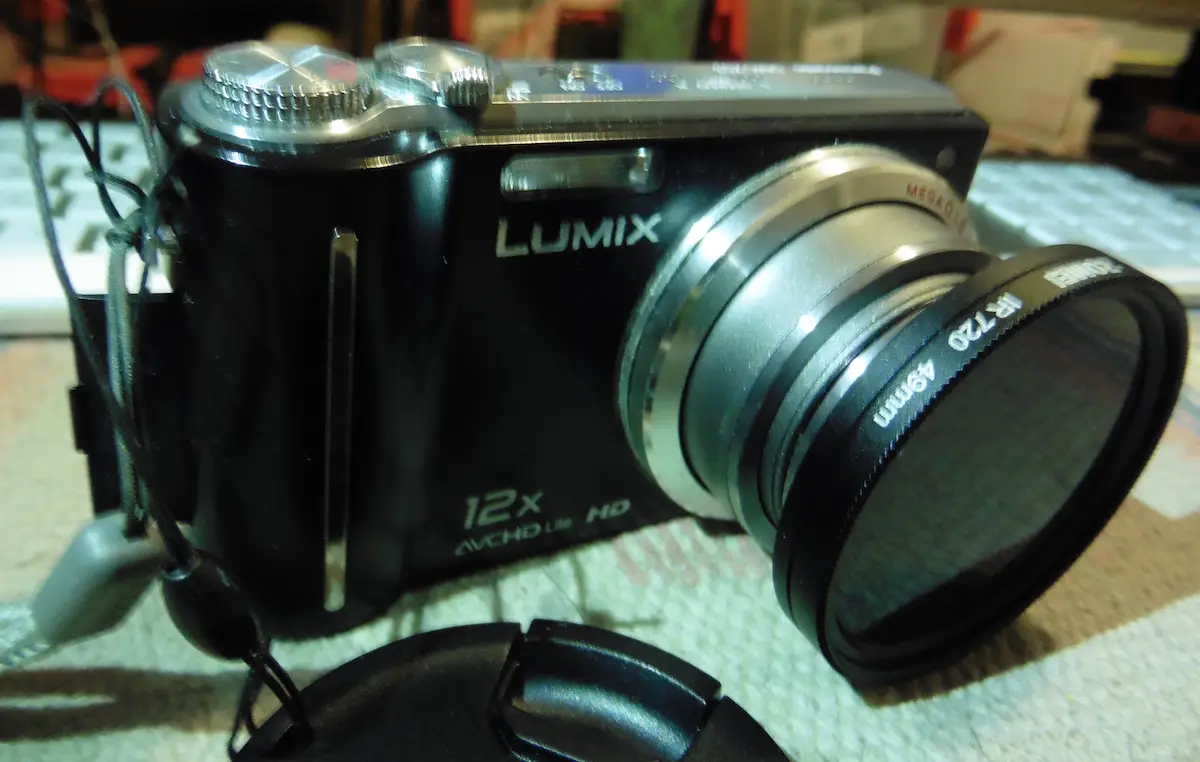
For the greatest flexibility we want to leave it as a full spectrum camera, and to attach filters to modify the pictures it takes. For example a 720nm Infrared filter blocks all light below 720nm. These filters look opaque because they do not allow visible light through the filter, but they do allow infrared light.
Unfortunately camera makers do not put normal filter mounts on the front of compact cameras. Let's talk about how to add a filter mount to a camera.
Among the videos attached at the bottom is one making these suggestion that one modify an Infrared filter, then glue that to the front of the lens. Namely, a 37mm filter is the right size to fit on the front of a Lumix ZS3 camera lens. If you file off the screw threads on the filter, making its backside flat, you can then use a strong double-epoxy glue to glue the filter to the lens. But that is not a removable filter, and you would instead have a full time infrared camera.
A similar possibility is to take a step up ring, modify it, and glue that to the front of the lens. Step up rings have the rear screw threads of a regular filter, and attach to a normal filter mount, on the front they have screw threads of a wider diameter filter mount. The purpose of a step up ring is to take a lens with one filter diameter, say 52mm, and to use larger filters on it, say 72mm.
The idea then is to use a step-up ring that goes from 37mm to a wider diameter, say 49mm. You then file off the rear screw threads from the step-up ring giving a flat back-side. And you then use a strong double-epoxy glue to attach the step-up ring to the camera. That results in adding a filter mount to the camera.
A product I found is:

The problem was that the filter mount quickly fell off.
What I found, however, is to use a strong double-epoxy glue, specifically
The result is this:
Full-time infrared camera conversions
Another option is to replace the internal filter with an internal IR filter. That would convert the camera to be a full-time infrared camera. The conversion above, making it a full spectrum camera, is the most flexible. The idea is that you can attach any filter you like, to have a wide range of effects just by switching filters.
The professional IR conversion shops do install an IR filter inside the camera, for example. But, they do so with glass IR filter of the correct size to fit inside the camera. I do not have the skill to readily cut a glass IR filter to size without destroying it.
I did find
Lee Filters 87C 4x4" Infrared Polyester Filter which is plastic (polyester) filter that you can easily cut to the desired shape.
In
Infrared Digital Camera - the Real Way we are instructed to use 6 layers of the Congo Blue filter inside the camera. You simply cut the gel to fit, and insert it in place of the filter that was removed.
In
Infragram Project: How to make a DIY Infrared Camera for only $10 he shows taping a "superblue" plastic filter to the front of the lens.
Obviously the issue of an IR filter is hugely simplified if your donor camera has screw threads on the front of the lens. You then don't have to ponder various hackeries to get an IR filter on the camera.
Converting a Compact Digital Camera to Shoot Infrared Only - 1. removing the infrared filter
Compact Digital Camera Conversion to Infrared - part 2 the infrared pass filter


