David Herron
Tags: Raspberry Pi »»»»
The Raspberry Pi is an inexpensive Linux computer that, by default, boots from a micro-SD card. While this is great for experiments, those using it in a production mode need reliability. The best choice is booting from a regular USB drive instead.
Did you know you can boot your Raspberry Pi 4 from a USB drive? It's easy, and doing so gives better performance and reliability than any SD card.
While a micro-SD card is cheap and easy to use, they're not exactly reliable, and they're very slow. It's fun to burn Raspberry Pi OS to an SD card to run an experimental system using a Raspberry Pi, but for some kind of production system that SD card is a liability.
In terms of performance, an SD card is likely to hit 25 MBps while an SSD over USB3 will easily hit 140 MBps. While that doesn't match the disk throughput of a regular SATA drive, running over USB is a huge improvement over an SD card.
For example, I recently watched a video about running OpenWRT on a Raspberry Pi to build a custom router. The idea was to use this while away from home to avoid security problems with public WiFi networks by instead tunneling through OpenWRT on your Raspberry Pi. An intriguing idea, but for a flaw. That video, as is true for almost every other tutorial video I've watched for Raspberry Pi, said to burn OpenWRT onto an SD card.
Maybe I'm missing something, but a practical device like a portable router should also be a reliable device. It would be very inconvenient for your portable router to die because the SD card wore out when you're 10,000 miles from home.
Regular disks - whether an SSD or HDD - are far more reliable than any micro-SD card, and they're a lot faster as well.
Fortunately it is relatively easy to configure a Raspberry Pi 4 to boot from USB. The following instructions are for the Raspberry Pi 4B, and the Raspberry Pi 400. The Compute Module 4 probably requires slightly different steps.
Current versions of the Raspberry Pi 4B, 400, and Compute Module 4, store the bootloader in an EEPROM on the logic board. On older Raspberry Pi's the bootloader was a file, bootcode.bin, in the /boot partition of the SD card.
Depending on the age of your Raspberry Pi 4, the following features may already be enabled.
Other articles in this series:
- Using multiple USB disks on a Raspberry Pi OS on RPI 4
- Installing OpenWRT on Raspberry Pi 4 using USB boot device
- A portable WiFI router/NAS/Docker using RaspAP on Raspberry Pi 4 with USB/SSD boot device
- Manually build a portable WiFI router/NAS/Docker on Raspberry Pi 4
- Power input and output limits on the Raspberry Pi 4B and 400
Power considerations
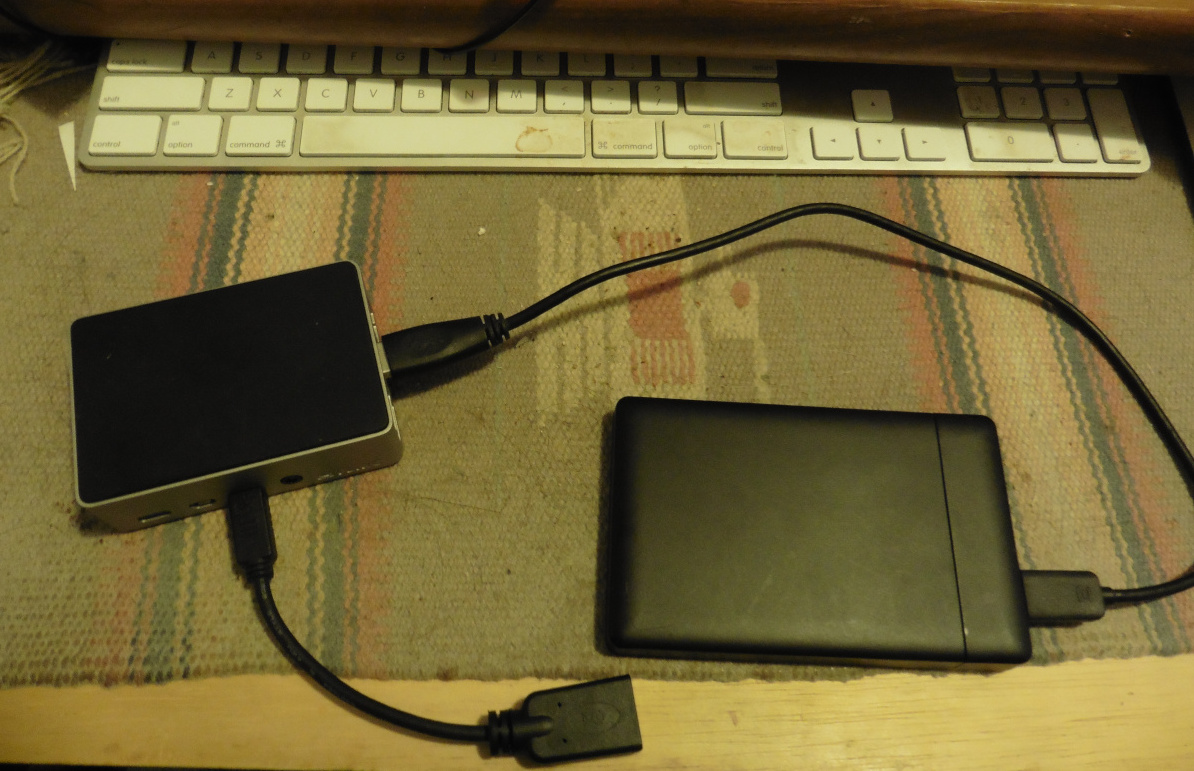
A USB enclosure containing a 2.5 inch laptop drive can be powered directly from the USB bus. But, you have to pay attention to power requirements. It's easy to go past the Raspberry Pi's capability to deliver power.
An SSD drive requires less energy than an HDD drive. Running multiple drives obviously requires more energy.
A USB3 powered hub will supply power without taxing the Raspberry Pi.
All 3.5 inch drives must be externally powered, because these drives require far more energy than the Pi supplies, and they also require a 12 volt supply. It is easy to get a USB enclosure for 3.5 inch drives, and use the power supply it comes with.
Updating Raspberry Pi OS on your SD card
The goal to enable USB booting on your Raspberry Pi 4. We do not know if your machine is already setup correctly, or whether some updates are required. Therefore, we'll initially boot from an SD card to run some command-line tools.
We'll be using command-line tools, discussed later, to edit the boot configuration, and update the bootloader. In my initial testing, I had an old SD card lying around with an old version of Raspberry Pi OS. The command-line tools mentioned later were older versions lacking critical features, and on the latest OS these tools had the necessary features.
One route is to do the following
$ sudo apt-get update
$ sudo apt-get upgrade
In my case the OS was so old this gave an error message. There wasn't anything critical on the SD card, so I could replace it with the latest OS.
Simply use Raspberry Pi Imager to install a new Raspberry Pi OS on your SD card. Be aware that will delete anything on the card, so save away anything important first.
Ensuring the boot EEPROM is up-to-date
The current Raspberry Pi bootloader has the ability to boot from USB and many other sources. In the past the recommendation was to use Raspberry Pi Imager to burn a Bootloader SD card that has USB Boot support. Nowadays there is a command in Raspberry Pi OS for this purpose.
Namely, rpi-eeprom-update updates the EEPROM.
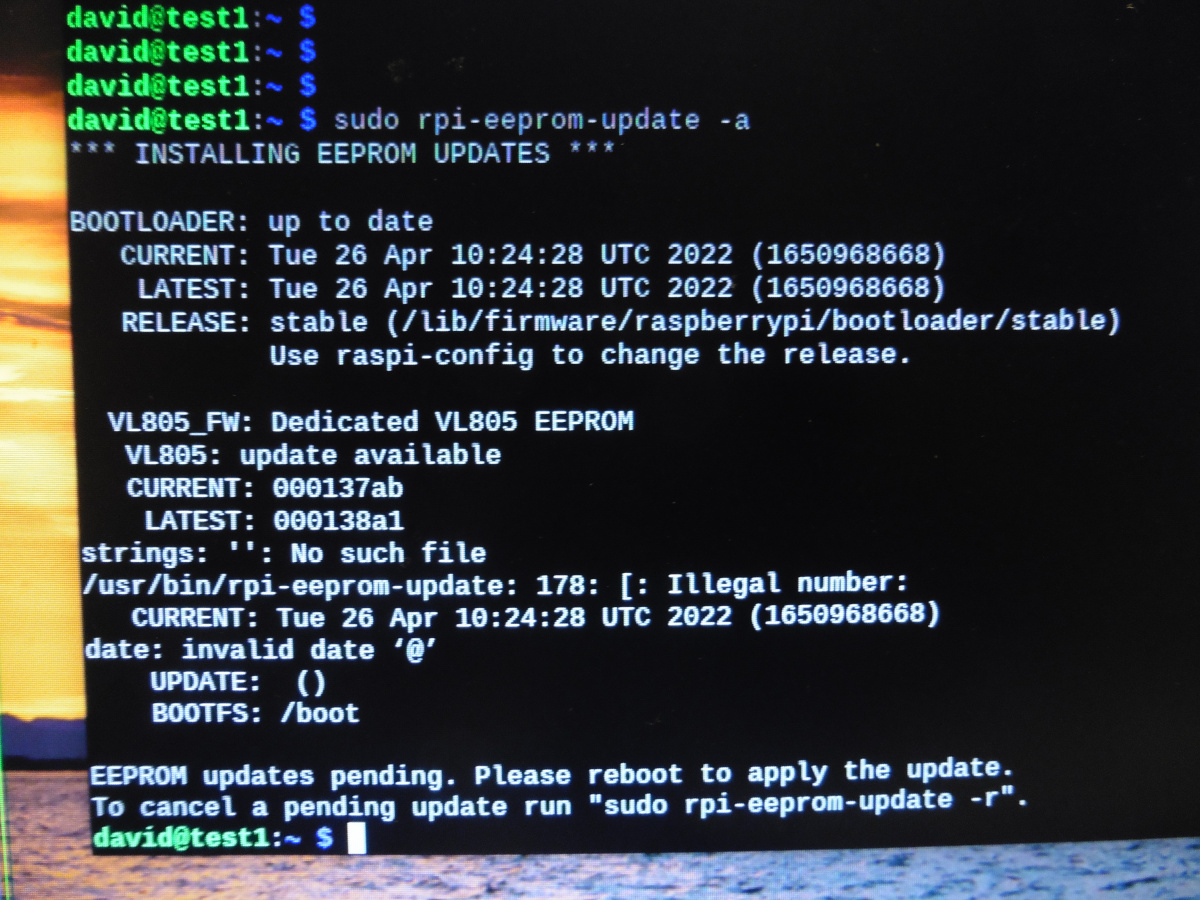
Running sudo rpi-eeprom-update -a means to automatically update the EEPROM. You'll notice there was a version change from 000137ab to 000138a1. I have no idea what that changes, but it's the latest version.
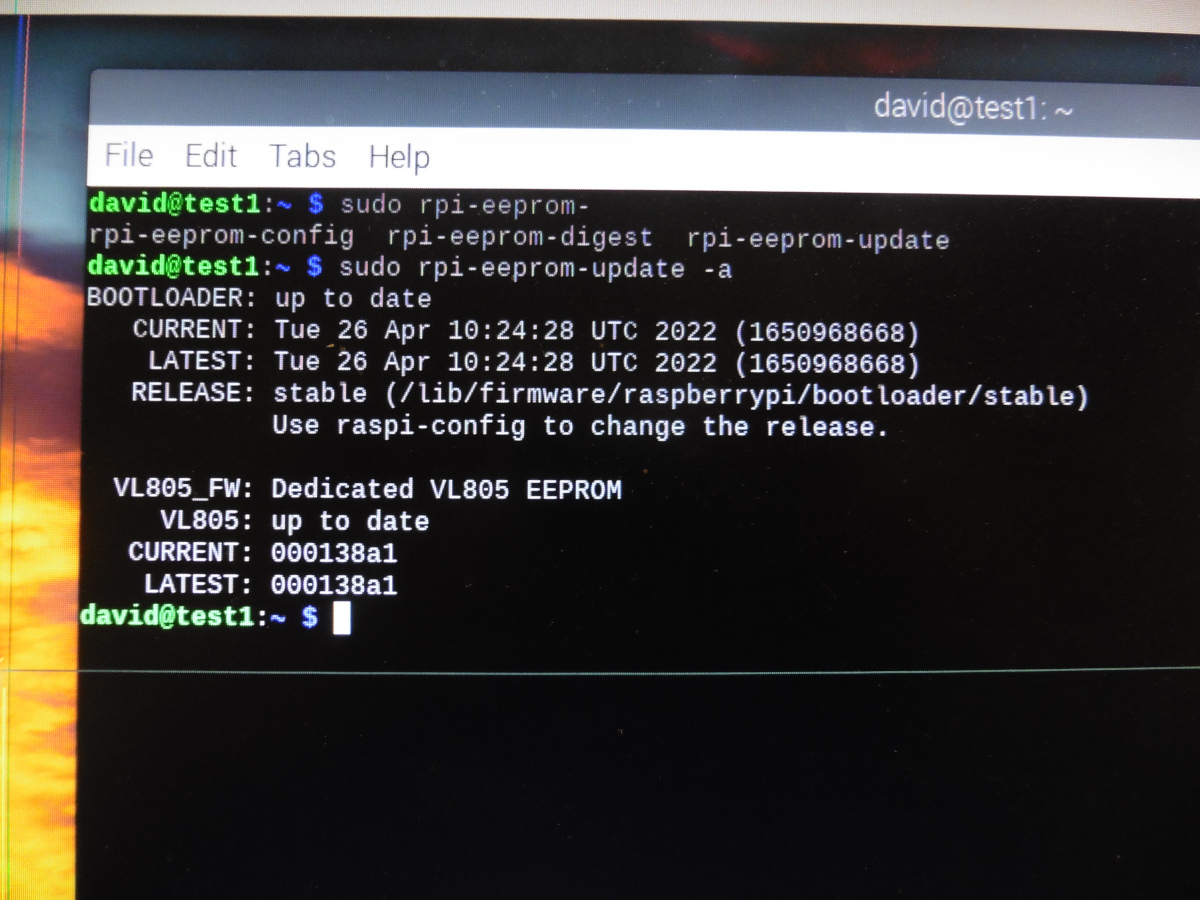
After rebooting, you see the EEPROM is fully up-to-date.
Configuring BOOT_ORDER in Raspberry Pi 4B EEPROM
The next step I did was to run rpi-eeprom-config to update the configuration of the boot EEPROM. The
Raspberry Pi documentation has a section on this if you want to read further.
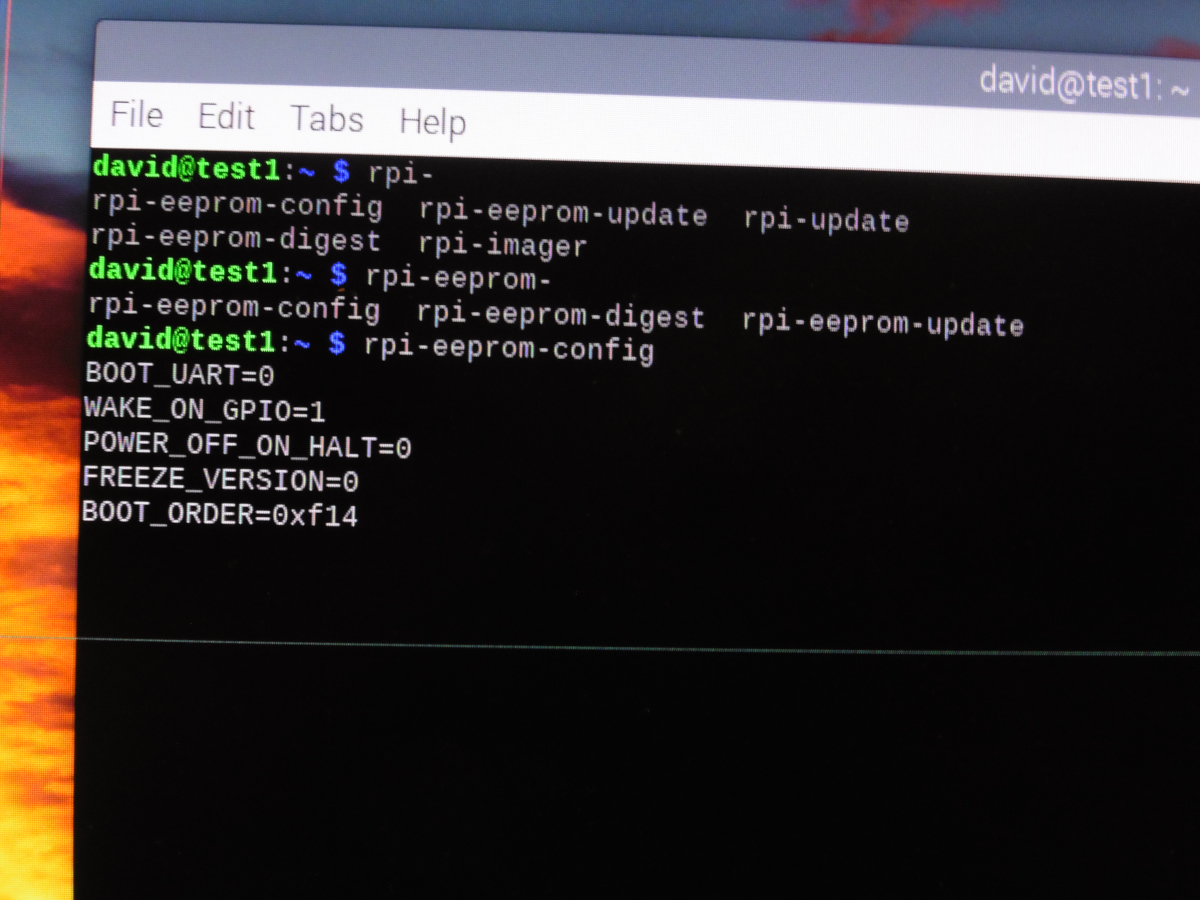
The command shown here prints the current configuration. There are a lot of interesting options which can be set.
To edit the configuration run this command:
$ sudo -E rpi-eeprom-config --edit
This will launch the editor in the EDITOR environment variable, letting you edit a text file which looks like the output shown above.
The part we're interested in is BOOT_ORDER. This option determines which device types the Raspberry Pi should attempt to boot from, and the order. The value is a hexidecimal number up to 8 digits. This is obviously a 32 bit number, because each hex digit is 4 bits, making 8 digits mean 32 bits total. In any case, the boot order is scanned from the right-most digit to the left-most digit. The boot order shown here, 0xf14, means
0x4Try USB mass storage boot0x1SD Card0xfReset, meaning it loops back to the first digit
As implied, this will try USB boot, then SD boot, repeatedly, until one or the other succeeds.
Booting Raspberry Pi 4B from SD after enabling USB Boot
Normally when booting a Raspberry Pi you have an SD card, and it just boots off that with no extra messages. After performing the above steps, the machine is configured to first try USB mass storage boot. If no USB device is present, you'll see this message on the screen:
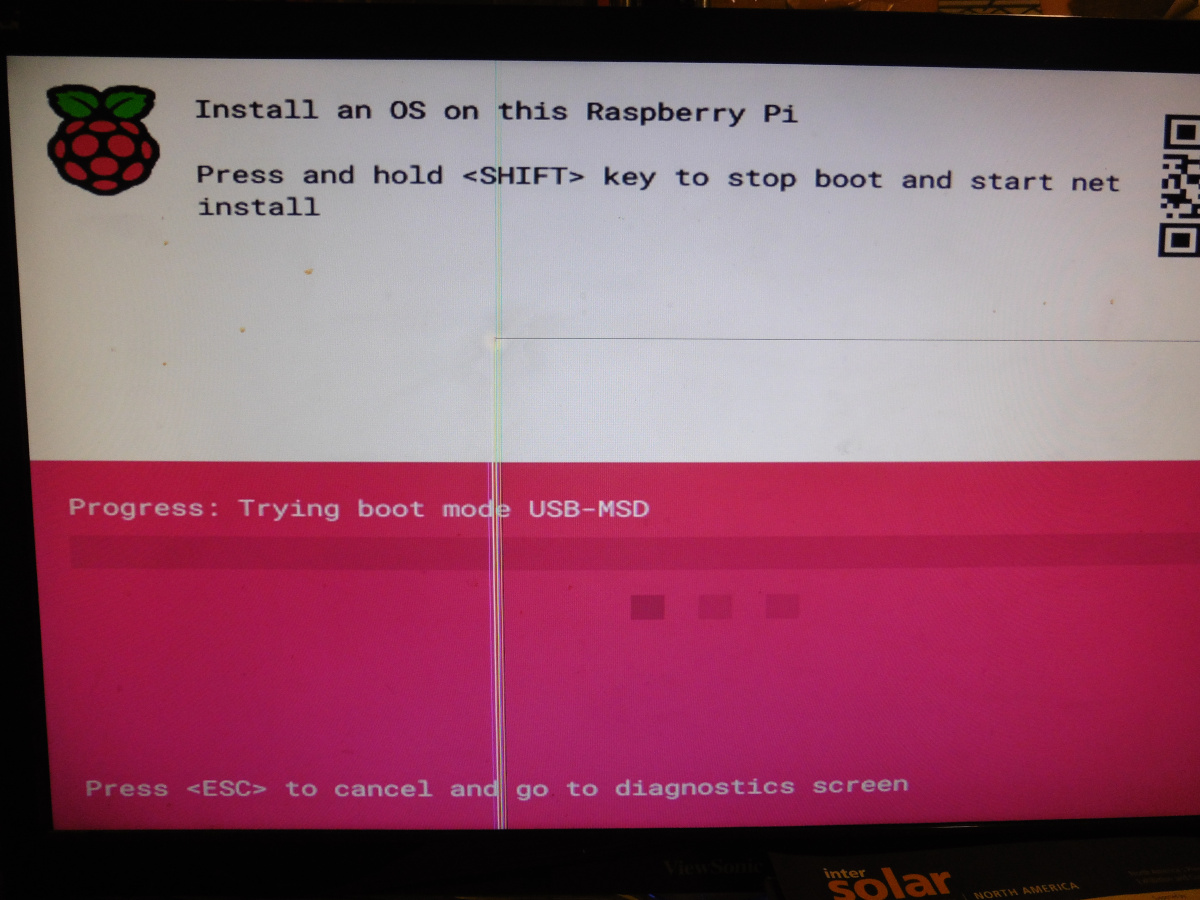
After a few moments it will then try the SD card.
Using Raspberry Pi Imager to burn Raspbian to a USB drive
Normally Raspberry Pi Imager is used for burning an operating system to an SD card. But, we can use it to burn images to any device, including an USB device.
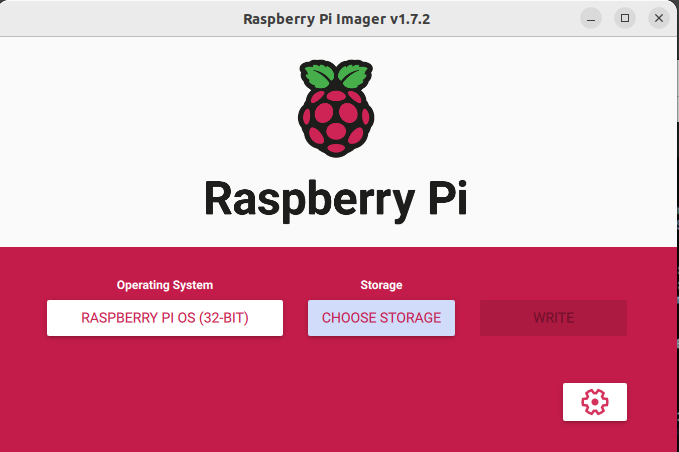
Run the Raspberry Pi Imager program as normal. First, select your preferred version of Raspberry Pi OS.
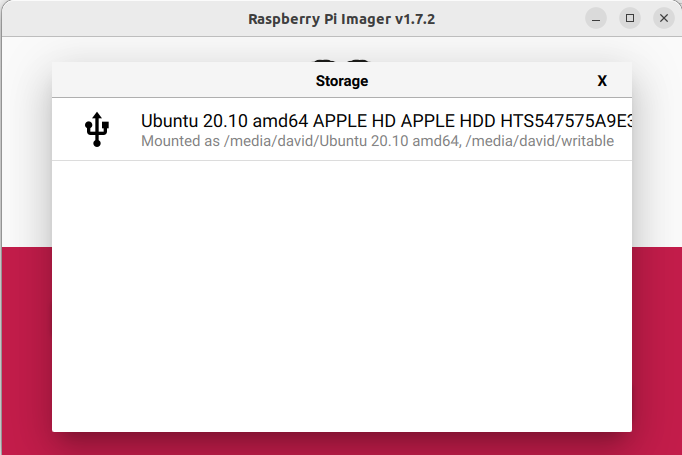
Clicking the Choose Storage button brings up this window showing the available choices. In this case I'd attached to my computer a 750GB HDD laptop drive that's in an external drive enclosure. Whatever drive you have, it will show up in this drive selector.
A useful step is to click on the gear icon shown in the window. This lets you preconfigure the Raspberry Pi OS image with some useful settings. In my case, I configured WiFi settings, enabled the ethernet, changed the default user name to something other than pi, and so forth.
Booting Raspberry Pi 4B from USB after enabling USB Boot
Now that you've verified the Raspberry Pi will look for a USB device, you can remove the SD card and attach a USB drive.
Instead of the screen looking for a USB boot drive, you might see the following screen:
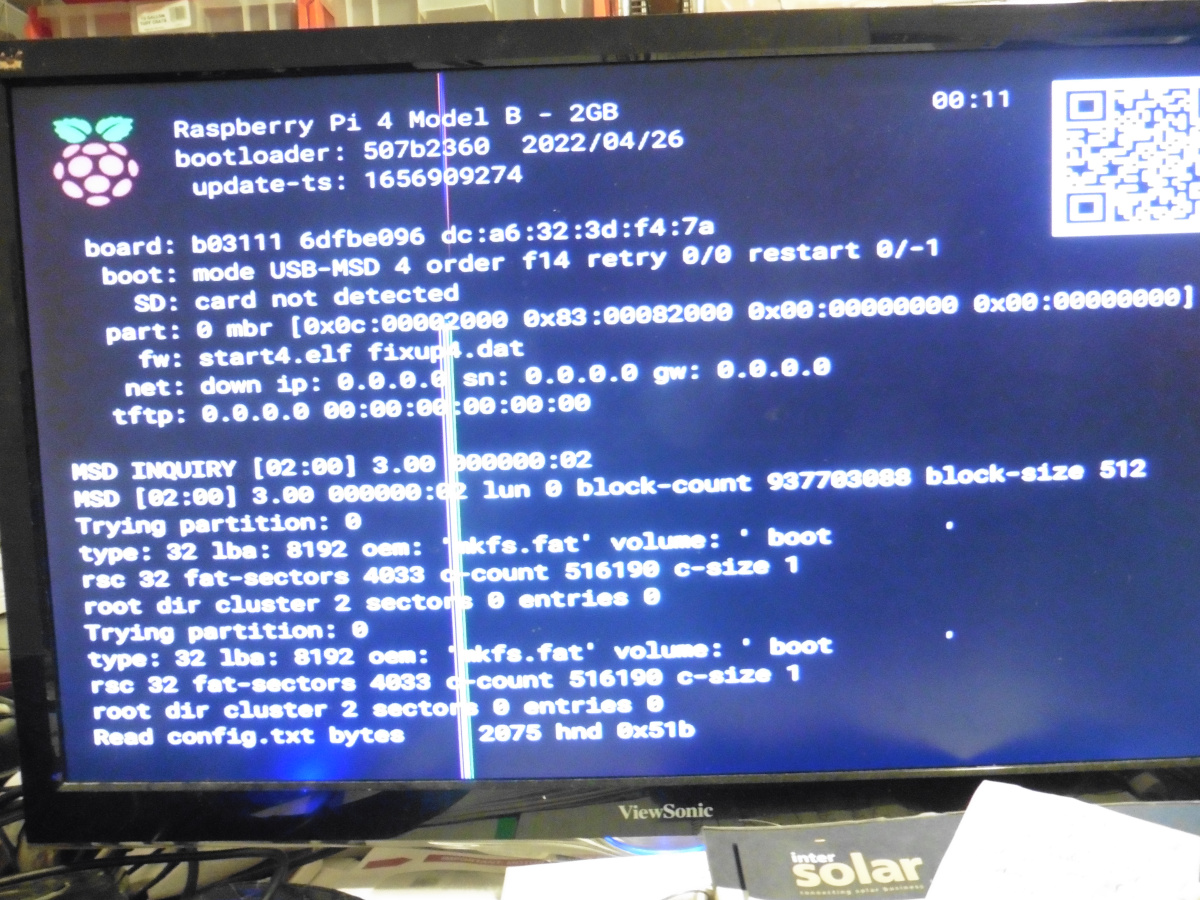
I do not see this screen on every boot.
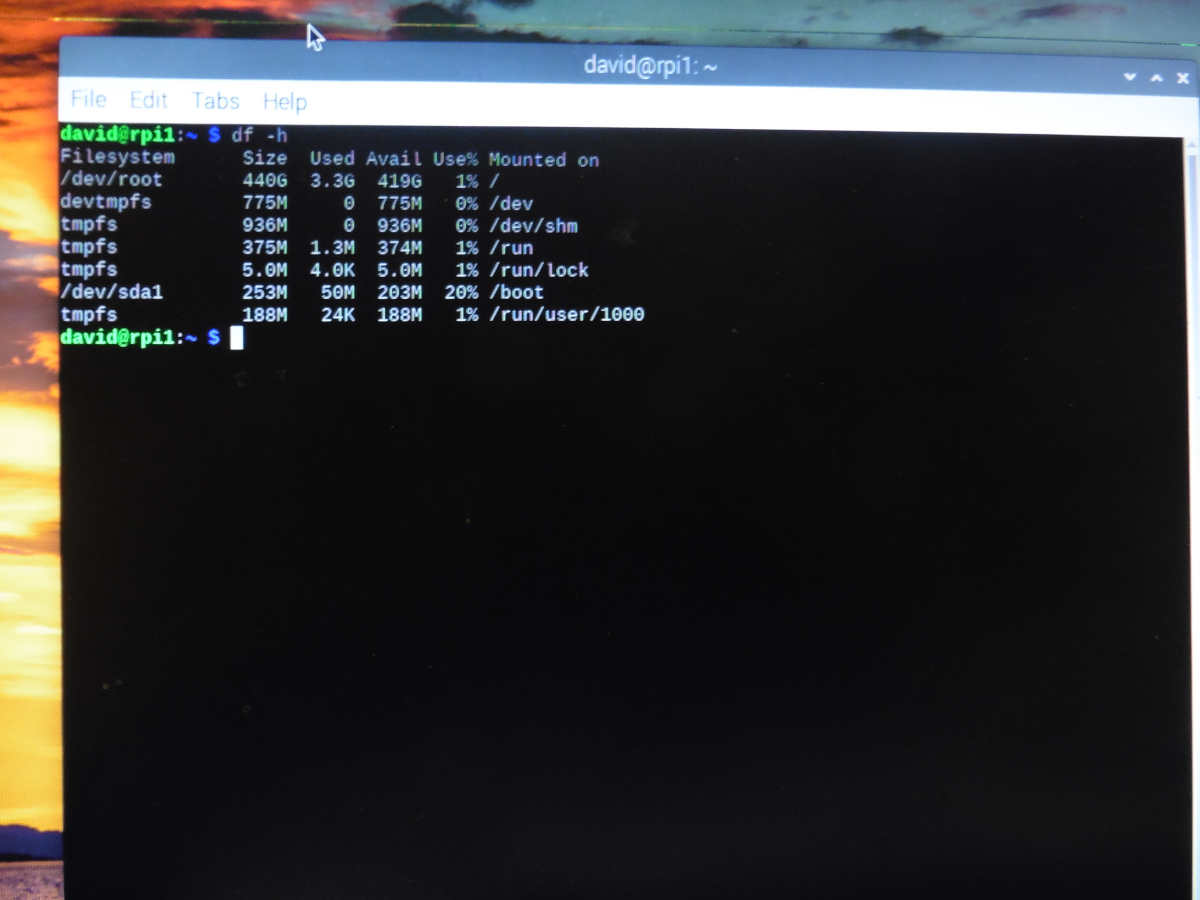
After rebooting, you can inspect the mounted discs and see that it is using the USB device. In my case it is using a 480GB SSD in an external 2.5" drive enclosure.
Summary
An important consideration is power supply. The Raspberry Pi 4B cannot supply much power. Bus-powered USB devices are powered by the USB bus, and therefore draw power from the Raspberry Pi. SSD drives consume less energy than HDD drives.
It may be necessary to use a powered USB3 hub, depending on the type of drive you're using, and how many drives. You can use this technique with 3.5" drives, but they will require an external power source. A powered USB3 hub provides on its own, ensuring the Raspberry Pi is not powering the devices.
Pay attention to which USB port you're using. The USB3 ports, the ones with the blue plastic, run much faster than the USB2 ports, the ones with the black plastic.
This is the final result, a Raspberry Pi that you can boot off a regular USB drive. It will run faster and more reliably than running the same Raspberry Pi off an SD card.
This technique is suitable for a variety of goals where long-term stability or performance is important. For instance, using a Raspberry Pi as a desktop computer replacement is a far better user experience with a regular disc like this.


 6Pcs Aluminum Chips VGA RAM Cooling Cooler Heatsink for IC MOSFET SCR,DIY for Raspberry Pi")


