David Herron
Tags: Apple »»»» MacBook Pro »»»»
A couple weeks ago I bought a 15" 2010 MacBook Pro from eBay, the laptop was described as "for parts or repair", it didn't have a disk or battery, and cost only $75 (plus shipping). I am working on refurbishing this computer. In this segment, I am replacing the keyboard. And while I'm at it, I fixed the placement of the trackpad.
This is part of a series of posts about refurbishing a 2010 "for parts or repair" MacBook Pro.
- Refurbishing a cheap 2010 "for parts or repair" MacBook Pro bought off eBay -- Master index
- Initial evaluation of the cheapest 2010 MacBook Pro found on eBay in May 2019
- Powering on the cheapest 2010 MacBook Pro found on eBay in 2019
- Replacing the keyboard on the cheapest 2010 MacBook Pro found on eBay in 2019 -- This post
- What does it cost to refurbish the cheapest 2010 MacBook Pro found on eBay in May 2019
In other parts it was determined the keyboard was bad. This meant the power button did not work, and even if I was able to boot the computer I could not type anything using the built-in keyboard.
While I have torn down several Unibody MacBook Pro's and replaced almost every part, I had not swapped the keyboard before. The process looked very daunting, and in any case I'd not had a reason yet to swap a keyboard.
It was recommended I watch this video about replacing a MacBook Pro 15" keyboard:
https://www.youtube.com/watch?v=xx7TmxmPqiE
That video sure helped with alluding my fears. And on iFixit I found a replacement keyboard for only $19.99, which is a very reasonable price.
Stripping down the MacBook Pro
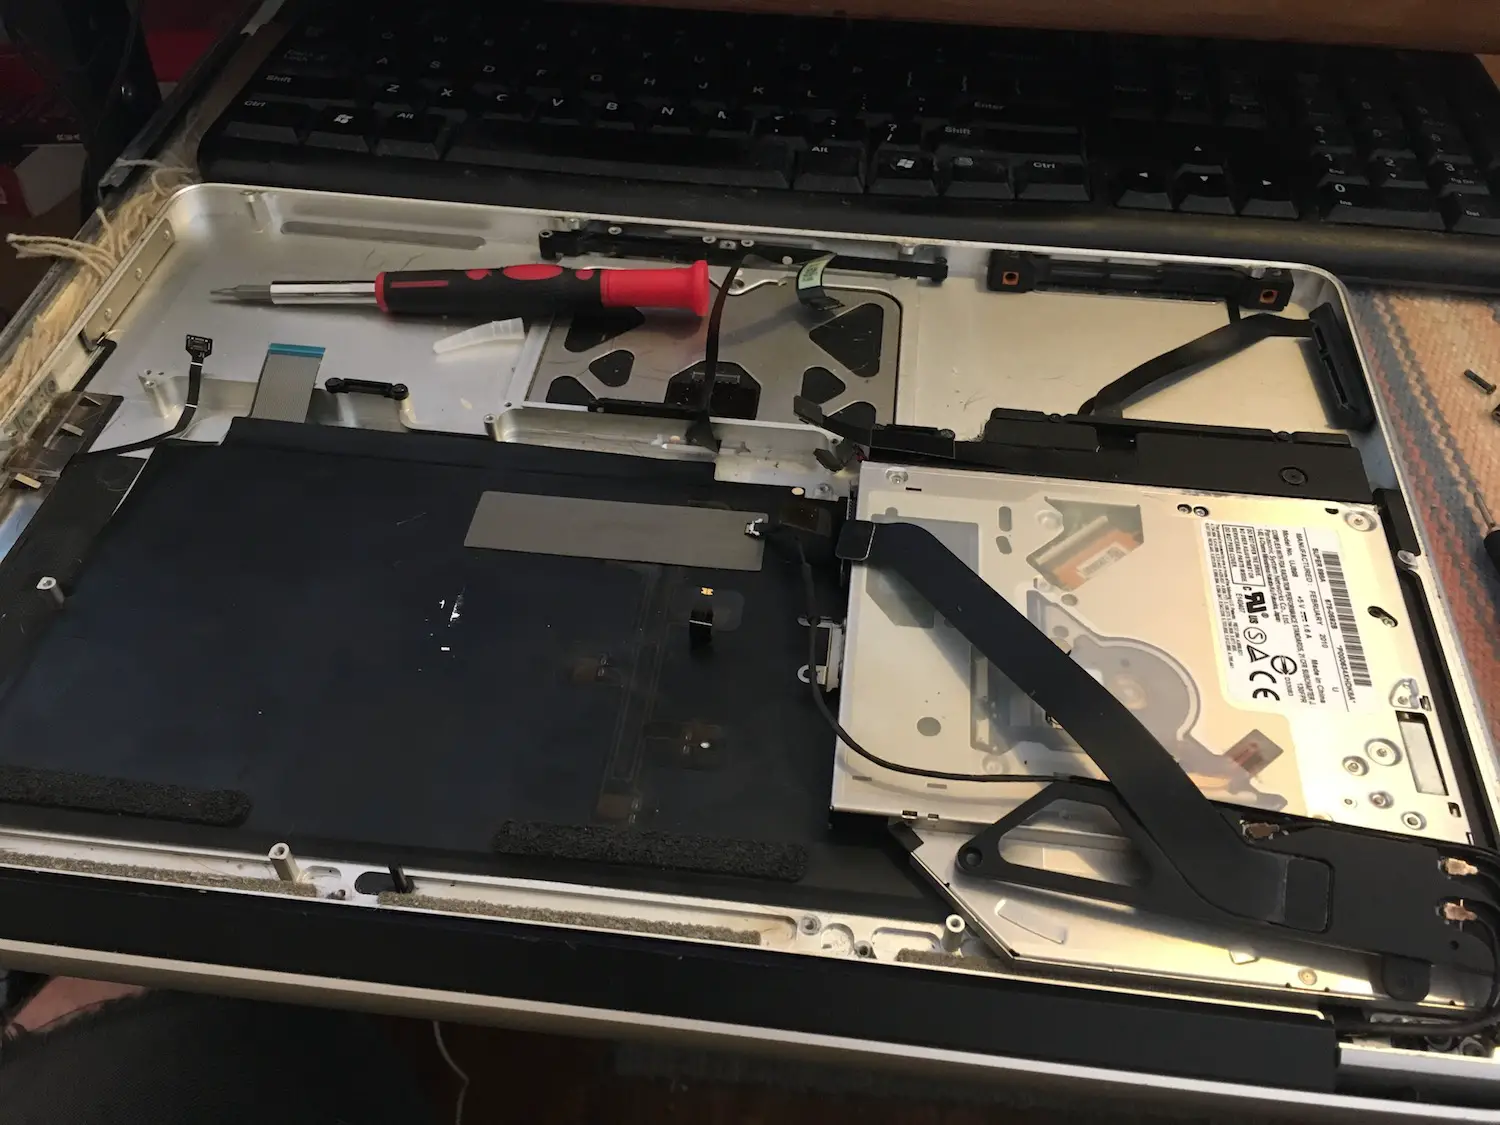
To get at the keyboard we have to strip off almost every part. In the Unibody MacBook Pro design, the keyboard is behind both the logic board and the optical drive. In this picture I've already removed the logic board, and am about to remove the optical drive. There is also a bar running from top to bottom that seems to serve primarily as the anchor point for both optical drive and logic board.
The black thing that looks like a sheet of plastic is the keyboard backlight. There is a teensy ribbon cable that powers the backlight, which connects to the logic board.
The backlight is three layers of different plastics, and a light emitting something-or-other. It is held in place using some glue, and it is fairly easy to remove. Simply start in one corner lifting up the plastic, then proceed all the way around. The ribbon cables for keyboard and mouse are both attached, so be careful about them.
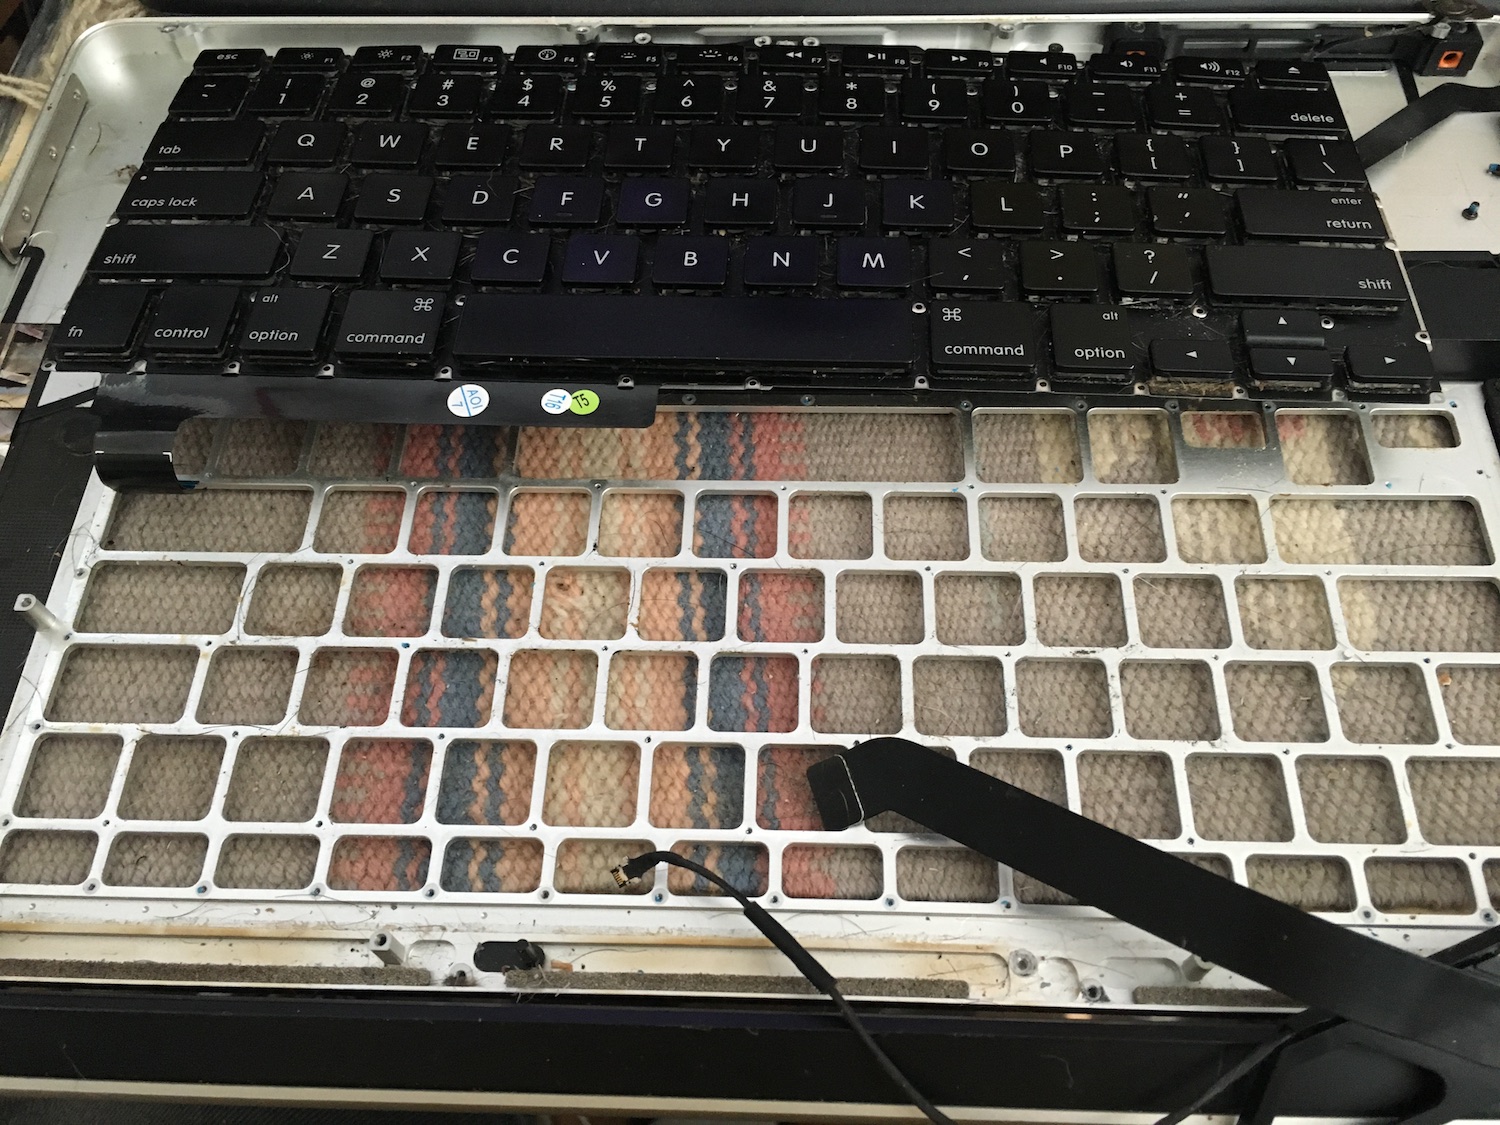
After removing the backlight you see this. Here's the daunting part of the process. There are over fifty TINY screws holding this down.
So.. what is this? It's the keyboard. The back of the keyboard, anyway.
Take a moment to look in awe at the beauty of this creation.
And then start cursing as you spend the next hour removing screws.
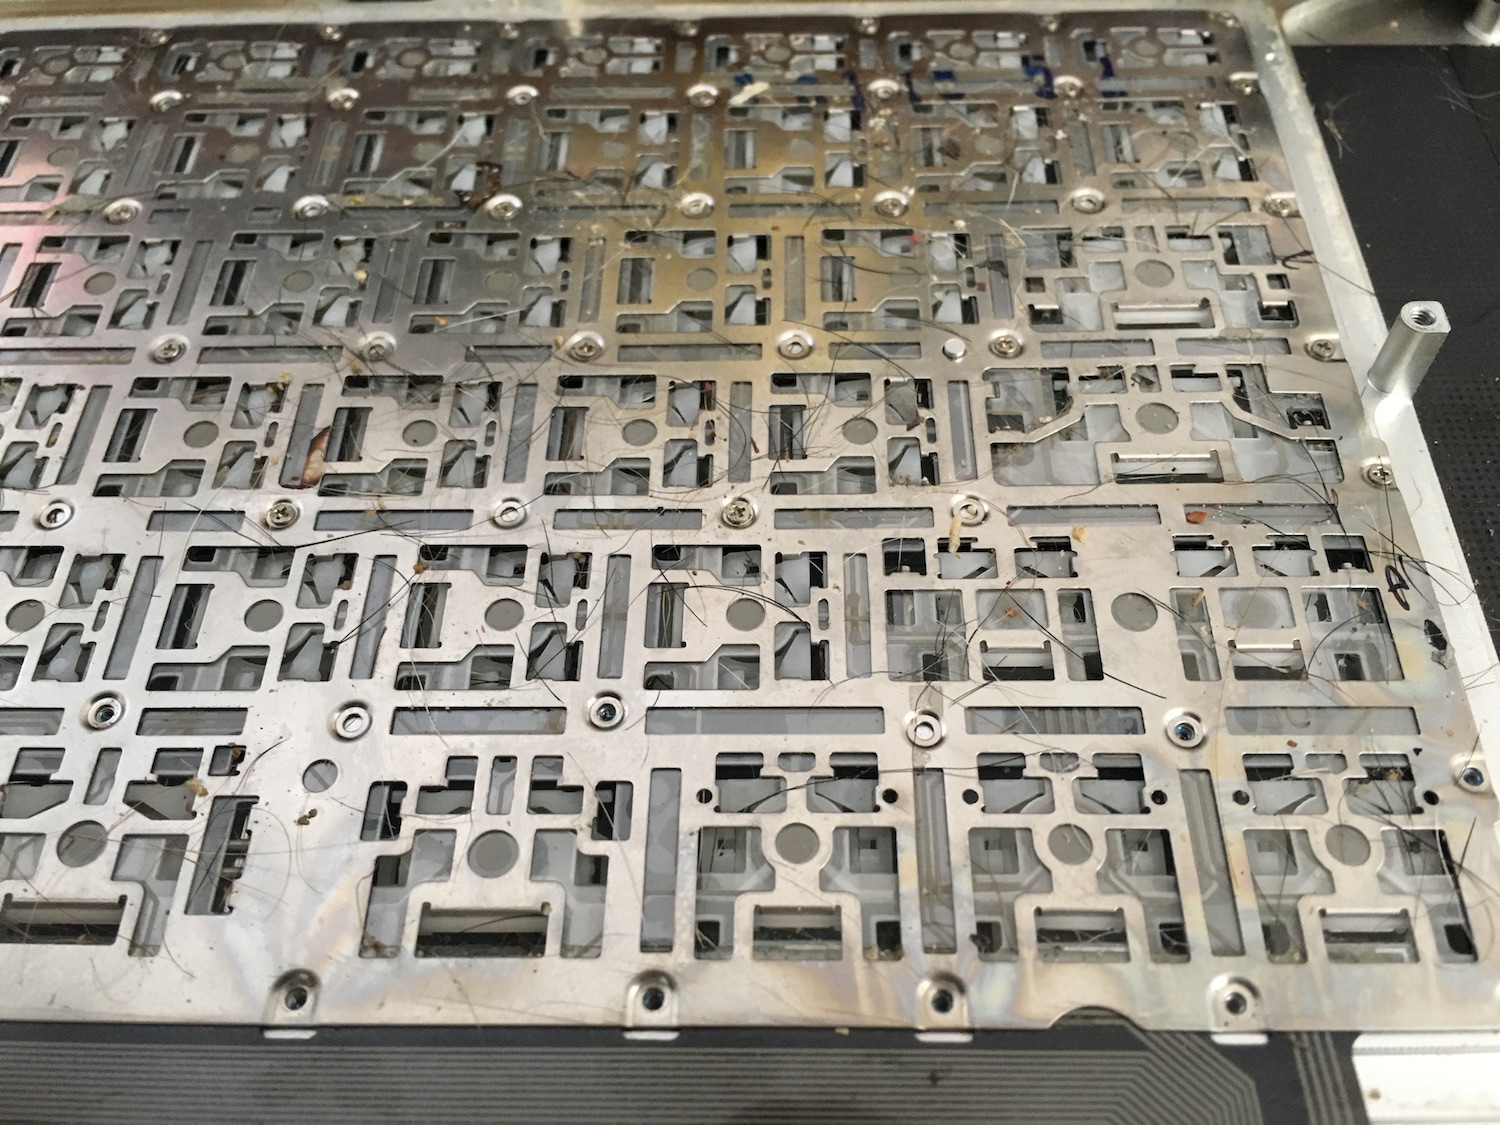
Here's a closeup of the keyboard. And ... of a bunch of hairs. Those loose hairs floating around your house? Some of them end up somehow buried inside your laptop. I'm not sure how that happens, but here's some proof.
The screws are more visible in this closeup.
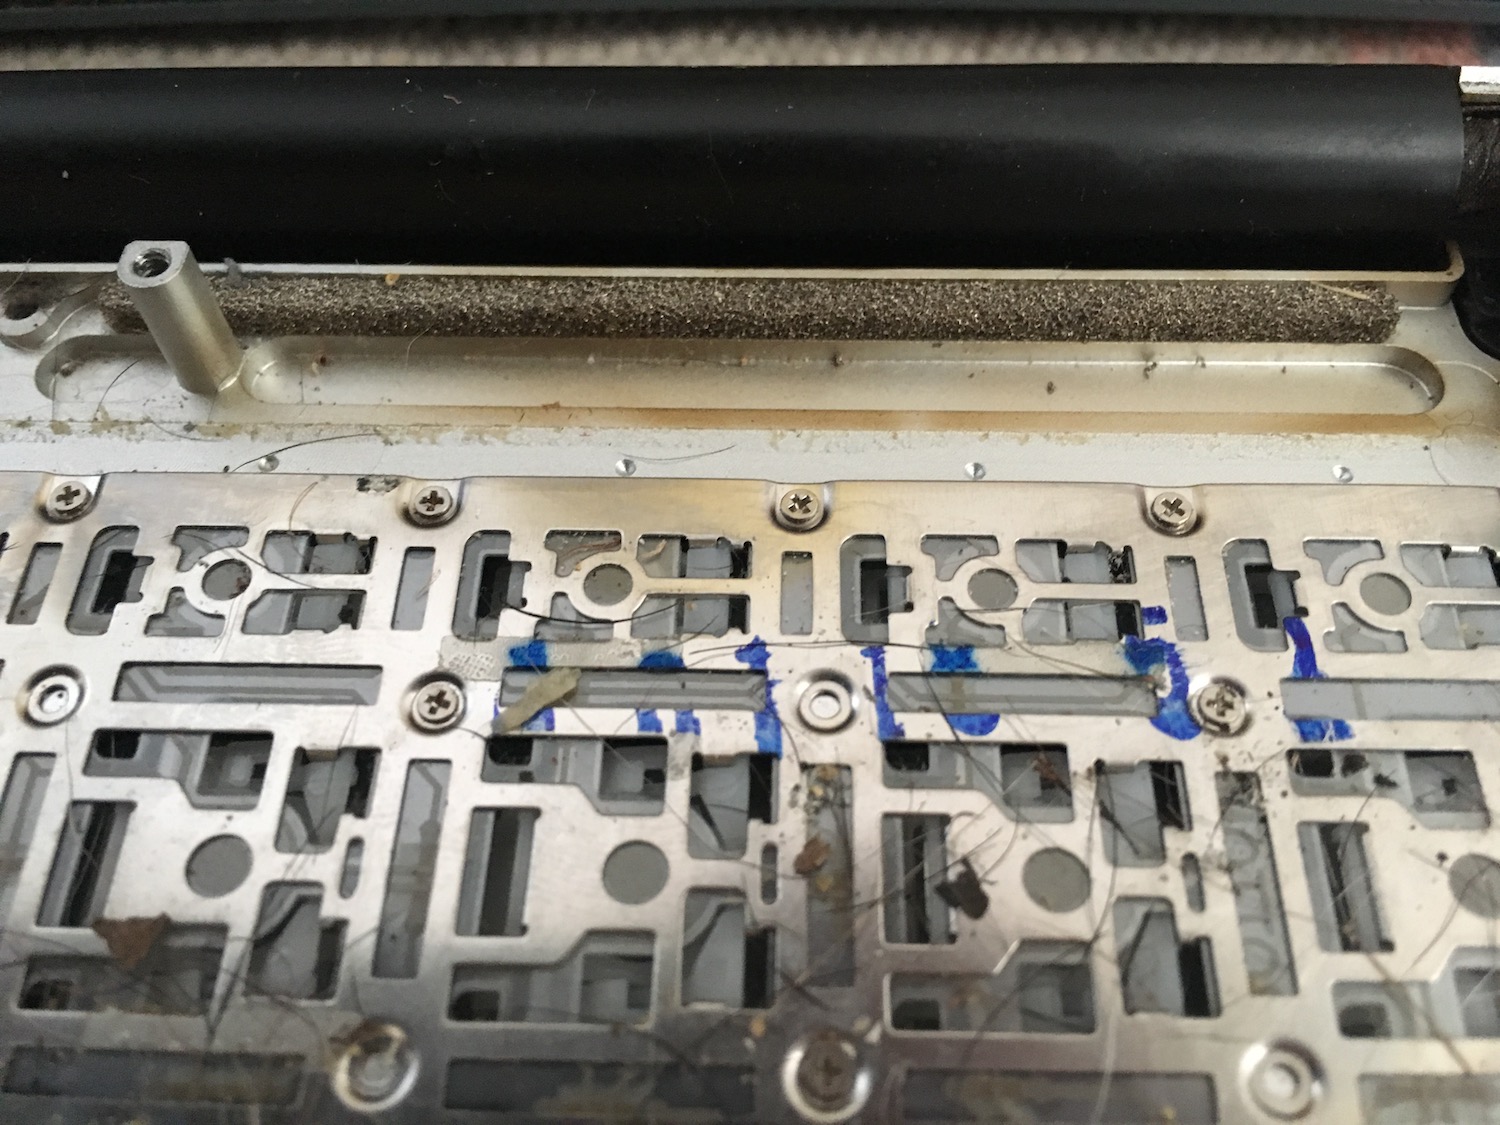
Here's another closeup, and this time I hope what's visible is the brownish sticky goop.
It is obvious this laptop suffered a liquid spill of a beverage like coca-cola.
Folks - PLEASE PAY ATTENTION - your laptop is NOT THIRSTY. It does not need to have beverages spilled into the keyboard.
Before proceeding, I took some towels and cleaner, and did my best to clean up the residue.
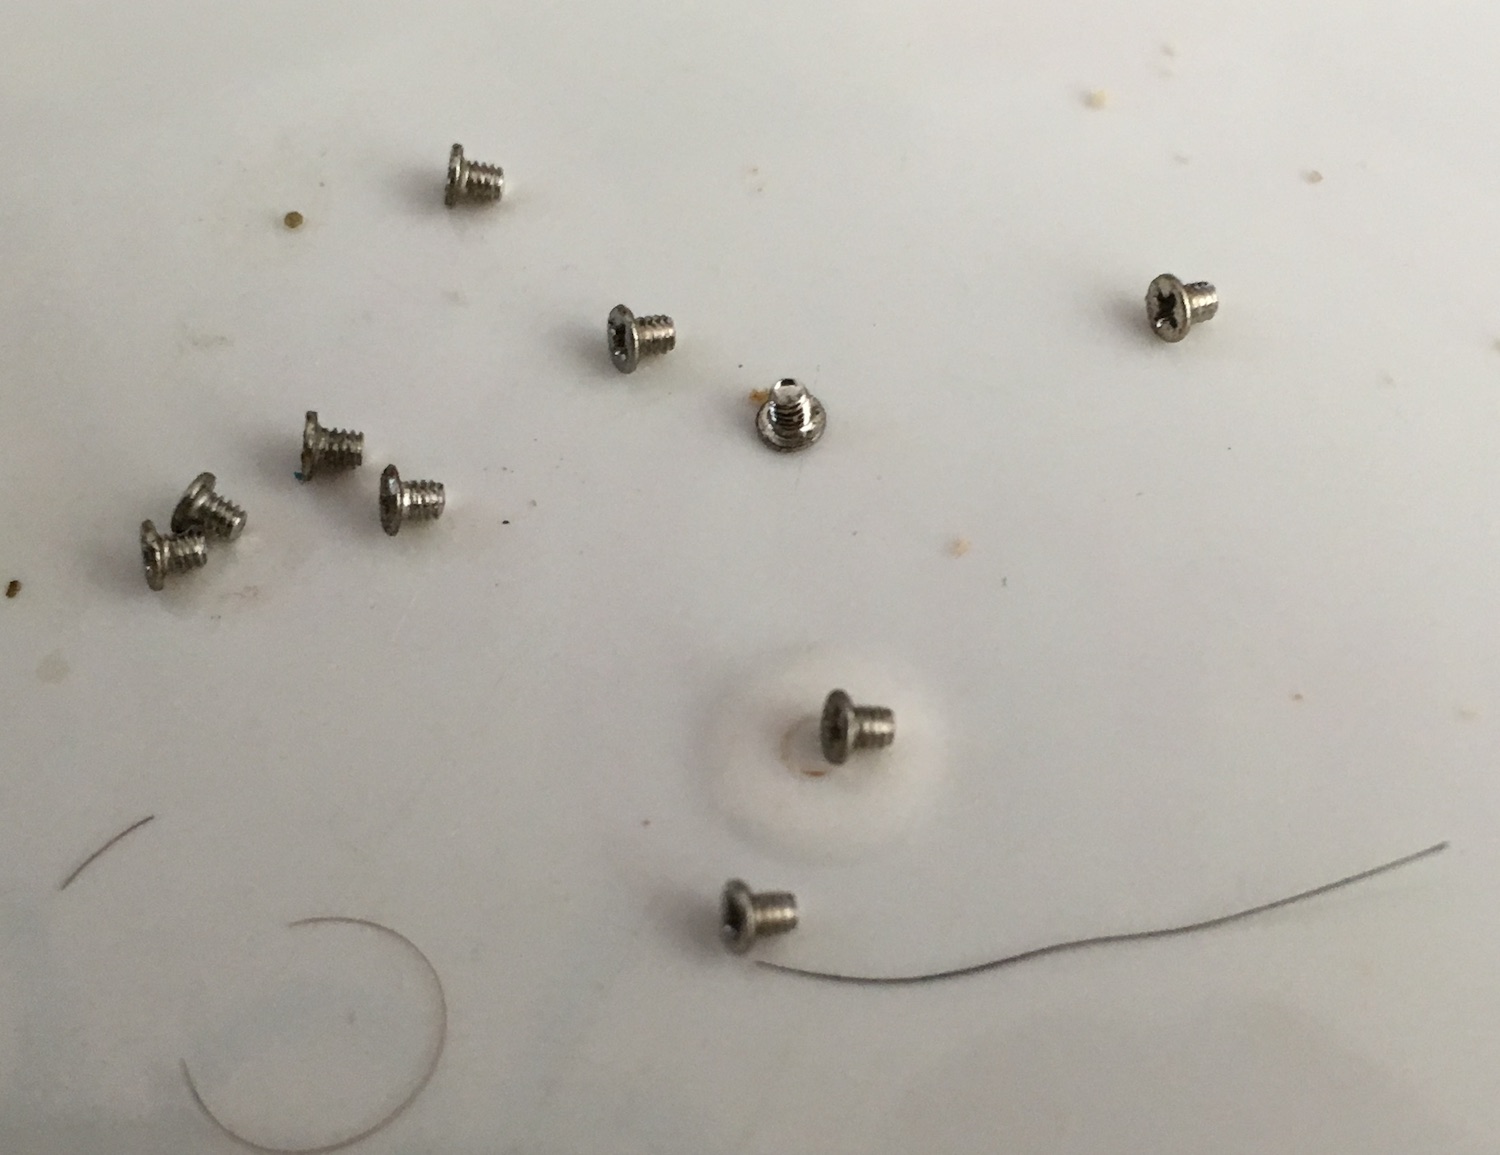
As I said - the screws are TINY. It is EASY to lose some of the screws, and also EASY to strip out the screw head. Be careful, and carefully put them in a tray as you go.
I had a screwdriver with a strong magnetic tip. That made the job much easier. Nothing is worse than fumbling with a tiny screw that can easily disappear to who-knows-where. The magnetic screwdriver made it easier to attach the screw to the tip, and simply guide from place to place.
After the last screws are removed the keyboard simply lifts up.
This is the old keyboard. The new one looks like it but does not have the QC stickers.
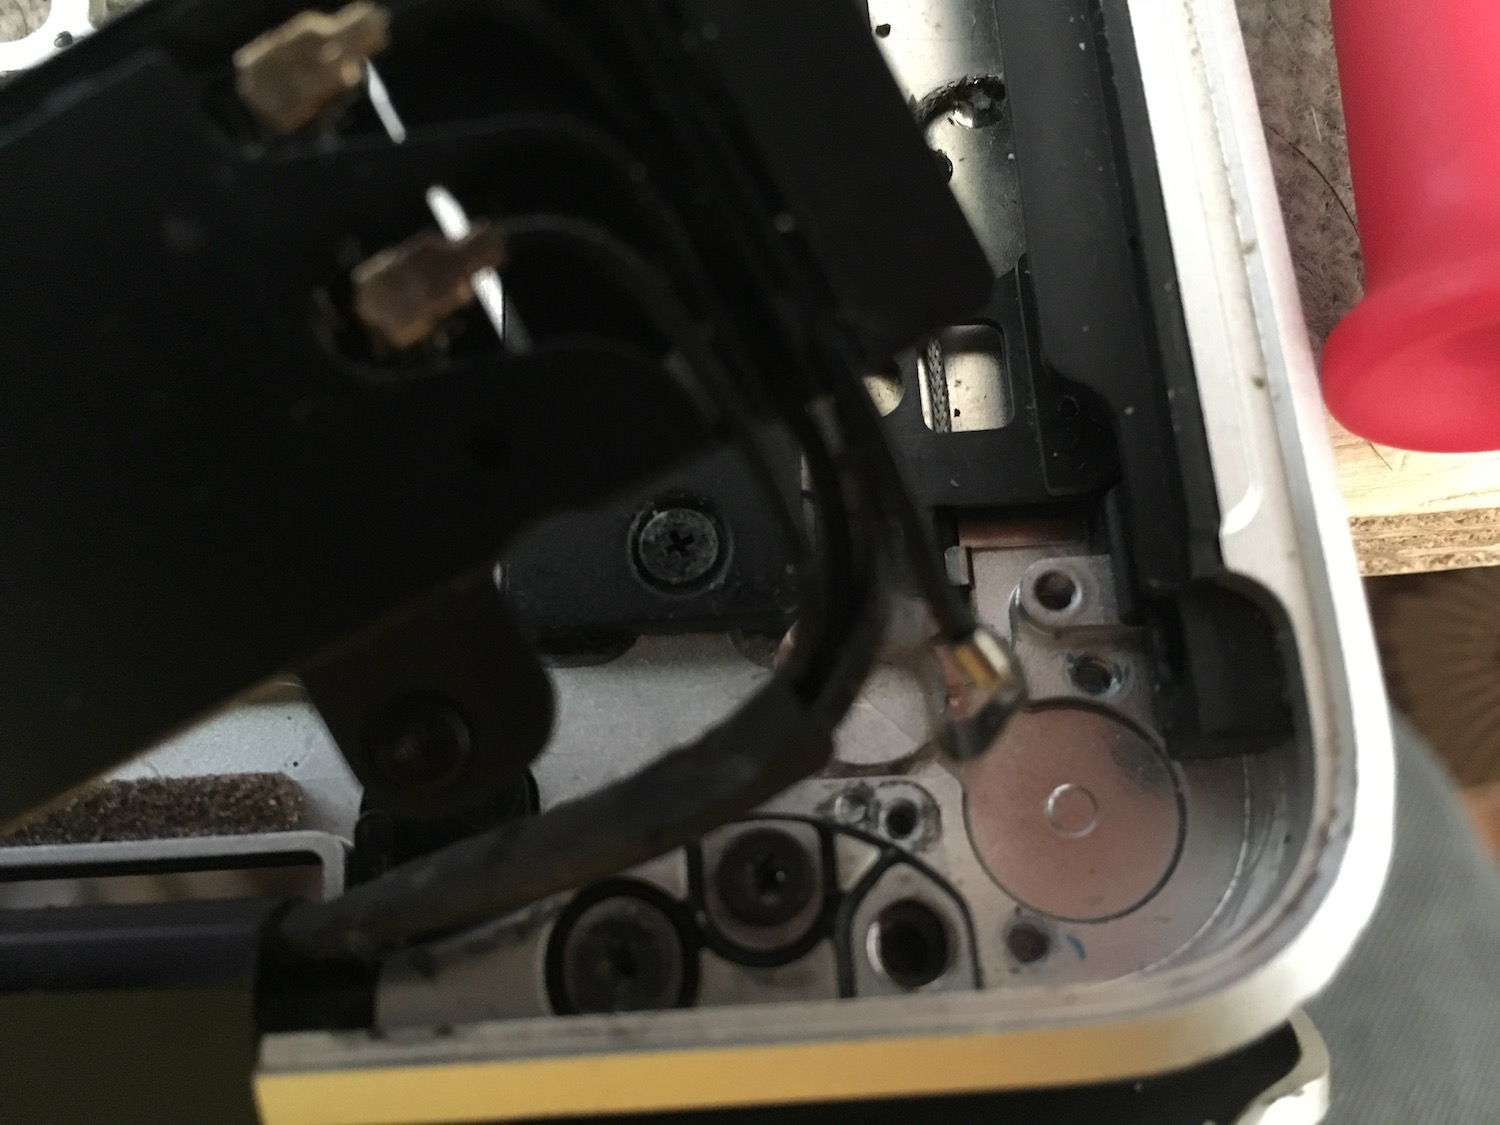
This is the back side of the power button.
The part that we press is simply a shell. The real button is this oblong thing that screws into the case. Getting into the corner where the button lives means removing the piece holding the WiFi antenna's. And getting the button OUT of that area was tricky, even after removing the WiFi thingy.
For that matter getting the new button into place was also tricky, because it's small and it's tight quarters, and on and on.
Once the power button is screwed into place, it's a matter of screwing in all those 50+ screws.
And then putting back all the parts - the backlight - the optical drive - that bar across the middle - the logic board - and getting all the ribbon cables connected correctly to the logic board.
Total time? Maybe 3 hours. Very tedious work that takes a lot of concentration because of all the tiny parts.
To pass the time and keep my mind a little active, while putting in the screws I tried to do it semi-randomly. I have no idea if it was important to install screws out of order. In many other cases it is important to do screws on opposite sides to ensure a thing is seated squarely. But is that practice required for the keyboard? I have no idea, but to keep my sanity I had to do something, and doing the screws out of order was it.
It was a pleasant result upon reassembling the laptop for everything to function, and more importantly for the power button to work and the keyboard to work perfectly. No ripping out of hair to take the laptop apart again to see what I might have done wrong. It just worked. Whew.
Adjusting the MacBook Pro trackpad after a swollen battery shoved it out of place
While I'm here I'll also discuss fixing the trackpad.
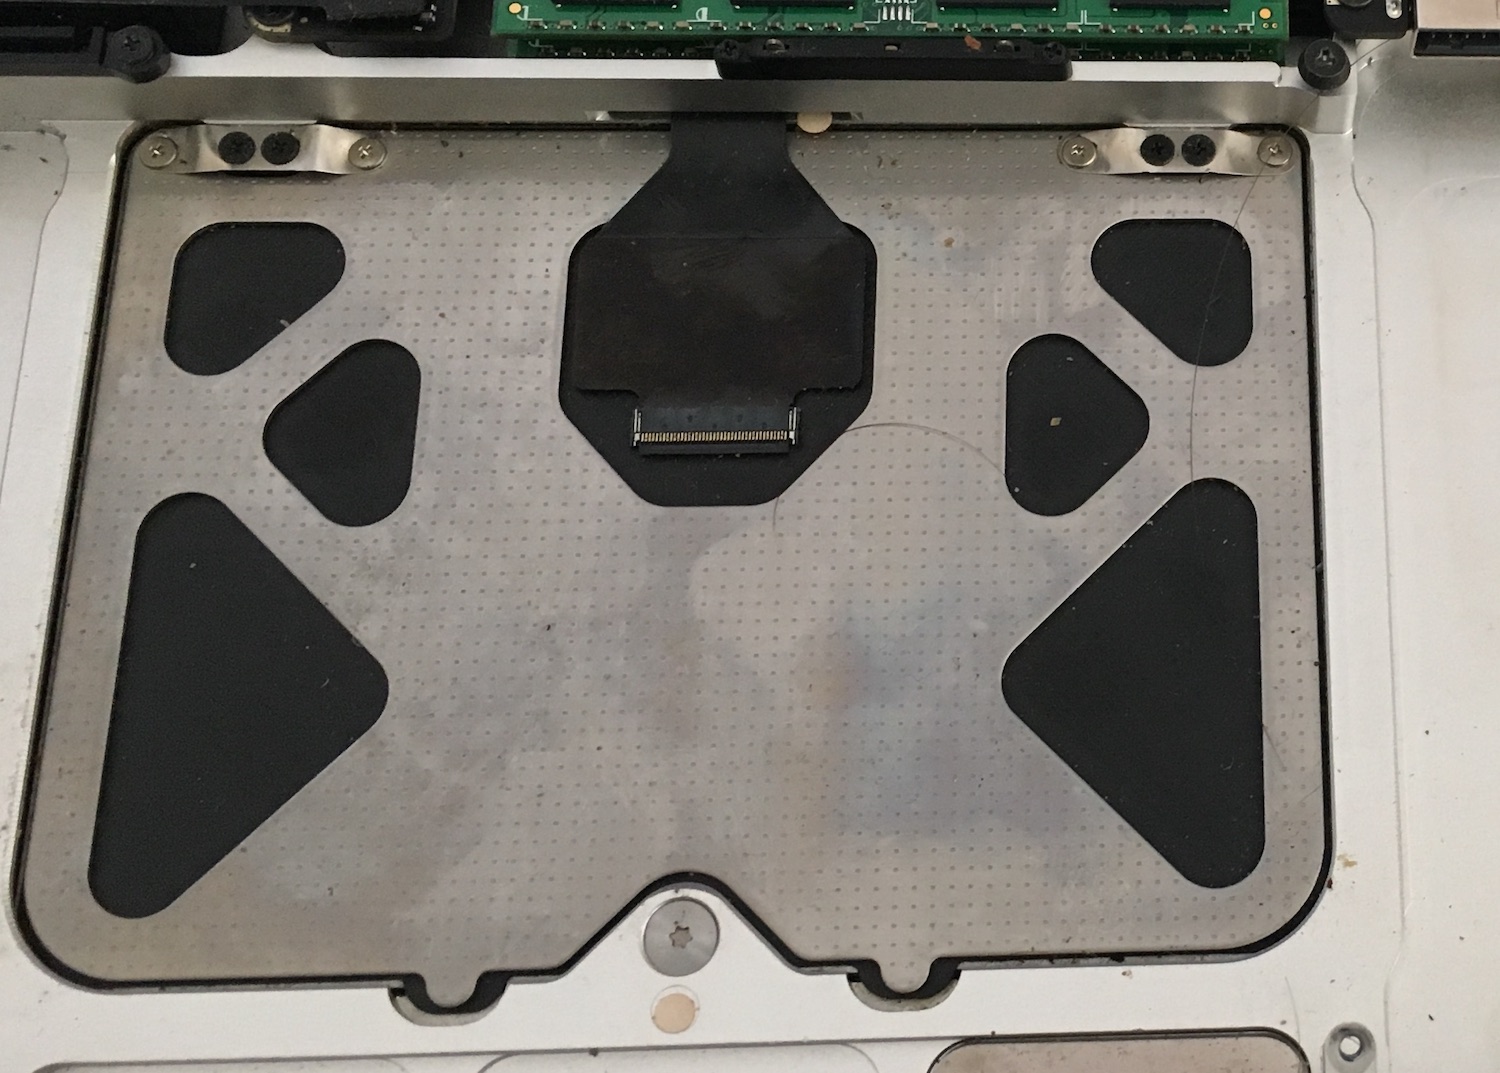
In the initial evaluation, I noted that the trackpad did not click very well. Also while the laptop case was open, I noticed the trackpad mounting tabs were bent.
Take a close look here and see that the mounting tabs are not flat. They're not supposed to look like this, the MacBook pro trackpad mounting tabs are supposed to be flat. This shape is a clue that the battery pack swelled, pushing the trackpad out of shape.
I asked the seller after finding this whether the battery pack had swollen - and he said yes.
So... I unscrewed the screws -- MORE TINY SCREWS THAT ARE EASY TO LOSE. Then I did my best to reshape the mounting tabs so they're flat. And I remounted the trackpad. It didn't quite remount to the correct place, but I was able to push it around to get it seated properly.
After booting the computer, the trackpad was functioning completely correctly.


")


