David Herron
Tags: Arduino »»»»
The Arduino is an extremely popular microcontroller for open source DIY hardware hacking projects. There are many flavors of Arduino, and for this project we'll use an Arduino UNO. All Arduino's have a well-defined GPIO interface supporting "Shield" boards providing customized capabilities. The GPIO pins can be connected to your DIY hardware, or to 3rd party Shields, for which there are many suppliers. That's what makes the Arduino so interesting to regular folk like you and me. There's a whole slew of microcontroller chips and boards targeted to commercial and industrial systems. That's not who we are, we're hacking away in a spare bedroom. With this article we'll take a first step or two to get an Arduino connected to our computer, get accustomed to the IDE, and upload a couple simple programs. Down at the bottom are a few videos.
Hardware
There's a slew of Arduino hardware available. The first simplification we're offering is - just get an Arduino UNO. It's enough of a system to do some useful projects without breaking the bank. The last thing to do at this stage is to get lost weighing between UNO's and Zero's and MegaWhatever's. There are Arduino UNO starter kits that come with a few extra useful parts, and that may be worth your while.


There are two ways to power the UNO. One is a DC input port accepting voltage up to 12 volts. That could be a battery, a power supply, or a power brick. The other way, and the simplest to start with, is via the USB port. Simply connect a USB cable between the Arduino UNO and your computer, and the UNO powers up. You'll also use that USB cable to send software to the UNO.
Next to the USB connector is a micro-switch. That is a RESET button letting you reboot the Arduino without power-cycling the USB connector.
Software - Arduino IDE and drivers
The Arduino website has lots of great information, and is also where you download the software. While you can probably do lots with the Arduino Web Editor, we suggest installing the Arduino IDE. IDE is geek-speak for "Programmers Editor" or more technically "Integrated Development Environment". The Arduino IDE has all the functionality required to edit Arduino code, access examples from an extensive online library, access utility libraries, and more.
Go to
https://www.arduino.cc/en/Main/Software and select the download for your computer. It will include not just the IDE but also device drivers.
Once you've downloaded the software, install it. For Windows, you may need to install Drivers that are included in the Arduino IDE download. The video below contains some caveats about specific steps and potential pitfalls when installing the drivers.
Launch IDE - tour
Once you've installed the software we can take a little tour.
The most important is to ensure we have the Arduino board correctly recognized by the Arduino IDE. With the Arduino connected to your computer, look at the Tools menu and there is a choice for Board and Port. These choices correspond with the board you have connected to your computer at any one time. The Arduino IDE makes its best effort to determine the Port and Board, but it's helpful to ensure it did so correctly.
On Windows you'll need to go to the Device Manager and look to see which COM port was assigned to the Arduino.
The Arduino IDE includes a Library Manager that's used to download extension libraries. Some of those libraries are written by the Arduino organization while others are written by the community. In the Sketch menu, under the Include Library choice is Manage Libraries. Click on that and a window pops up letting you search for and install libraries.
A large number of example programs are available to help you get started with the Arduino. In the File menu is the Examples choice which presents a variety of example programs. Which gives us the cue for the next section.
Load the Blink example
The Blink program is a useless example. It just blinks one of the LED's on the board. However, this application is a quick way to verify the hardware is setup correctly and to learn a couple things about the Arduino.
If there is an Angel statue nearby, however, don't run this program because whatever you do when near a Weeping Angel, Don't Blink
With that out of the way, and shooing away any wayward Angels, in the Examples menu select 01.Basic and Blink. The IDE will open a new editing window containing the sample application.
The programming language is more-or-less-don't-look-too-closely C, a venerable programming language. Learning to program the Arduino is a chance to learn C, more-or-less, if you don't already know that language.
// the setup function runs once when you press reset or power the board
void setup() {
  // initialize digital pin LED_BUILTIN as an output.
  pinMode(LED_BUILTIN, OUTPUT);
}
The setup function in an Arduino sketch is run once when the program starts. In this case it sets up the named pin, LED_BUILTIN, as an output pin.
// the loop function runs over and over again forever
void loop() {
  digitalWrite(LED_BUILTIN, HIGH);   // turn the LED on (HIGH is the voltage level)
  delay(1000);                       // wait for a second
  digitalWrite(LED_BUILTIN, LOW);    // turn the LED off by making the voltage LOW
  delay(1000);                       // wait for a second
}
The loop function runs continuously and is meant to handle "events" and make behavior changes by either reading pin states or changing pin states. In this case the LED_BUILTIN pin is first set HIGH, then set LOW, with 1000 milliseconds between each.
In case it's not clear -- this will change the output state of one of the pins on the Arduino GPIO. This particular pin corresponds to an LED on the board, and therefore the LED will blink on and off repeatedly.
With your Arduino plugged in, there are two buttons to click in the IDE user interface. They are the Verify button, which looks like a checkmark, in the toolbar, followed by the Upload button, which looks like a right-ward-pointing-arrow. Upload causes the program to load into the Arduino.
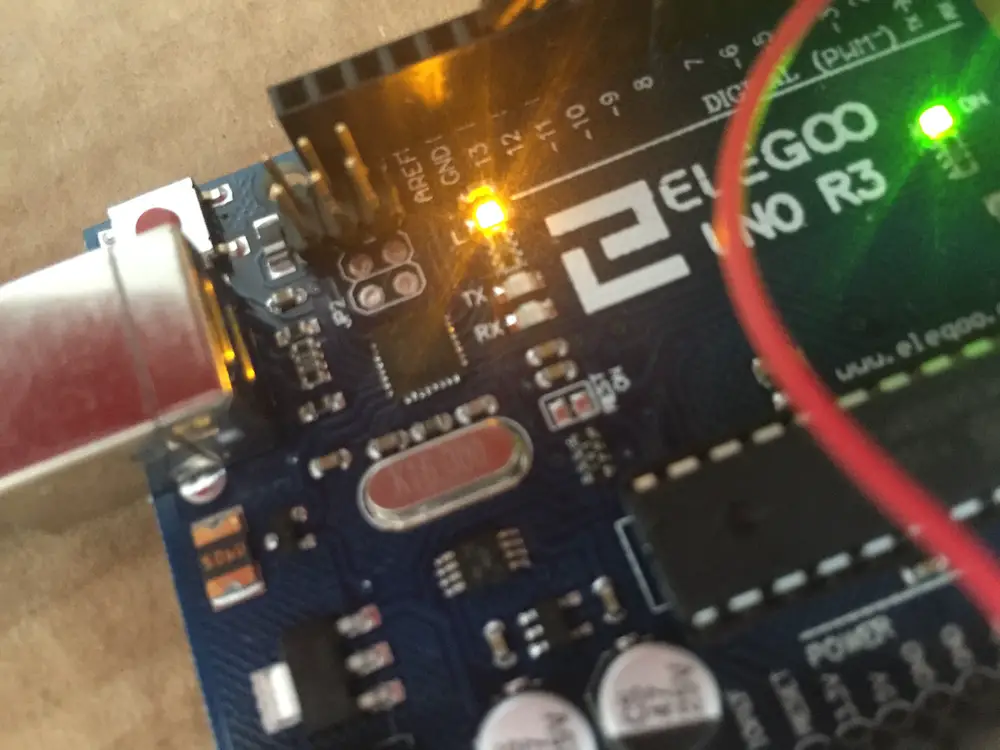
This is the LED in question. While you're looking at this, next to the USB header is a little button. Press the button and you'll see the lights briefly flicker, and then the blinking starts.
You can verify that your program is causing the blinking by adjusting the delay values - for rapid blinking, set the delay to 500 for a 1/2 second delay between each step.
Next step
We've verified that we can upload a program to the Arduino and make it do something. The next step is setting up an LCD display Displaying text on LCD screen from the Arduino UNO


