David Herron
Tags: Arduino »»»»
The Arduino doesn't have an intrinsically native display. Programmers frequently debug their software by printing stuff to a screen, or they need a human-machine-interface to show what's happening, and even a simple text display can be quite handy. With this article we'll install a particular kind of LCD display, and learn how to drive the LCD display using the LiquidCrystal library. This particular LCD requires wiring up a little circuit that uses a potentiometer to control brightness. While we might yearn for a simple-to-connect-display, we do learn a little electronics along the way. At the end of the day the Arduino is about encouraging us to fire up our soldering iron and making things. Once you've wired the display, the LiquidCrystal library makes it easy to display text on the screen.
The LiquidCrystal library runs on Arduino, and supports LiquidCrystal displays (LCDs) based on the Hitachi HD44780 (or a compatible) chipset. These are widely available and very inexpensive.


While the first of these is the one I used, both claim to be compatible with the HD44780 and therefore the following instructions are suitable for both.
Wiring the LCD display board
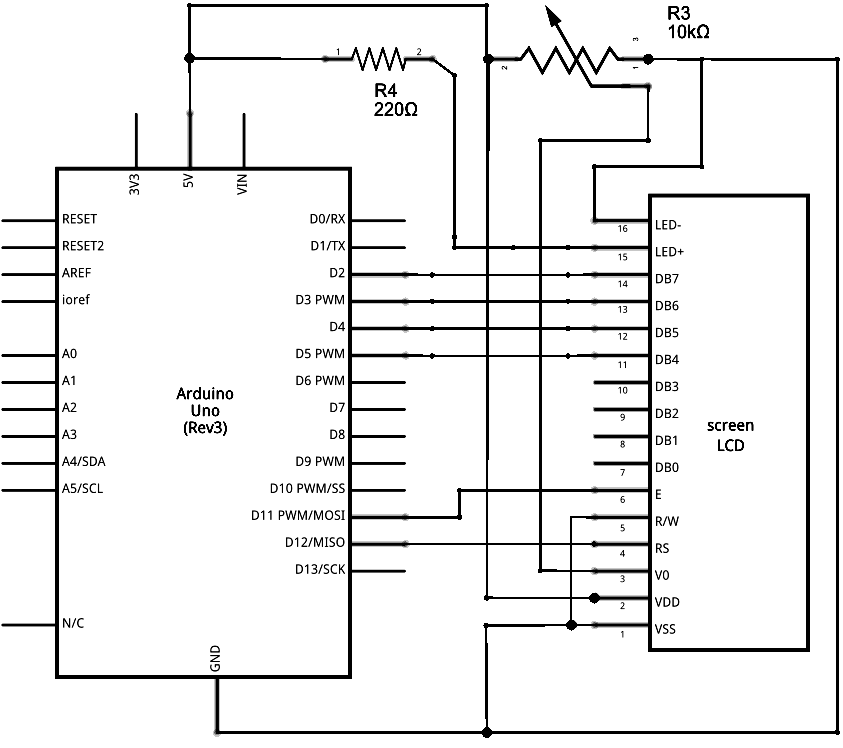
The video below goes through the process of wiring such a display using this wiring diagram. It's useful to compare between this diagram and what is done in the video.
In that video the wiring is performed on a prototyping breadboard. The display boards shown above have simple holes on a PC board to which you solder wires, whereas in the video he clearly pushes the display into holes in the breadboard.
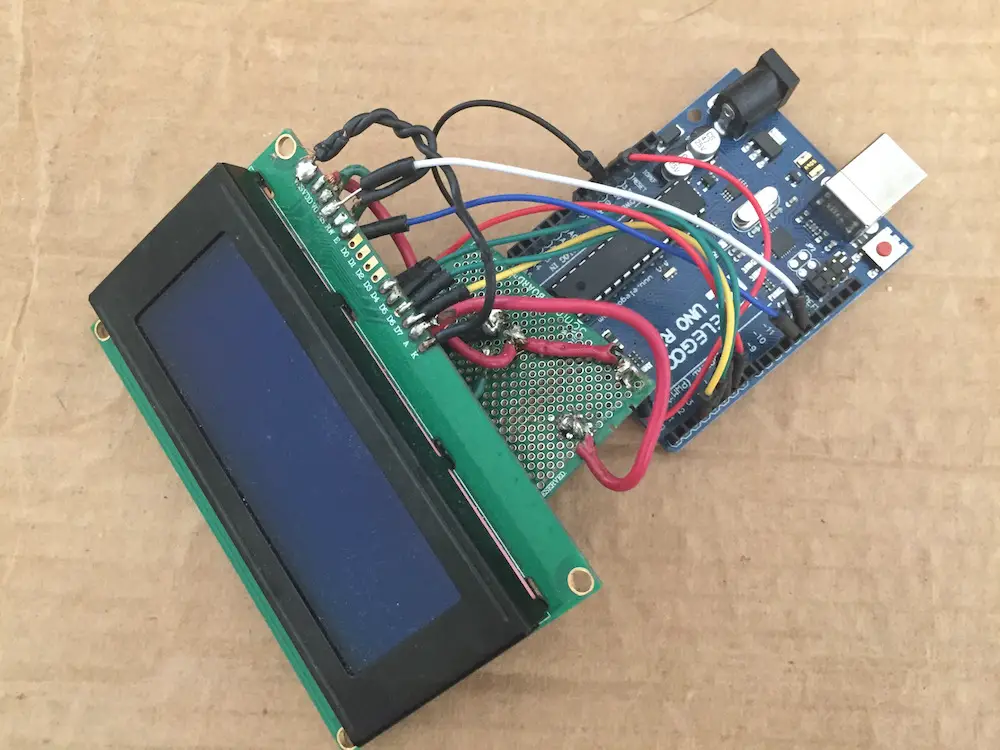
The Arduino I purchased came in a kit with a breadboard and a bunch of jumper wires. I should have wired the display as in the video, with components on a breadboard. But this LCD doesn't have a way to securely connect the jumper wires. That's because the LCD display board simply has holes, and while you can stick the jumper wires in the holes they don't stay in place. Pondering the gizmos in front of me, I decided to instead solder components to a small circuit board.
I'm afraid my soldering job wasn't good, and the connection is a little flaky - the display flickers out if you move it around, fixed by adjusting the wires.
Connecting the LCD display, adjusting brightness
However you choose to wire it, the first step is to adjust the display contrast. This is controlled by setting the potentiometer until the display looks right.
Simply connect it to the Arduino, then turn on the Arduino. While there is no default text displayed, some blocks and other things will show up letting you adjust the potentiometer.
Installing the LiquidCrystal library, quickie sample programs
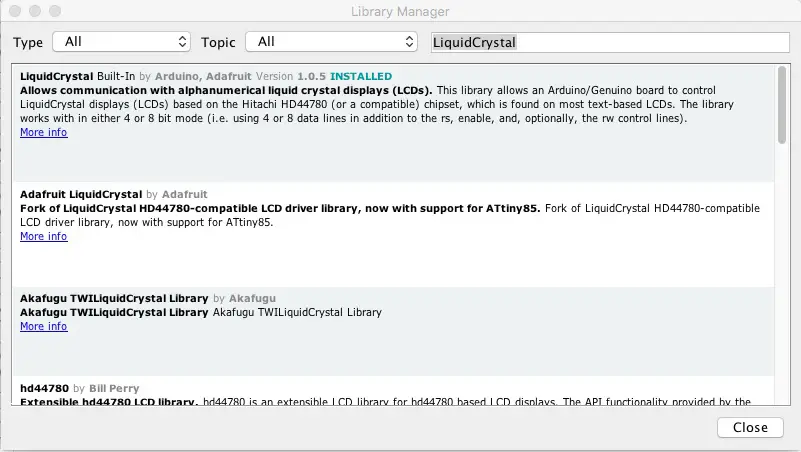
Before printing text to the LCD we need to make sure the LiquidCrystal is installed. As with all other Arduino libraries, you do this via the Library Manager section of the IDE. Simply enter LiquidCrystal in the search box and it shows up as shown here. If you need to install that library, it's done from here.

In the Sketch the wiring of the LCD display to the Arduino is documented.
  The circuit:
 * LCD RS pin to digital pin 12
 * LCD Enable pin to digital pin 11
 * LCD D4 pin to digital pin 5
 * LCD D5 pin to digital pin 4
 * LCD D6 pin to digital pin 3
 * LCD D7 pin to digital pin 2
 * LCD R/W pin to ground
 * LCD VSS pin to ground
 * LCD VCC pin to 5V
 * 10K resistor:
 * ends to +5V and ground
 * wiper to LCD VO pin (pin 3)
For example, that section in the comments is the same as wiring diagram.
// initialize the library with the numbers of the interface pins
LiquidCrystal lcd(12, 11, 5, 4, 3, 2);
This line of code actually informs the LiquidCrystal library what Arduino pins to use in communicating with the display. Of course they match the wiring diagram.
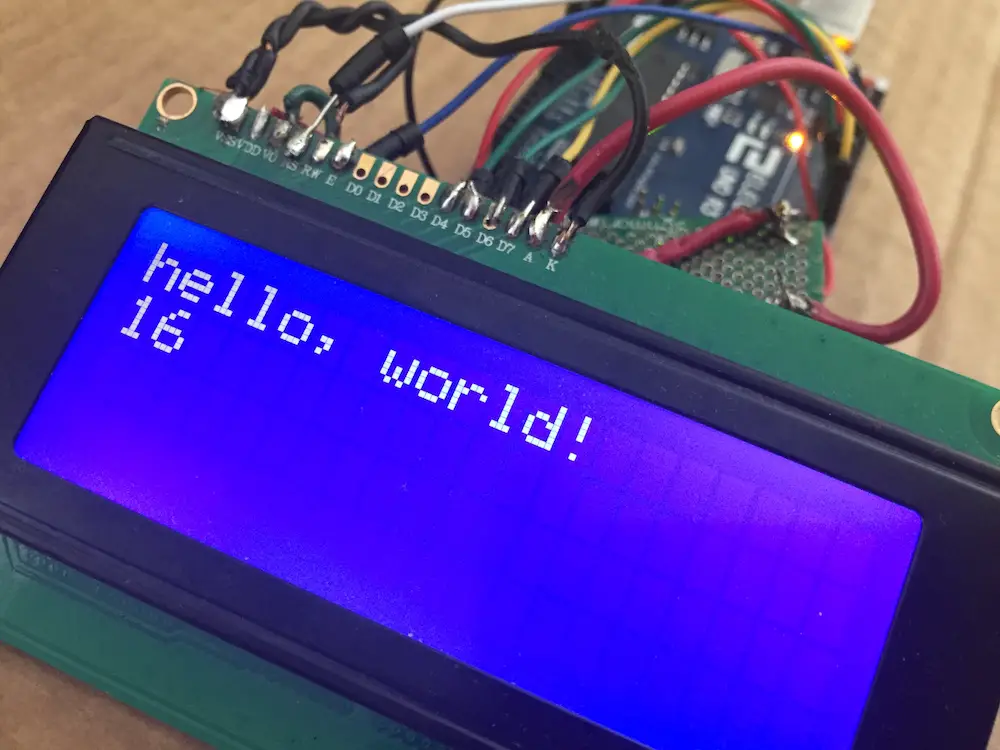
lcd.begin(16, 2);
This line in setup configures the display size. The displays shown above has 20 columns by 4 rows, while this line of code configures the display for 16 lines by 2 rows.
lcd.begin(20, 4);
Change it to this if you have a 20x4 display as suggested above.
lcd.print("hello, world!");
This looks simple doesn't it? The LiquidCrystal library takes this and works out the graphics to show the text. The display we've chosen here accepts graphics commands, not text commands. Behind the scenes of this command there's a lot going on, but we don't have to worry about that.
void loop() {
  // set the cursor to column 0, line 1
  // (note: line 1 is the second row, since counting begins with 0):
  lcd.setCursor(0, 1);
  // print the number of seconds since reset:
  lcd.print(millis() / 1000);
}
Here is the loop of this Sketch, meaning that this function execute repeatedly. The setCursor command moves the text cursor to the first column (column 0) of the second line of the display (line 1). The subsequent lcd.print command takes the current time, printing it on the screen at the location of the text cursor.
Links
LiquidCrystal library -
https://www.arduino.cc/en/Reference/LiquidCrystal


