David Herron
Tags: OpenAPI »»»»
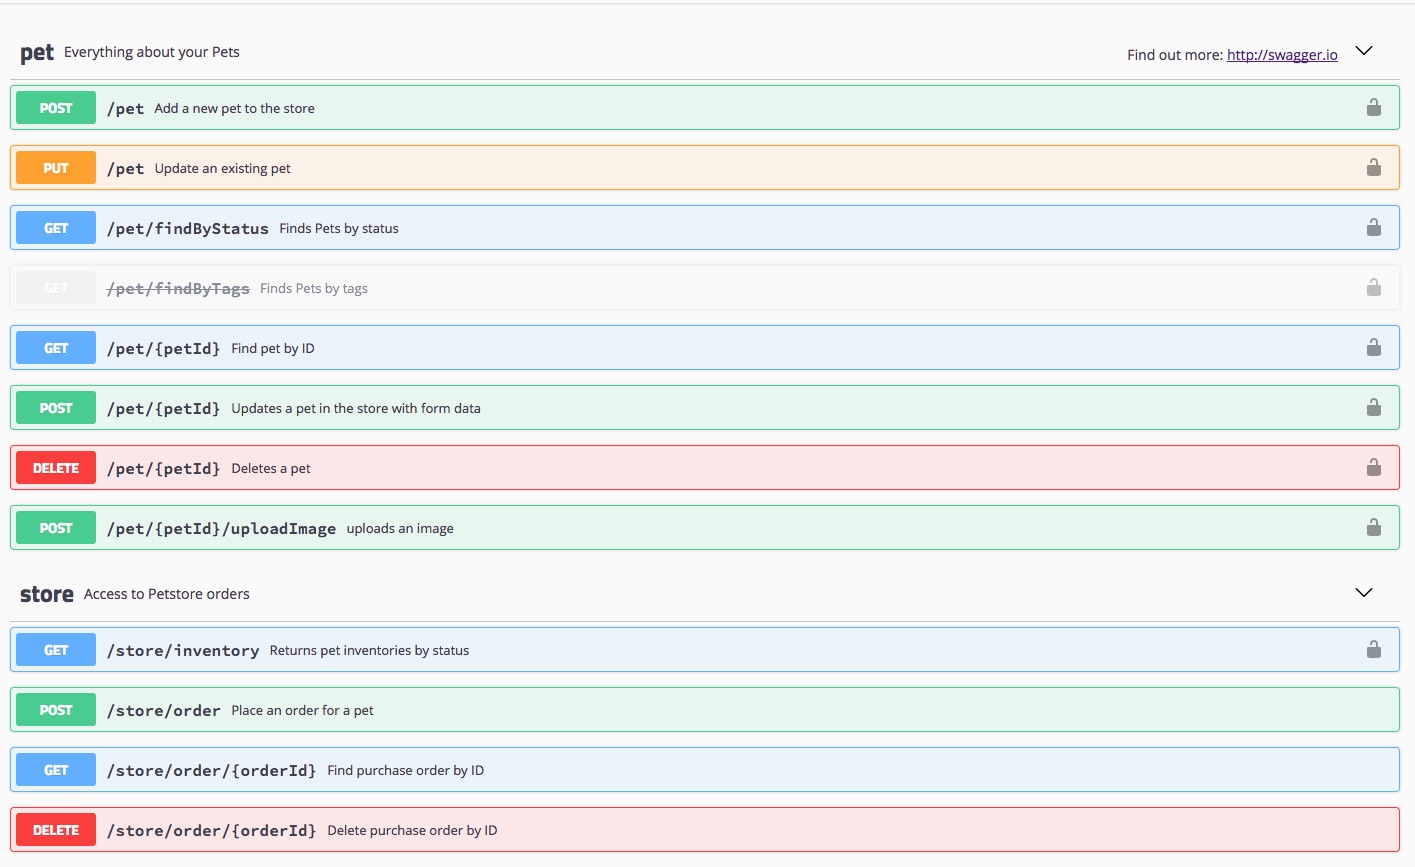
Among the Swagger Tools is Swagger UI, an excellent tool for browsing an OpenAPI specification, the methods it defineds, and the data models it defines. Swagger UI turns the YAML or JSON specification file into an interactive browsing of the API. In this article we'll go over deploying the Swagger UI documentation viewer in a regular web page.
The GitHub repository for Swagger UI (
https://github.com/swagger-api/swagger-ui) goes over two usage modes: 1) HTML and 2) Docker. In Easily edit or view OpenAPI 3 API specifications using free tools we go over using Swagger UI from a Docker container, and in this article we'll go over using it in an HTML file.
The Swagger UI documentation includes this template:
<!DOCTYPE html>
<html lang="en">
<head>
  <meta charset="utf-8" />
  <meta name="viewport" content="width=device-width, initial-scale=1" />
  <meta
    name="description"
    content="SwaggerUI"
  />
  <title>SwaggerUI</title>
  <link rel="stylesheet" href="https://unpkg.com/swagger-ui-dist@4.5.0/swagger-ui.css" />
</head>
<body>
<div id="swagger-ui"></div>
<script src="https://unpkg.com/swagger-ui-dist@4.5.0/swagger-ui-bundle.js" crossorigin></script>
<script>
  window.onload = () => {
    window.ui = SwaggerUIBundle({
      url: 'https://petstore3.swagger.io/api/v3/openapi.json',
      dom_id: '#swagger-ui',
    });
  };
</script>
</body>
</html>
The <link> and first <script> tag includes URL's to retrieve Swagger UI code from unpkg.com. While useful for a demo, I believe it is not a best practice to rely on this for production use. Even though unpkg.com probably has great reliability, it is a 3rd party service and if it crashes your site could crash. Therefore it is better to install the swagger-ui-dist package from NPM locally, then use the relevant files from your own project.
Inside the SwaggerUIBundle call is a url parameter which points at the OpenAPI specification you wish to display.
There's nothing magical about this template, and you can host Swagger UI in a page containing the regular navigational elements of your website. What's needed in your HTML is:
- The
<link>to bring in the Swagger UI CSS. - The
<script>to bring in the Swagger UI JavaScript.- Notice that this tag includes
crossoriginwhich is needed if the URL for the specification is from a different domain from the domain of the JavaScript, to avoid CORS errors.
- Notice that this tag includes
- The
<div>which serves as the container for the OpenAPI specification browser. - The
<script>tag that executes theSwaggerUIBundlefunction.
Setting up the Swagger UI in a simple HTML file
Let's start by running this:
$ npm install swagger-ui-dist --save
This installs the package from the NPM repository. Obviously your project must already be using NPM, which is part of the Node.js distribution. If you're using a different technology stack, it should be possible to run NPM in a side directory, then copy files into your project. Or maybe there is a Swagger UI package available for your technology stack.
After running the above command we get this directory:
$ ls node_modules/swagger-ui-dist/
absolute-path.js        swagger-ui-bundle.js
favicon-16x16.png       swagger-ui-bundle.js.map
favicon-32x32.png       swagger-ui.css
index.css               swagger-ui.css.map
index.html              swagger-ui-es-bundle-core.js
index.js                swagger-ui-es-bundle-core.js.map
LICENSE                 swagger-ui-es-bundle.js
NOTICE                  swagger-ui-es-bundle.js.map
oauth2-redirect.html    swagger-ui.js
package.json            swagger-ui.js.map
README.md               swagger-ui-standalone-preset.js
swagger-initializer.js  swagger-ui-standalone-preset.js.map
Compare these files with the HTML template, and you'll see they match up. There are also files here which theoretically shouldn't be distributed in production.
In whatever way which makes sense for your technology stack, make sure the above files will appear as something like https://YOUR-DOMAIN/vendor/swagger-ui-dist. The /vendor URL space is commonly used for code from 3rd parties, which this is.
Therefore, where the template says https://unpkg.com/swagger-ui-dist@4.5.0 substitute /vendor/swagger-ui-dist.
The last change to make is in the SwaggerUIBundle call, to substitute the URL for your OpenAPI spec for the PetStore URL shown in the template.
We have created a sample page using todo.yml
Summary
Swagger UI is easy to implement for displaying interactive documentation of an OpenAPI specification. As shown here, the OpenAPI, JavaScript, and CSS files can be deployed on a server, and displayed on an HTML page containing a few pieces of markup. Alternatively, Swagger UI can be deployed using a Docker container, if your deployment is to a cloud service, as discussed in Easily edit or view OpenAPI 3 API specifications using free tools.


