David Herron
Tags: Docker »»»» Docker MAMP »»»»
MongoDB, as one of the popular NoSQL databases, is part of many software projects. Hence, one must sometimes know how to configure and setup MongoDB in a Docker environment.
MongoDB is billed as "a general purpose, document-based, distributed database built for modern application developers and for the cloud era. No database makes you more productive." That's a nice marketing speech, but what does it mean?
Being document-based means "it stores data in JSON-like documents." The actual data storage on disk is BSON, a binary form of JSON. The user interface and query language is about queries into collections of JSON objects. There is no formal schema, unlike SQL databases. This makes the experience of using MongoDB more free flowing and fluid.
Being distributed means that MongoDB has built-in support for multiple instances, on multiple servers, maintaining the same data set.
We won't be going into any of that in this tutorial, but it's useful to know those capabilities exist. It is a fully featured database that inspired a wave of non-traditional-non-SQL database usage. Our goal in this post is an introduction to using MongoDB in Docker.
Launching MongoDB on Docker requires mounting a data directory into the Docker container. Optionally, a configuration file can be mounted into the container for customization.
To support administering the MongoDB instance, we can easily create a second container to run Mongo Express.
Quick start to using MongoDB on Docker
There are a large number of MongoDB images available on Docker Hub. But, let's turn to the official MongoDB Docker image, which is fairly easy to setup and deploy.
For a quick win, let's start up a MongoDB container, run a mongo client, and generally poke around to see what's there.
$ docker pull mongo
Unable to find image 'mongo:latest' locally
latest: Pulling from library/mongo
d2ca7eff5948: Pull complete
ebb958661291: Pull complete
cdfa71d101a9: Pull complete
88a286579fc2: Pull complete
9441b8e1ae36: Pull complete
0e6fe40bb4bd: Pull complete
fca9be9954eb: Pull complete
9d3de1a5bb82: Pull complete
2e423513a19e: Pull complete
2fcd12f78f7c: Pull complete
Digest: sha256:05fd4fd3710a84dcf12e5880a5fc225a245792d2d9b6156722c5f4c0fab74d86
Status: Downloaded newer image for mongo:latest

$ docker run --name some-mongo  mongo
2018-03-05T06:23:52.002+0000 I CONTROL  [initandlisten] MongoDB starting : pid=1 port=27017 dbpath=/data/db 64-bit host=84e5705ac41f
2018-03-05T06:23:52.002+0000 I CONTROL  [initandlisten] db version v3.6.3
...
This starts the MongoDB container. You can verify it's running with this command
$ docker ps
CONTAINER ID  IMAGE    COMMAND                  CREATED         STATUS         PORTS         NAMES
84e5705ac41f  mongo    "docker-entrypoint.s…"   4 minutes ago   Up 4 minutes   27017/tcp     some-mongo
A TCP port, 27017, is exposed but is not publicly visible, which is the standard MongoDB port.
It's not recommended, but if you did want to publicly expose this port add -p 27017:27017 to the docker run command. Instead the best practice is to only make the MongoDB port available to other Docker containers.
But first let's explore access to the server from inside its container
$ docker exec -it some-mongo bash

root@84e5705ac41f:/# mongo
MongoDB shell version v3.6.3
connecting to: mongodb://127.0.0.1:27017
MongoDB server version: 3.6.3
Welcome to the MongoDB shell.
For interactive help, type "help".
Using docker exec gets us into the container. We can then run the Mongo client as shown here.
> db.foo.find()
> db.foo.save({ a: 1});
WriteResult({ "nInserted" : 1 })
> db.foo.find()
{ "_id" : ObjectId("5a9ce2ec3f7f33d53a61b357"), "a" : 1 }
The MongoDB query language is JavaScript, and results of commands are therefore JavaScript objects. In this case we first ran find on the db.foo collection, and found no documents. We then used save to insert a document, meaning a JavaScript object. Then rerunning db.foo.find, the newly inserted document is found.
Connecting to MongoDB container from another Docker container
The MongoDB container would be installed alongside another container (or three) running an application that uses the MongoDB container. Therefore we need to see how to get one container to talk with the MongoDB container. To do that we'll run a second MongoDB container, but use only the MongoDB client program to connect to the MongoDB instance in the other container.
$ docker network create mnet
d7d0c678626407eb2b9de733d1ec7ef4243833cc8f64f59a77218e5bd1be3b8f
First, we need a Docker bridge network. Bridge networks are used to connect containers together. In the Docker universe you'll find old documentation suggesting to use the --link option to connect two containers together. In the Docker documentation today, you'll see --link described as a deprecated feature and that we're supposed to use bridge networks instead.
A Docker bridge network is a virtual subnet you create within your computer.
$ docker network inspect mnet
...
        "Name": "mnet",
        ...
            "Config": [
                {
                    "Subnet": "172.18.0.0/16",
                    "Gateway": "172.18.0.1"
                }
            ]
...
You can inspect a bridge network as so. First we see the subnet is assigned the 172.18.0.0 network.
Docker has a built-in DNS server, and each container has a host name determined by its container name. Meaning that from a container on a given subnet, your software can attach to software in another container on that bridge network using the container name as the host name.
$ docker rm some-mongo

$ docker run --name some-mongo --net mnet  mongo
2018-03-05T06:33:59.202+0000 I CONTROL  [initandlisten] MongoDB starting : pid=1 port=27017 dbpath=/data/db 64-bit host=b142745a2ba9
2018-03-05T06:33:59.202+0000 I CONTROL  [initandlisten] db version v3.6.3
We delete the old some-mongo instance, so we can start a new one. This time we connect it to mnet.
Then in another window we can attempt to connect with the MongoDB server from another container:
$ docker run -it --rm --net mnet mongo mongo --host some-mongo
MongoDB shell version v3.6.3
connecting to: mongodb://some-mongo:27017/
MongoDB server version: 3.6.3
Welcome to the MongoDB shell.
For interactive help, type "help".
...
> db.foo.find()
> db.foo.save({ a: 1});
WriteResult({ "nInserted" : 1 })
> db.foo.save({ life: 42});
WriteResult({ "nInserted" : 1 })
> db.foo.find()
{ "_id" : ObjectId("6045677ef78c5bbab5526cc2"), "a" : 1 }
{ "_id" : ObjectId("60456790f78c5bbab5526cc3"), "life" : 42 }
>
This runs another MongoDB container, in which we run the command mongo --host some-mongo, so that it connects to the MongoDB instance in the some-mongo container. We then run a few commands as before, but this time we're connecting between containers.
To verify, exit from that MongoDB client and rerun this command:
$ docker exec -it some-mongo bash
...
> db.foo.find();
{ "_id" : ObjectId("6045677ef78c5bbab5526cc2"), "a" : 1 }
{ "_id" : ObjectId("60456790f78c5bbab5526cc3"), "life" : 42 }
>
This again connects to the MongoDB instance from inside its container, and verifies that we see the same data set.
Customizing the MongoDB configuration file
There is a default MongoDB configuration file in the container, but the file is not enabled. You can easily see it in the MongoDB container:
$ docker exec -it some-mongo bash
...
root@ddc3ebc4cf9e:/# ls -l /etc/mongod.conf.orig
-rw-r--r-- 1 root root 626 Feb 22 20:24 /etc/mongod.conf.orig
If this file were named mongod.conf it would be used by the database. But named this way, the configuration file is ignored, and instead you're using the default configuration.
Documentation on the MongoDB configuration file:
https://docs.mongodb.com/manual/reference/configuration-options/
Suppose you have a configuration file to use, and you've stored it on your laptop in a file named mongod.conf. You can mount that configuration file into the container like so:
$ docker run --name some-mongo --net mnet  \
            -v ./mongod.conf:/etc/mongod.conf \
            mongo
The -v option is short for --volume, which lets us inject directories or files into a container.
The documentation suggests that using the configuration file then requires that mongod be launched as mongod --config /etc/mongod.conf. To do this:
$ docker run --name some-mongo --net mnet \
            -v ./mongod.conf:/etc/mongod.conf \
            mongo \
            mongod --config /etc/mongod.conf
Inside a Dockerfile, the CMD instruction specifies the default command that's run when the container is executed. We've already seen we can put a command at the end of the docker run command, and that command will be launched inside the container. But, what this does is to override the CMD instruction in the Dockerfile. In this case, the desired result of the mongo container is to launch the mongod process, and in this case we're causing it to launch with an additional command line option.
Persisting the MongoDB database
So far the database used by the MongoDB instance has lived solely within the container. Therefore, in our previous examples, the database vaporized as soon as the container was deleted.
Docker container lifecycle's are incompatible with database lifecycles. Databases potentially have a useable lifetime measuring in decades, while a container's lifetime can be measured in minutes. Therefore we need to store the MongoDB database outside the container.
Fortunately that's simple, and simply requires using an option we just saw.
$ docker run --name some-mongo --net mnet \
        --volume ./data-directory:/data/db \
        mongo
The /data/db is the default location MongoDB uses for storing data. This use of the --volume option causes the host directory, data-directory, to be mounted into the container at that file-system location.
Creating a Docker Compose file to manage MongoDB
As we learned with MySQL and Wordpress, the Compose file is a powerful way to describe Docker application deployment. The docker run command is nice, but the Compose file is much more convenient especially since it can be used to describe a multi-container deployment. To learn about using Compose files see Deploying MySQL to get started using a Docker Compose file
Create a file named docker-compose.yml containing this:
version: '3.9'

services:
    mongo:
        image: mongo:latest
        container_name: mongo
        volumes:
            - ./data-directory:/data/db
            # - ./mongod.conf:/etc/mongod.conf
        networks:
            - mnet

networks:
    mnet:
        driver: bridge
This is a straight transliteration of the commands we typed earlier into a simple succinct configuration file. This covers both the MongoDB container as well as the virtual network we used.
To start the MongoDB database:
$ docker-compose up
Creating network "mongo_mnet" with driver "bridge"
Creating mongo ... done
Attaching to mongo
...
This starts the services described in the Compose file.
We can verify that it successfully launched:
 docker ps
CONTAINER ID   IMAGE          COMMAND                  CREATED         STATUS         PORTS       NAMES
897f511079b5   mongo:latest   "docker-entrypoint.s…"   2 minutes ago   Up 2 minutes   27017/tcp   mongo

$ ls
data-directory     docker-compose.yml

$ ls data-directory/
WiredTiger          collection-0--4736893604217565335.wt index-5--4736893604217565335.wt
WiredTiger.lock     collection-2--4736893604217565335.wt index-6--4736893604217565335.wt
WiredTiger.turtle   collection-4--4736893604217565335.wt journal
WiredTiger.wt       diagnostic.data                      mongod.lock
WiredTigerHS.wt     index-1--4736893604217565335.wt      sizeStorer.wt
_mdb_catalog.wt     index-3--4736893604217565335.wt      storage.bson
And we can rerun the same test commands shown earlier.
When you are done with MongoDB run this:
$ docker-compose down
Stopping mongo ... done
Removing mongo ... done
Removing network mongo_mnet
This will shut down and delete the mongo container, but the database directory will still be there.
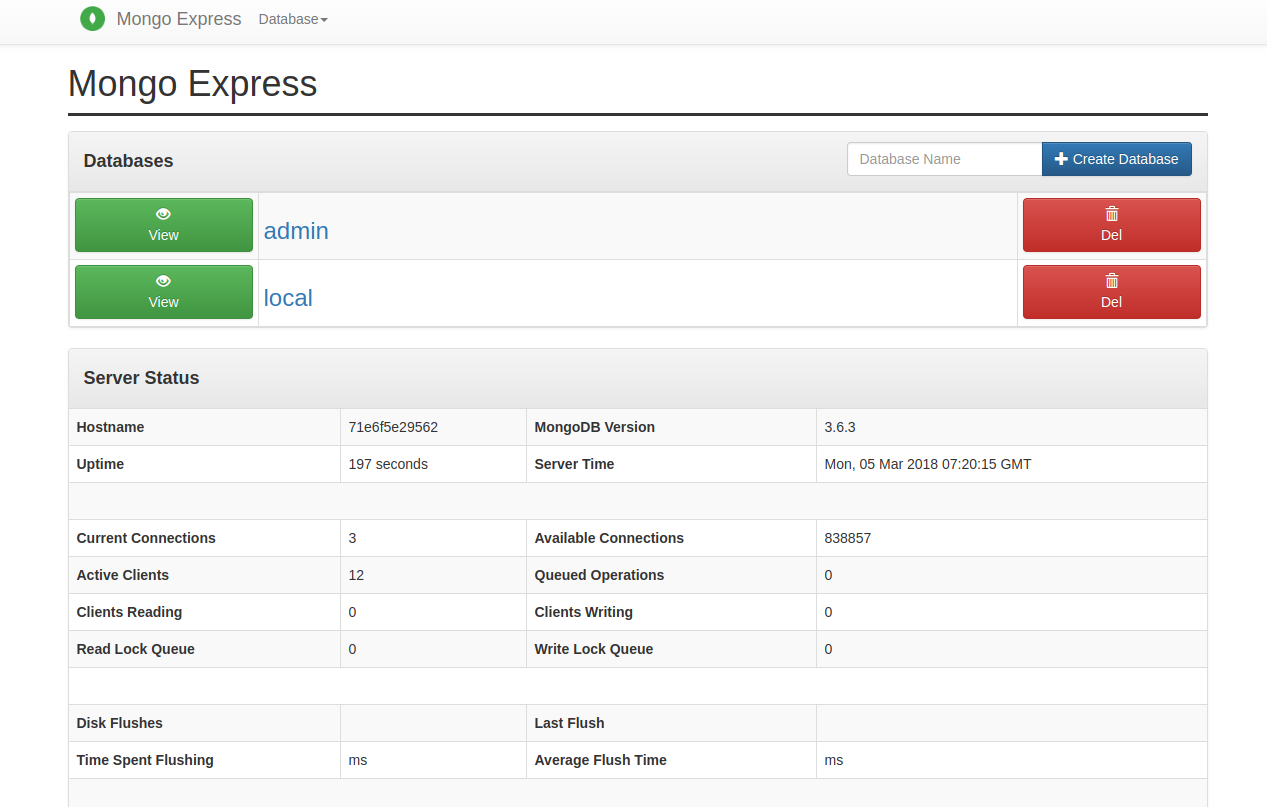
Launching Mongo Express in a Compose file
This is a web-based MongoDB administrative service.
https://hub.docker.com/_/mongo-express/
This is rather easy to set up:
$ docker run -it --rm  \
   --name mongo-express \
   --net mnet -p 8081:8081 \
   -e ME_CONFIG_OPTIONS_EDITORTHEME="ambiance" \
   -e ME_CONFIG_BASICAUTH_USERNAME="user" \
   -e ME_CONFIG_BASICAUTH_PASSWORD="fairly long password" \
   -e ME_CONFIG_MONGODB_SERVER="some-mongo" \
   mongo-express
To use the Mongo Express service, connect your browser to http://localhost:8081. You'll be asked for a user name and password, for which you use the values in ME_CONFIG_BASICAUTH_USERNAME and ME_CONFIG_BASICAUTH_PASSWORD. It will connect to the MongoDB at the host name you give in ME_CONFIG_MONGODB_SERVER.
But, having created a Compose file, let's instead add this to docker-compose.yml:
    mongo-express:
        image: mongo-express:latest
        container_name: mongo-express
        environment:
            ME_CONFIG_OPTIONS_EDITORTHEME: "ambiance"
            ME_CONFIG_BASICAUTH_USERNAME: "user"
            ME_CONFIG_BASICAUTH_PASSWORD: "fairly long password"
            ME_CONFIG_MONGODB_SERVER: "mongo"
        networks:
            - mnet
        ports:
            - 8081:8081
        depends_on:
            - mongo
        restart: unless-stopped
This is a straightforward transliteration of the docker run command into a Compose file. The settings are mostly the same, but with two changes. The first is trivial, in that we've renamed the MongoDB container to simply be mongo rather than some-mongo. But the other change is more significant.
You'll notice when running the resulting Compose file that this error is printed:
...
mongo-express    | Thu Mar 11 01:07:31 UTC 2021 retrying to connect to mongo:27017 (2/5)
mongo-express    | /docker-entrypoint.sh: connect: Connection refused
...
mongo-express    | Mongo Express server listening at http://0.0.0.0:8081
mongo-express    | Server is open to allow connections from anyone (0.0.0.0)
mongo-express    |
mongo-express    | /node_modules/mongodb/lib/server.js:265
mongo-express    |         process.nextTick(function() { throw err; })
mongo-express    |                                       ^
mongo-express    | Error [MongoError]: failed to connect to server [mongo:27017] on first connect
...
What's happening is that Mongo Express is starting before the MongoDB server is listening for connections. The connection refused message is a simple byproduct, since the server doesn't have its port open yet. Indeed, a few moments after Mongo Express gives up, MongoDB will print a message saying it is Waiting for connections on port 27017.
In the Mongo Express documentation there doesn't seem to be a setting to tailor its reaction to a connection refused. Instead the documentation simply says to have a running MongoDB container. But how do you handle putting both MongoDB and Mongo Express containers in the same Compose file?
Our method was to add the depends_on and restart attributes. The depends_on attribute tells Docker Compose in order to start one container, one or more other containers must have started. In other words, it lets us create a rudimentary dependency tree. Unfortunately that wasn't enough to fix this particular problem.
The restart attribute tells Docker what to do if a container crashes. For cloud deployment we're admonished to plan on their being failures, and to design the system to restart any failed piece as needed. In Docker, the restart policy is one tool to implement this goal. In this case, unless-stopped means to automatically restart a failed container unless the system was manually shut down.
That means when the Mongo Express container fails to connect to MongoDB, the container will die. Docker will see a crashed container. Because we've told Docker it is supposed to restart this container, it will do so. In testing on the first restart Mongo Express was able to connect with MongoDB.
Summary
In this tutorial we've gotten our feet wet with the MongoDB server, learning the basics of setting it up and using it.
Links
-
https://hub.docker.com/_/mongo/
-
https://www.mongodb.com/
-
https://github.com/mongo-express/mongo-express
-


