David Herron
Tags: Photography »»»» Infrared Photography »»»»
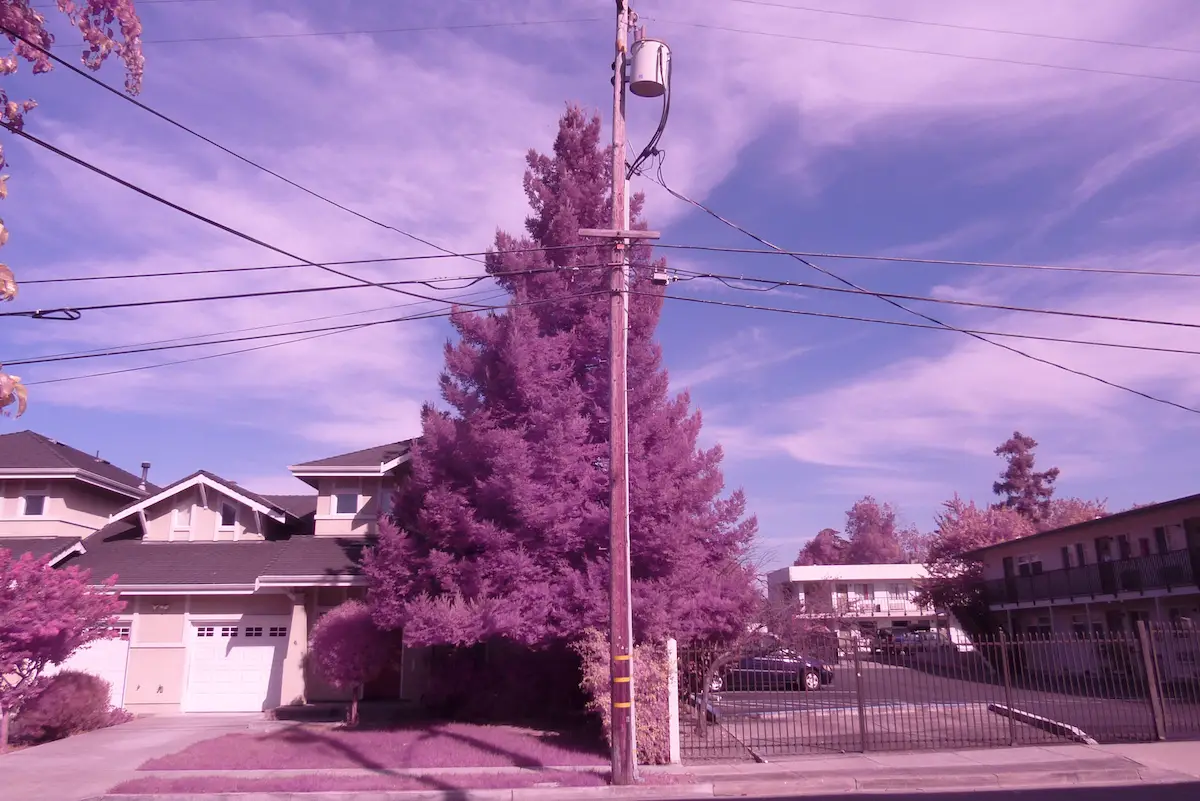
Infrared photography is a portal into an invisible world that's in front of our eyes but which we cannot see. Our eyes see only a portion of the light spectrum (from red to purple). While most digital cameras can see the infrared spectrum, in most cases the camera must be slightly modified to remove the filter which blocks infrared light. With infrared photography the sky is dark, the grass and any other plants are white, and it's like seeing a bizzaro other-world that's opposite the world we inhabit.
Infrared photography is done with a camera that records light in the infrared spectrum. Normal human sight covers light in the range of 400nm-700nm (from purple to red), while the infrared spectrum starts at 700nm. For a camera to record pictures with light above 700nm requires:
- The lens system must pass through infrared light
- The image sensor (or film) must be sensitive to infrared light
When developed decades ago infrared photography was of course done with infrared-sensitive film. Today we use digital camera's instead.
Infrared photography is not the same as thermal imaging. Thermal infrared images are much further into the infrared spectrum. Wavelengths used for photography range from about 700 nm to about 900 nm.
In other words Infrared Photography fits into a broader area of photography dealing with images captured in different light wavelength segments.
| Type of Photography | Discussion | Wavelengths |
|---|---|---|
| Ultraviolet photography | Taken with a camera sensitive only to the ultraviolet spectrum | 200-380nm |
| Normal spectrum photography | Taken in the visible light spectrum, using a camera that is not sensitive to infrared | 400-700nm |
| Full spectrum photography | Taken with a camera sensitive to both the normal light spectrum, and to the infrared spectrum, and possibly to the ultraviolet spectrum | 400-1000nm |
| Infrared photography | Taken with a camera sensitive only to the infrared spectrum | 700-1000nm |
| Thermal imaging photography | Taken with a camera sensitive to the far infrared | As much as 14,000nm |
Maybe you're not a scientist who's studying the a phenomena occurring in a certain light spectrum. Maybe you want to explore making artwork that looks like it's from another world. That's what infrared photography is about.
How is IR Photography done?
In a normal camera intended for normal photography, the manufacturer usually adds what is called an IR/UV Cut Filter. These filters block (a.k.a. Cut) light in the IR and UV spectrum, allowing light from the normal spectrum to pass through.
As I note elsewhere it's possible to modify a camera by removing that filter so the camera is then sensitive to IR light: DIY Convert Lumix DMC-ZS3 for infrared or full spectrum photography
There are several companies that convert cameras for IR photography. And there is at least one IR camera made by a manufacturer, the Fujifilm X-T1 IR.
Once you have certified the camera is sensitive to IR light, the next step is to block the visible light by using an IR filter. These filters look opaque because they block visible light, and only pass light above a certain wavelength. The filter will be marked as to the wavelength range it blocks. Some IR filters allow a small amount of visible light so the photographer can implement special color effects.
| Filter type | Discussion |
|---|---|
| 720nm | This is the typical IR filter, as typified by the Hoya R72 or Wratten 89b. This allows some visible light through for false color, and good contrast black & white. |
| 550nm | These were inspired by the "false color IR film" of yesteryear. This allows even more visible light, giving pictures with deep blue skies and blood crimson reds. |
| 590nm | These let in a fair amount of visible light. Leaves turn a golden yellow, and the skies are bright blue. |
| 620nm | These are a step in-between the 550nm and 590nm filters and the 720nm. With this filter leaves are a pale yellow and the skies are even brighter blue. |
| 850nm and above | These are good for a dedicated black & white IR camera. Pictures produced are close to traditional black & white IR film, without any post-processing. |
| Clear glass - Full Spectrum | In this case you replace the internal filter with glass, or simply leave out the internal filter. The camera sensor will than receive a light spectrum from UV to IR, which produces interesting effects, and might produce unwanted effects. |
| UV filter, which some call a "two spectrum filter" | These block UV light and allows all other light. Because IR light is passed, the picture includes all kinds of effects we cannot see with normal vision. Because UV is blocked pictures are a little sharper. |
| NDVI Blue IR filter (Blue +IR) | These allow through "blue" light and IR light, and are directly useful for NDVI (Normalized Difference Vegetation Index) crop analysis applications. Out of the camera the sky comes out a deep purple/blue and leaves are yellowish. While there are forestry and agricultural uses for this, it can also be useful in landscape photography because the images are so striking. |
What are the uses of IR photography?
Besides the possibility to create other-worldly pictures, IR photography can be useful in a wide range of circumstances:
- In wedding or portrait photography the skin can look softer, and most blemishes disappear
- Many dyes look different in the IR spectrum, making it easier to spot camouflage, counterfeit money, and to see through spills to recover an original document
- In astrophotography, some stars are visible only in UV or IR spectra
- Full spectrum photography is useful in analyzing the health of plants, in medicine, in forensics, and other fields
- Night vision cameras usually peer into the infrared spectrum
Shooting infrared photographs
For the most part taking a picture in the infrared spectrum is the same as regular photography. You follow whatever composition strategy you prefer, like the rule of thirds, and arrange your subject, then shoot the picture. But there are a few considerations to follow.
Since the IR filter is so dark you might not be able to see to frame the shot and focus. If you're using a removable filter it may be necessary to put the camera on a tripod, then frame/focus before attaching the filter.
It may also require experimenting with metering modes to see how well the camera performs with an IR filter. It may be necessary to use a long exposure with the camera on a tripod.
The color shifts are fairly predictable, and you'll need to learn how to see a scene as it will appear in IR. Green plants will show up as a tan or white color, and the sky will show up as a darker blue.
The colors straight out of the camera might not look that way. Instead the picture will often mostly have pink/tan colors that don't look good. It'll be useful to shoot in RAW mode for greater flexibility.
In the camera it's possible to manipulate the white balance using a photographers grey card.
Back on your computer in the photo editing software, most apps have a white balance slider and you can select something in the picture that should be white. Also play with the contrast slider.
Another technique is to use channel mixing to swap the blue and red channels. In Photoshop this is done in Image > Adjustments > Channel Mixer. To swap red and blue, on the blue channel you select red for 100%, and on the red channel you select blue for 100%.
Another possibility is converting the picture to black & white. Before doing so the red/blue channel swap is helpful.


")
 Starter Kit (32 GB EVO+ Edition, Premium Black Case)")


