David Herron
Tags: Photography »»»» Infrared Photography »»»»
An infrared picture straight out of the camera usually has a strong pink overcast, and you're probably thinking "I paid how many dollars to convert a camera to get garbage pictures like this?" After quite a bit of studying and learning, I'm finally getting the hang of making interesting-looking pictures with simple photo editing tools (like Gimp or Graphic Converter) from pictures taken with a converted infrared camera. There are some simple techniques like swapping the red and blue channels which are widely recommended, but that's just the start and of course photo manipulation programs have a zillion options to explore.
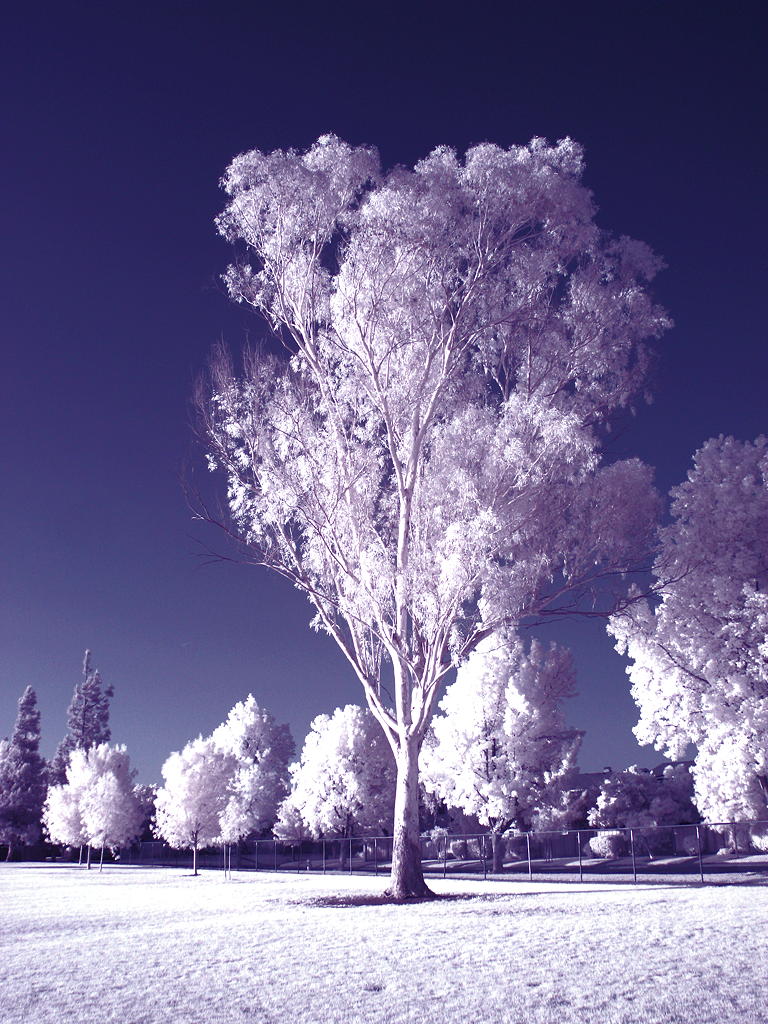
Canon Powershot G6 - tree image
I have a Canon Powershot G6 - a very old-school digital camera - that had been professionally converted to infrared in 2005. It has an internal filter that's probably set for 720nm. This picture was shot in November 2006.
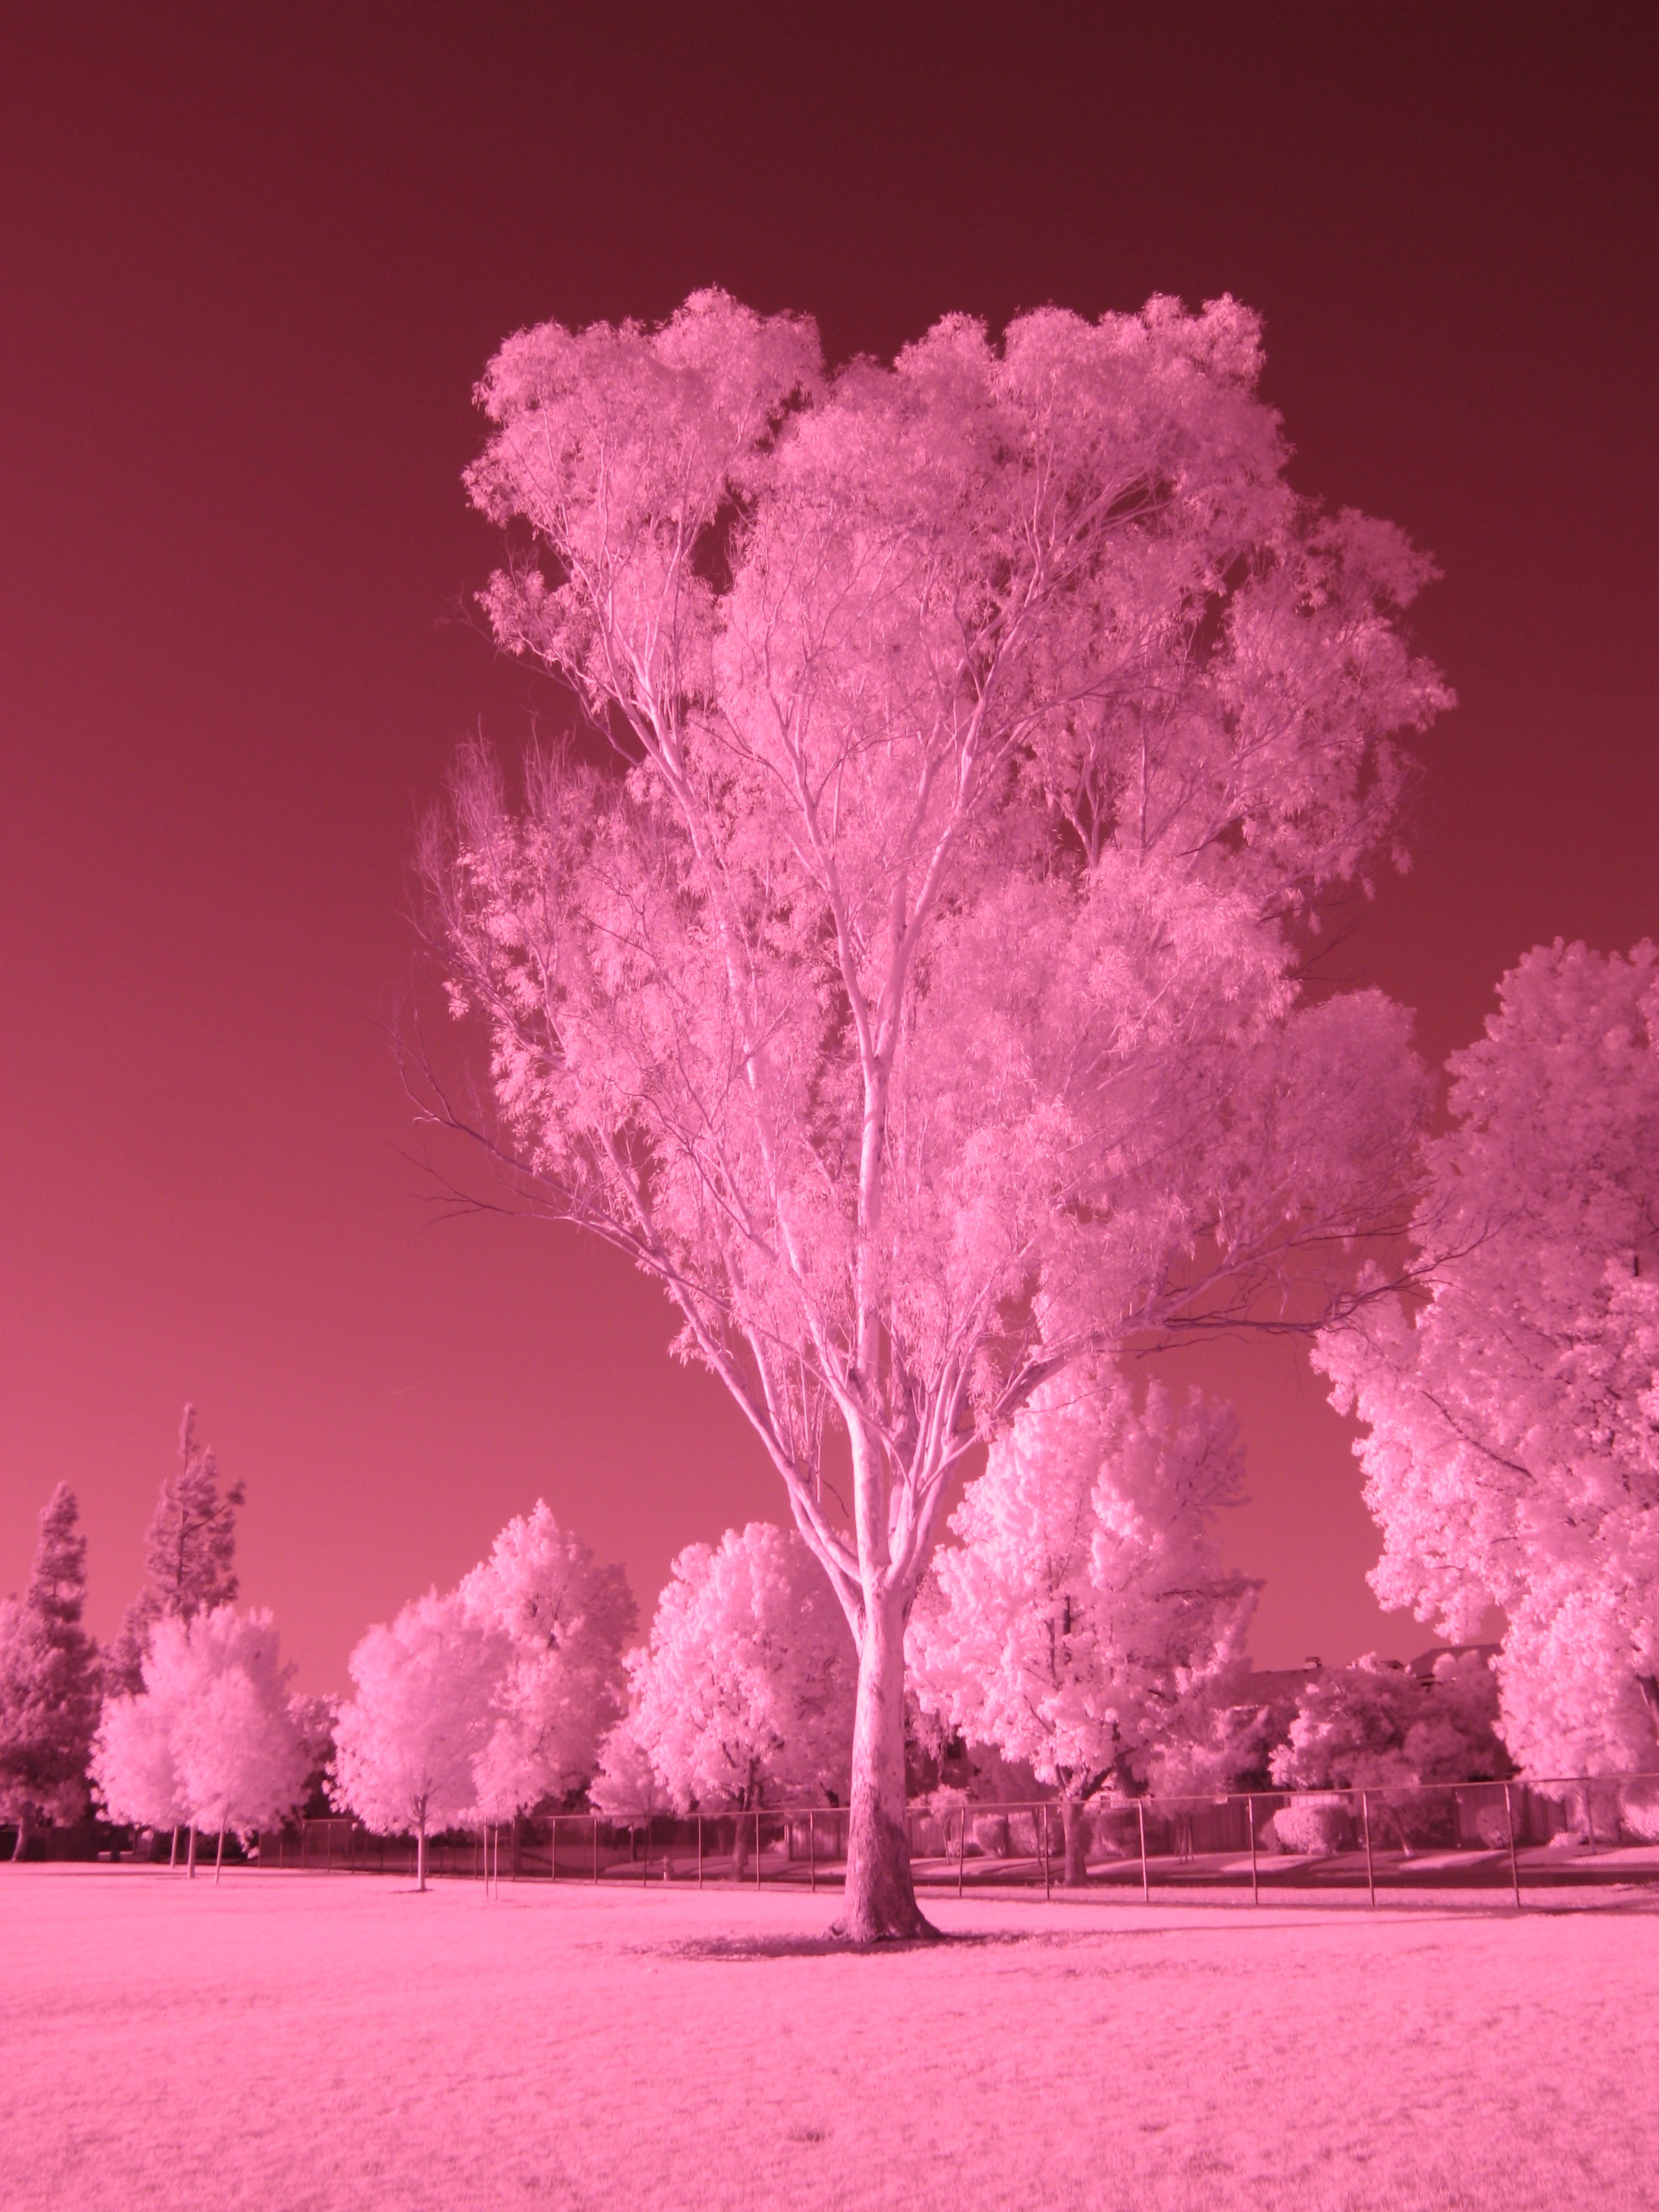
This is typical for pictures coming out of a camera converted for infrared photography. The image sensor is mostly seeing Red information, because the infrared filter is blocking all visible light. We obviously cannot convince anyone to like infrared pictures with yucky images of this sort. Post-processing is required to make something that looks nice.
For this example I used Graphic Converter, a photo manipulation and editing tool for Mac OS X. As we go I'll also discuss how to do similar changes using Gimp (or other apps) to process/edit infrared pictures.
White Balance
It's widely recommended to use a camera that can set the white balance. Obviously in the infrared the camera doesn't have a clue what white looks like. For example the recommendation is to point the camera at some grass to set the white balance - because in the infrared grass looks white.
In this case I took the picture 15 years ago, and lacking a TARDIS I can't go back in time to set the white balance in the camera. But, even if I could go back in time, the camera in question doesn't even support setting a custom white balance. How do you take a good infrared picture with a camera that doesn't support a custom white balance? Fortunately most photo editing programs (Gimp et al) can manipulate the white balance.
The first step - if your photo editing program supports layers (as Graphic Converter and Gimp do) - duplicate the layer. You're about to make a change to the photo and with the duplicated layer you can easily flip back and forth to see how well the change worked out.
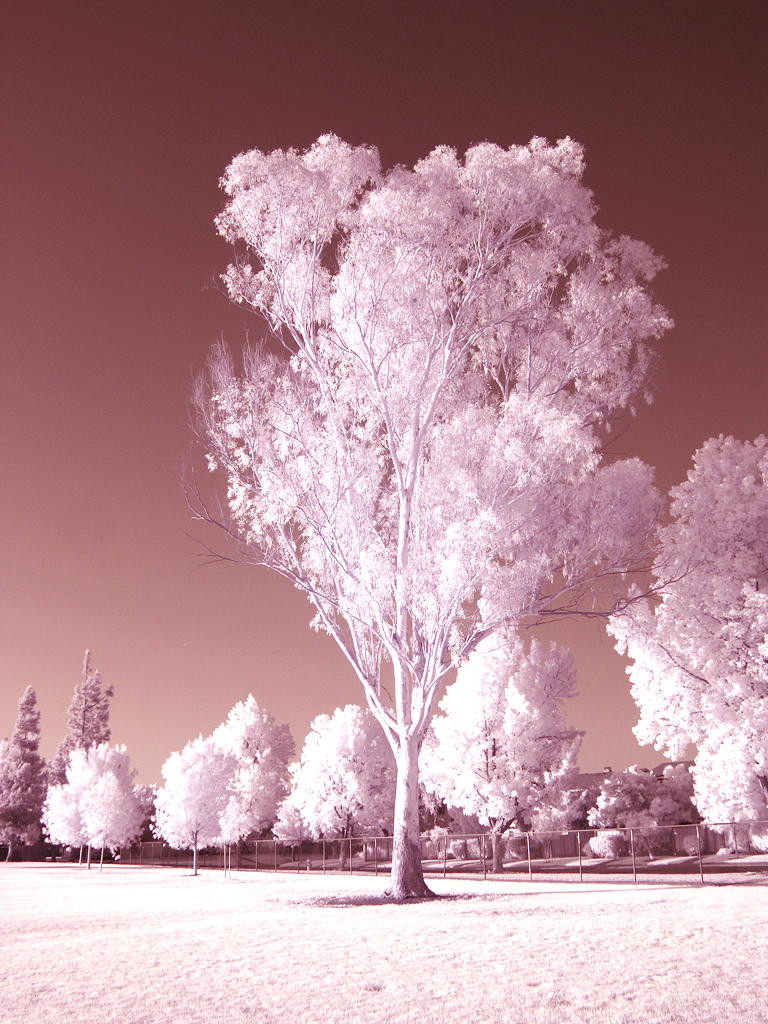
Immediately the picture is so much better. We could almost stop here (after darkening it a bit) because it looks like an old-school black-and-white infrared photo. We'll take this a bit further, but we first need to talk about what I did.
In Graphic Converter (and some other programs) you can set a custom white balance using a color picker to select a section of the picture that should be white. Gimp's white balance tool doesn't support this, unfortunately, since it only has an "automatic white balance" tool.
For Graphic Converter the "Effect" menu has a choice named "White Correction". It asks you to click on a place in the picture that should be taken as white, and it recomputes the image appropriately.
This is very similar to setting a custom white balance in most digital cameras. In the camera you're asked to point the camera at something that should be taken as "white" and the camera sets its white balance appropriately.
In the infrared - since grass or tree leaves show up as white - the recommendation is to set white balance using grass or trees as the reference point.
Therefore - for this picture, when asked to set the white balance point I clicked on the grass.
Swap red and blue channels
This picture is pretty good. However there are two changes that need to be made. One is there's still a pinkish tone. Secondly, it looks overexposed.
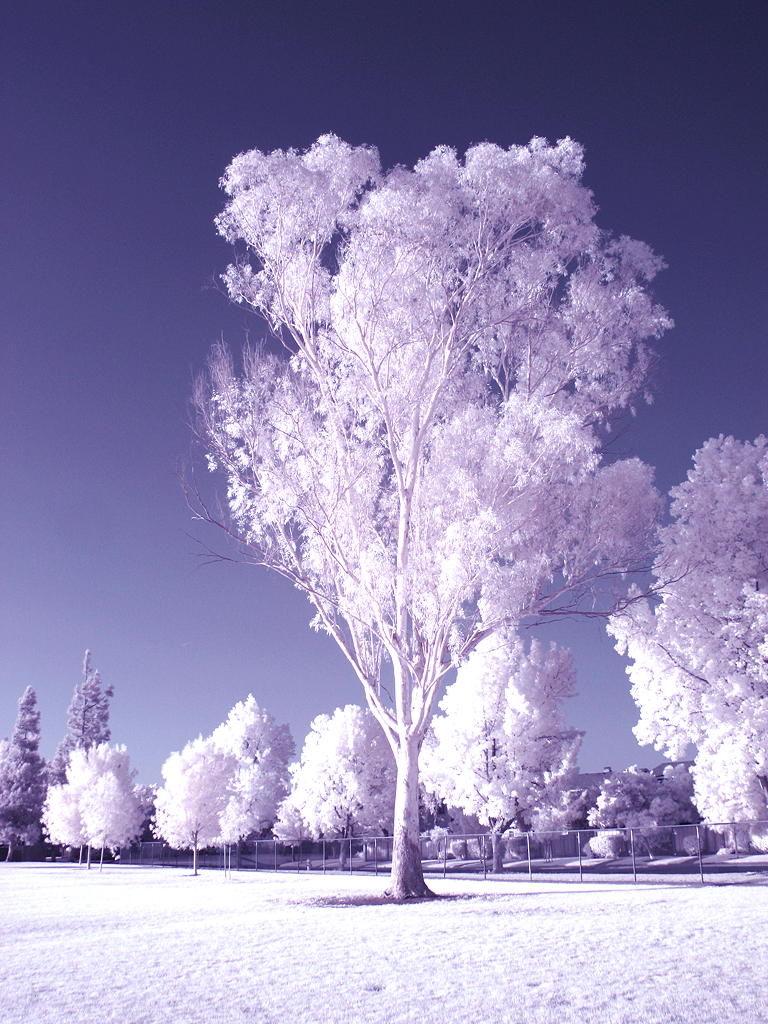
The next common recommendation is to "swap the red and blue channels".
The first time I heard that I went "swap the what?" I think what's meant is - each pixel in an image is made of a Red, Green, and Blue value. To swap red and blue means, for each pixel, to take the Red value and put it in the Blue slot, then take what had been the Blue value and put it in the Red slot.
As you can see the image improved tremendously. No pinkish hue. If nothing else it looks too blue, maybe.
In Graphic Converter, in the Effect menu there is a sub-menu named Channels and one of the choices is Swap Red and Blue. That's easy enough. In other programs, like Gimp, you are instead put into a dialog box and there's a little mumbledy-foo to manage the swap.
Namely - in Gimp, on the Colors menu, there is a Components sub-menu. In that sub-menu is a choice to bring up the Color Mixer dialog box.
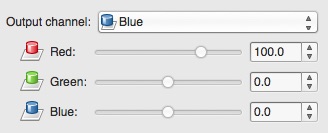
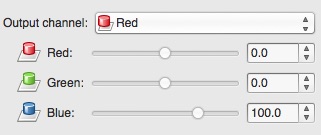
The color mixer allows arbitrary reshuffling of values from one channel into the other channels. For instance you could take the Red channel values, make the Red channel read "0" then the Green and Blue channel to have whatever value was in the Red channel. That's kind of arbitrary and would have a very strange result, so let's not get distracted with what that would actually look like.
In any case what we show here is the Color Mixer settings to assign red values to the blue channel, and blue values to the red channel.
Darkening the picture
The image looks much better but it still looks too dark. And maybe it has a bluish tone.
However as we see, darkening the picture a bit really improves it. I don't feel the tone is overly blue now, plus all kinds of details pop out. I can see the tree branches, and texture in the grass, and to some extent texture in the leaves.
In Graphic Converter I simply used the Brightness with Curve dialog. Every photo manipulation program has an option for lightening/darkening an image. Just use that tool.
Setting levels
Another useful tool is the Levels tool. Most photo manipulation tools have a tool like this, but in Graphic Converter it's not as comprehensive as for other applications (like Gimp).
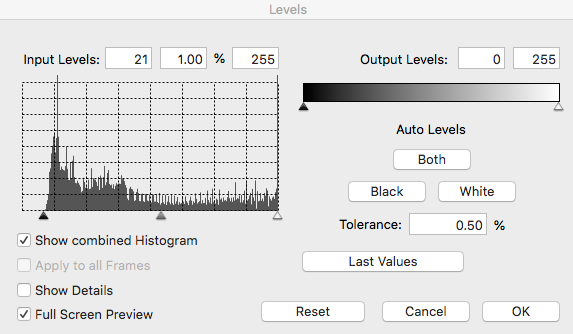
What's shown is the histogram of the picture. What that means is for every possible R/G/B value, how many pixels have that value. Sort of. In Graphic Converter it's only showing you a combined histogram. In other programs, like Gimp, you're shown the Red and Green and Blue values separately in the histogram, and further in Gimp you can set levels for each channel separately.
What does "setting levels" mean? It means moving the triangle from the edge of the histogram to wherever there starts being values in the histogram. As shown here - there were no values towards the black end of the scale, so I moved the left-hand triangle up to where the histogram started to have values.
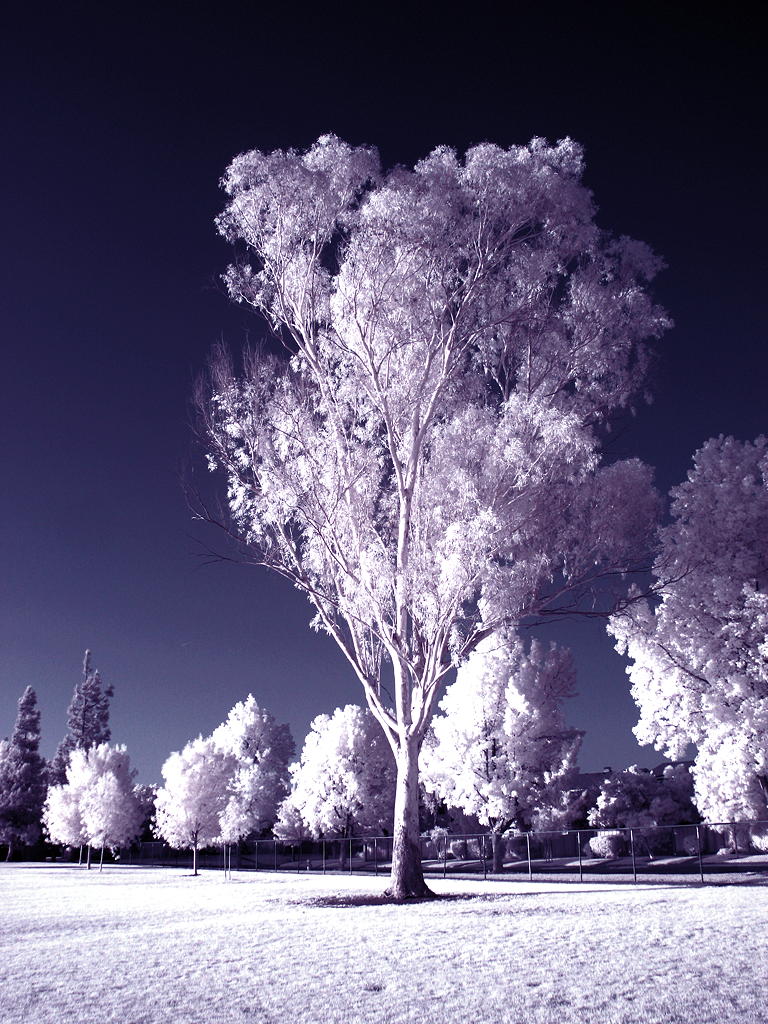
The result? Looks even better if you ask me.
Canon Powershot G6 - San Francisco Bay
To prove that wasn't a one-off success, here's another shot from the same camera taken the same day.
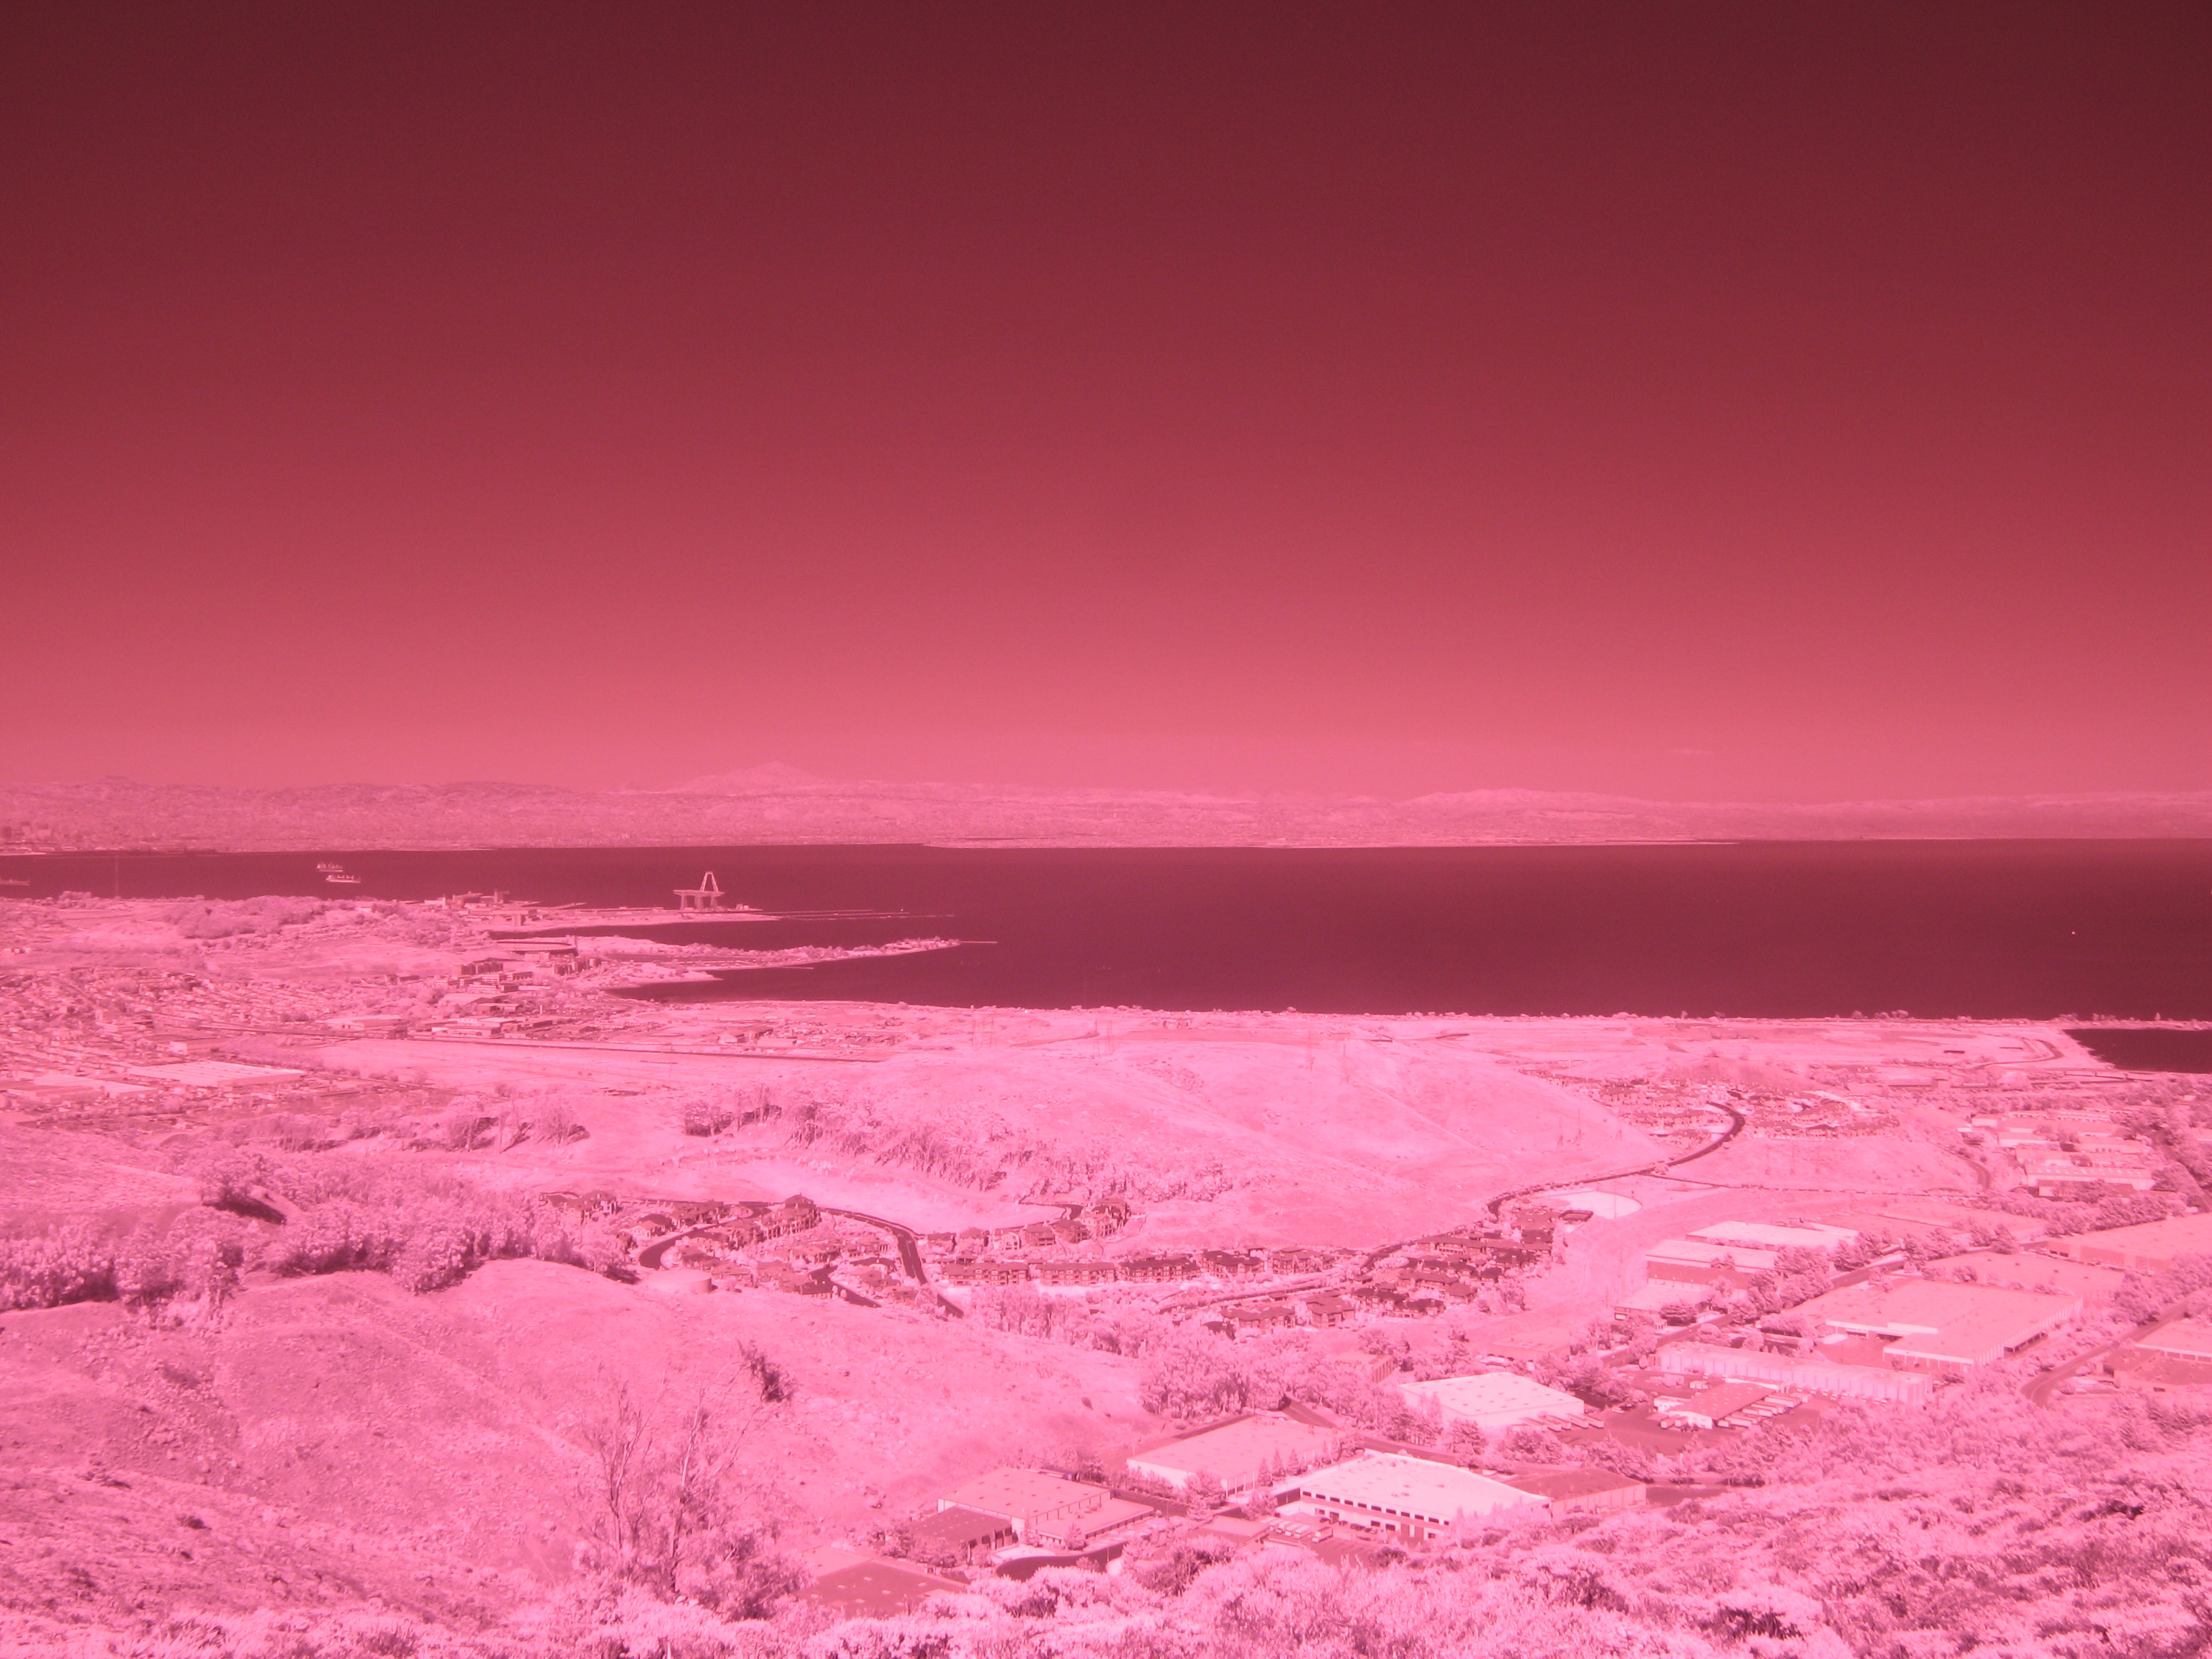
Near as I can tell this was taken on San Bruno Mountain looking towards the East Bay hills across the bay. In the foreground is the naval yard that used to be located near Candlestick Park - both of which are now gone in the name of urban revival.
The important thing is - it's the same yucky pinky colors.
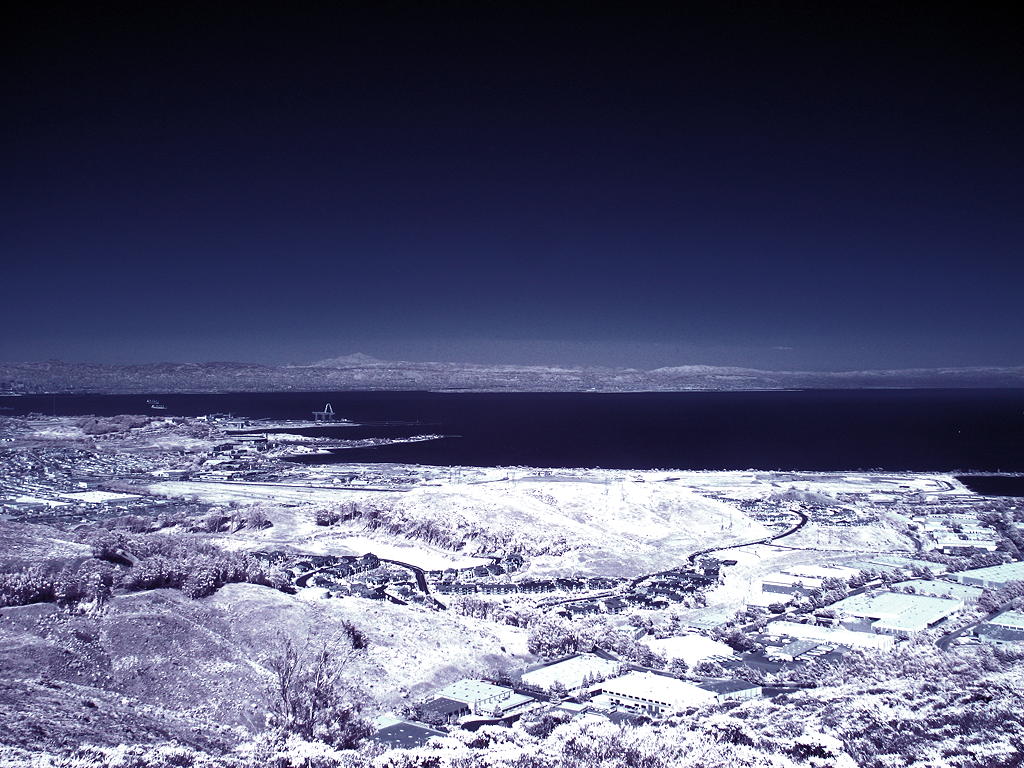
After the same steps in Graphic Converter we end up with this. Upon darkening the picture sufficiently a whole lot of detail popped out, including the mountains in the East Bay.
I especially like how the vegetation and buildings in the foreground turn into this grey and white crinkly thing that looks like it just snowed. But this is the San Francisco Bay Area where we don't get snow like that. The effect is even more pronounced if you darken it further (not shown here).


