David Herron
Tags: Photography »»»» Infrared Photography »»»» Night Vision »»»»
If you have an old digital camera gathering dust in a corner, you can easily convert it into a night vision camera. The difficulty level is generally easy, but does depend on how the camera you choose is built.
The purpose of this article is demonstrating reusing an old digital camera along with an infrared illuminator to create a night vision camera. Since it is a camera this allows you to take pictures or movies at night, or to simply use the camera as a night vision scope.
"Infrared illuminator" is simply a fancy phrase for "infrared light" or "infrared flashlight". For there to be infrared at night that can be seen by the camera we need a source of infrared light. The infrared illuminator serves this purpose.
Everything shown in this article is very inexpensive. Suitable camera's are easy to find for low cost on eBay or elsewhere, and IR illuminators are very inexpensive.
The process is relatively simple:
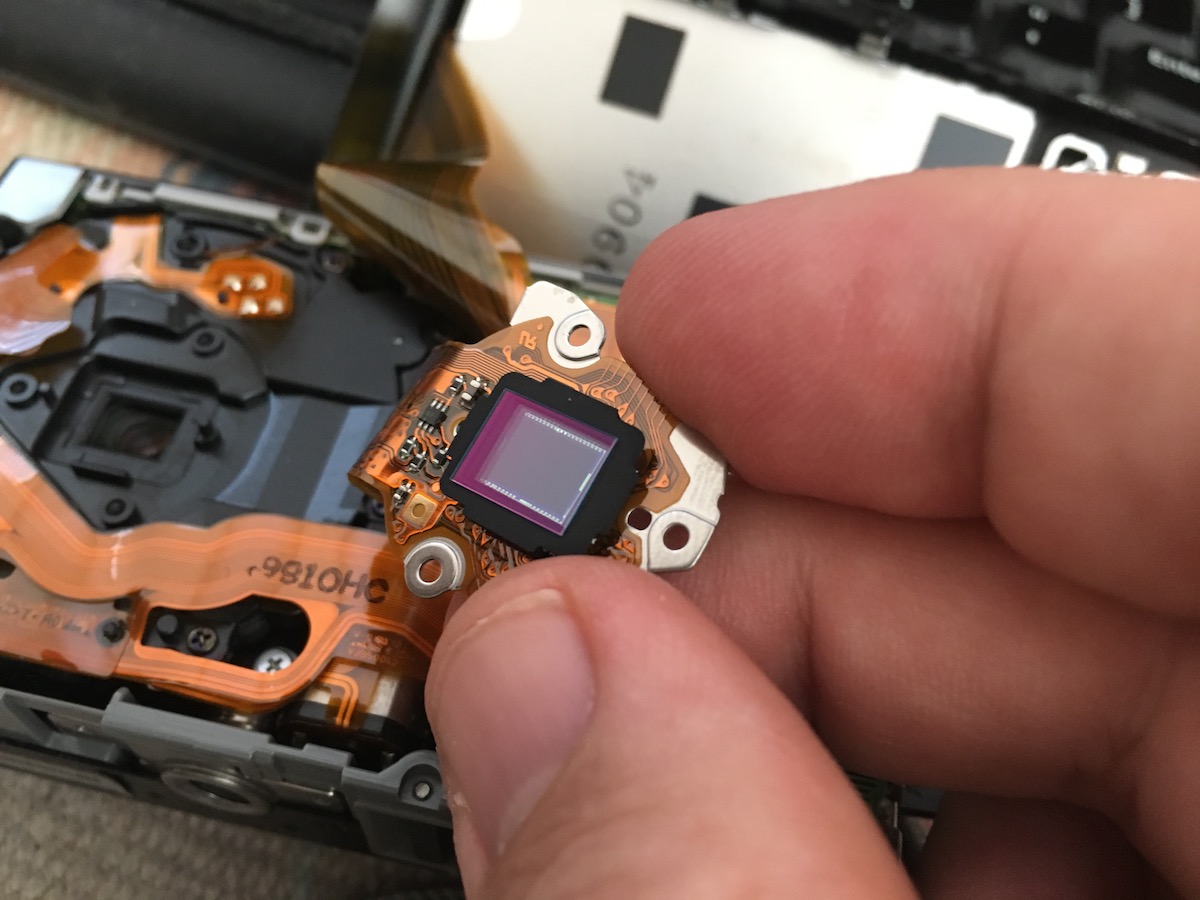
- Disassemble the camera, to extract/remove the UV/IR "Cut Filter"
- Attach an IR LED to the camera
- Power said LED from the camera's battery pack, along with a switch to turn the LED on and off
Some of those steps may be difficult for certain camera's. But that's the basic procedure. How this works is:
- By removing the "UV/IR Cut Filter" the camera can now see infrared light as well as visible light
- The IR LED emits infrared light
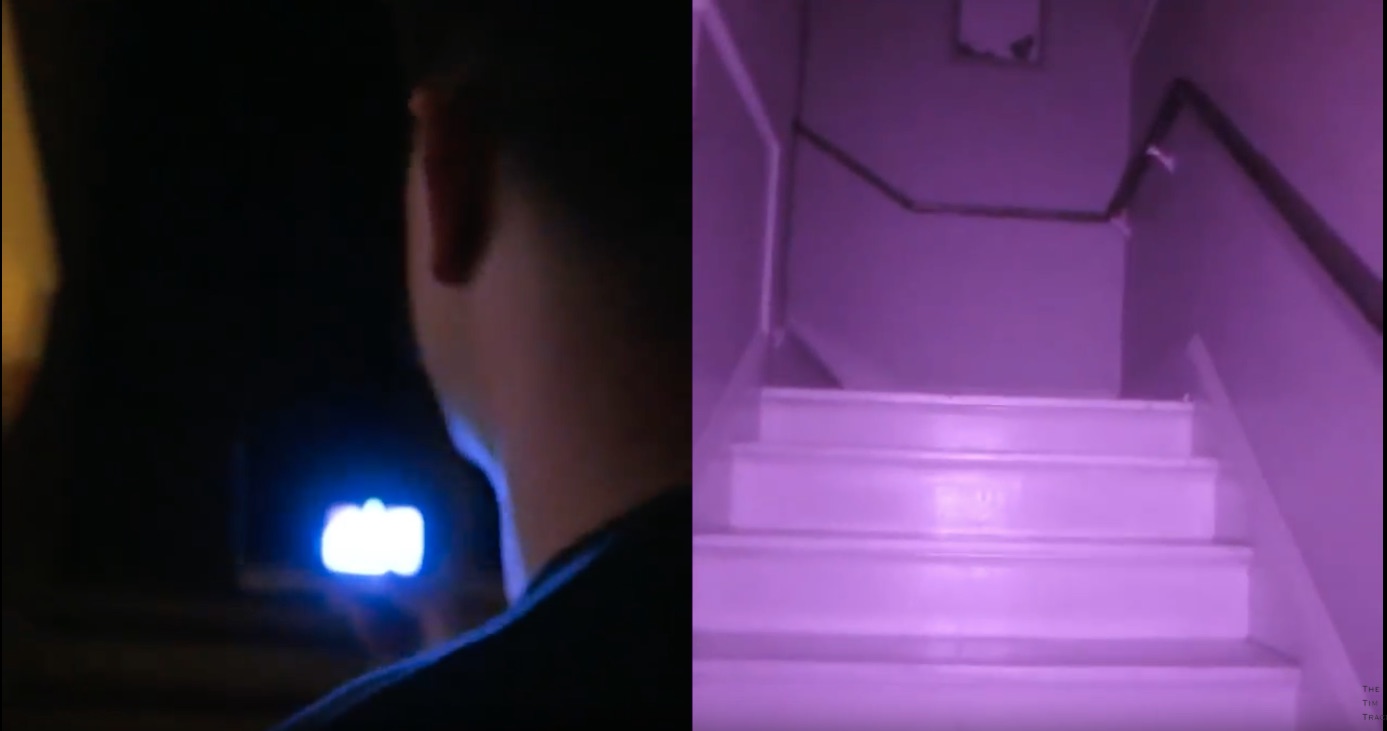
- Therefore the IR LED acts like an infrared "flashlight" illuminating the scene, so that the camera can see things in what looks like pitch dark
What does the UV/IR Cut Filter do?
Maybe you're reading this and wondering What's an UV/IR Cut Filter? I don't blame you, because I didn't really understand this until I started looking into infrared camera's.
An "UV/IR Cut Filter" cuts both ultraviolet and infrared light. "Cuts" in this case means "blocks" meaning that it prevents UV and IR light from getting to the camera sensor.
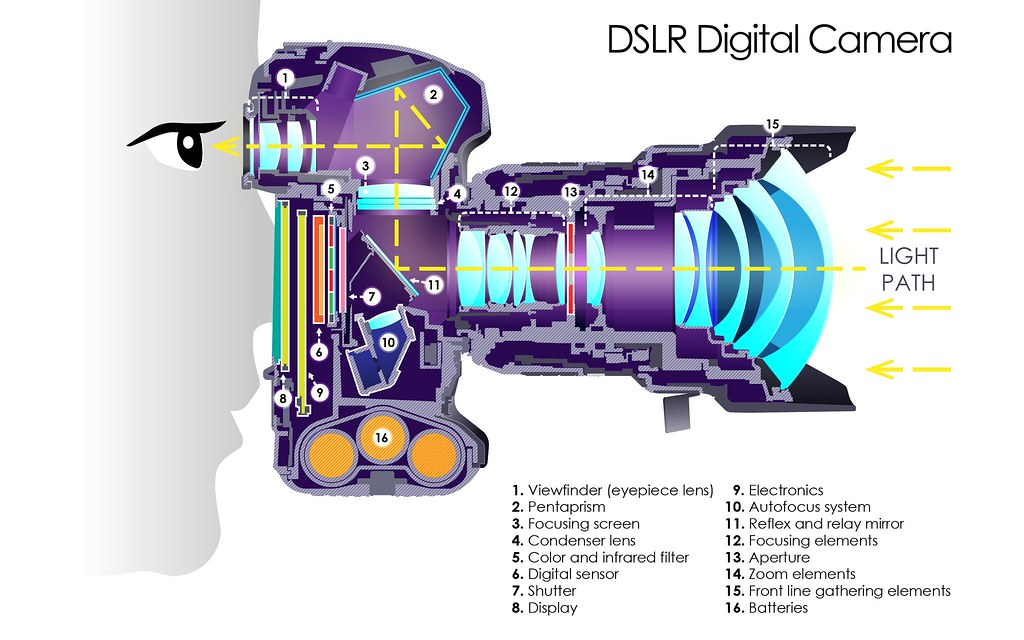
Take a careful look at this diagram. Item 5, Color and infrared filter is what I called UV/IR Filter above. Notice that it is located directly in front of the sensor, and behind the shutter.
While this shows a DSLR camera, even a cheapo digital camera is built to the same pattern with a UV/IR filter just in front of the sensor.
Therefore to make a camera able to "see" infrared light, one simply removes that filter. Indeed see DIY Convert Lumix DMC-ZS3 for infrared or full spectrum photography
But, for some camera's this is an "easier said than done" sort of task.
What makes a night vision camera?
Once you've removed the IR filter does a camera magically see in the dark? No. The camera cannot see light that is not there. Camera's sensitive to the infrared are not the same as thermal camera's, since thermal camera's record a completely different light spectrum.
There are two ways that "night vision camera's" work.
- Light amplification where scant infrared light is beefed up -- "night vision" means it's pitch dark, and you're dealing with very little light
- Shining infrared light on a scene
For a budget DIY conversion of a night vision camera, it is a lot easier to add infrared light to a scene. Therefore in this article we'll focus on the second method.
Recapping the project
We now understand that in theory we need to do these things:
- Remove the IR filter so the camera can see infrared light
- Attach an IR illuminator to the camera
- Ensure the IR illuminator has power
In the following sections we'll go over each step in detail.
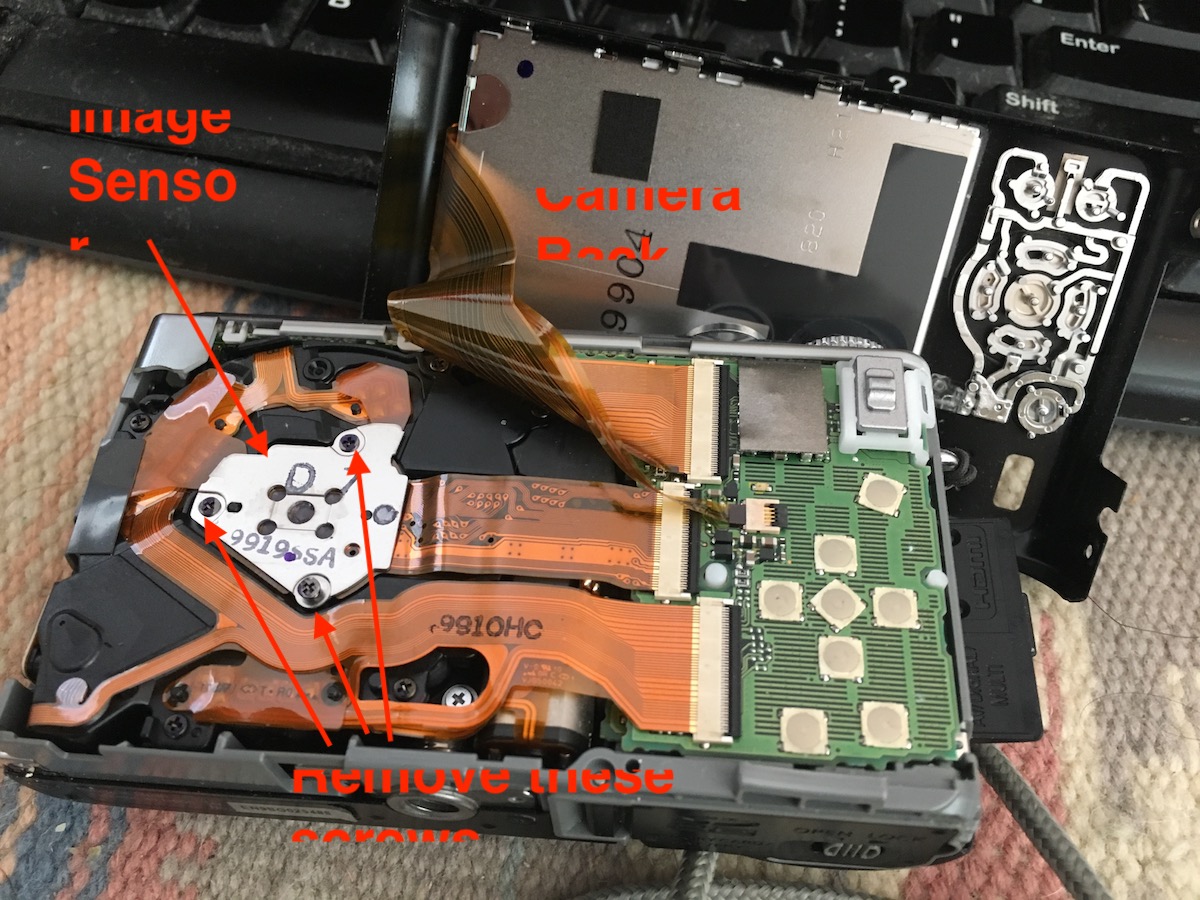
Removing the UV/IR Filter
Each digital camera is built differently. What's needed is to research the process for the camera you've chosen. In a companion article (DIY Convert Lumix DMC-ZS3 for infrared or full spectrum photography) we show how to convert a Lumix DMC-ZS3 to be an infrared camera. That article will give you an idea of the process, as will the video linked below How To Make A Night Vision Camera Out Of A Regular Digital Camera DIY!!!.
The DMC-ZS3 is a very easy conversion, and that camera (or any others in the ZS range) has a very rugged feel to it. Some other cameras are harder to convert - in one of the videos below you see the Canon Elph conversion process in detail, and I sure do not want to do that one.
Infrared Illuminator's
A modern infrared illuminator is one or more LED's that emit infrared light. While there are prebuilt illuminator devices with built-in LED's, it is also possible to buy the LED's and build your own device.
Infrared LED's
Here are a few example infrared LED units available on eBay.
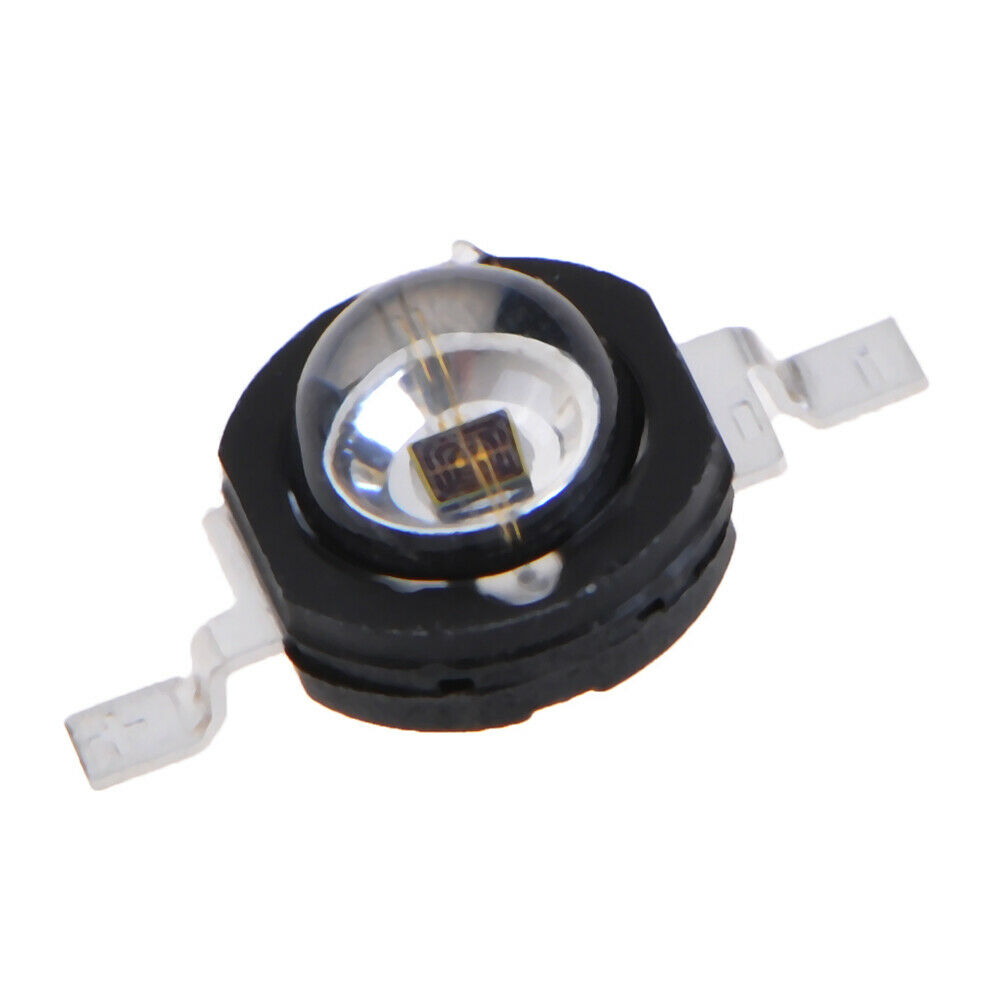
3W high power 850nm Infrared LED
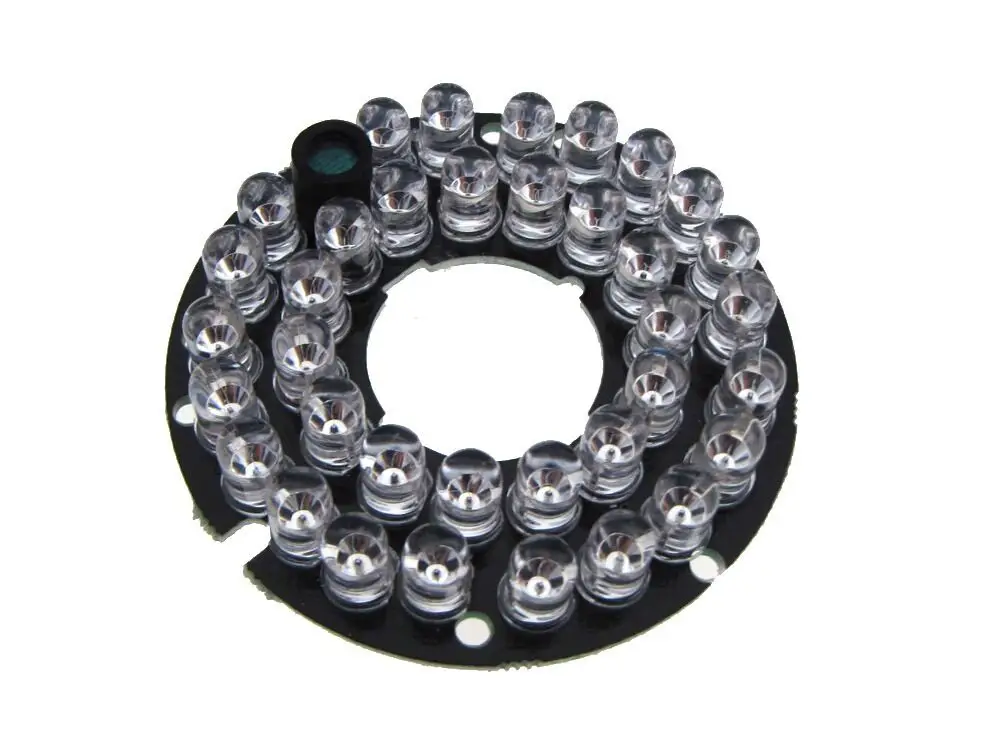
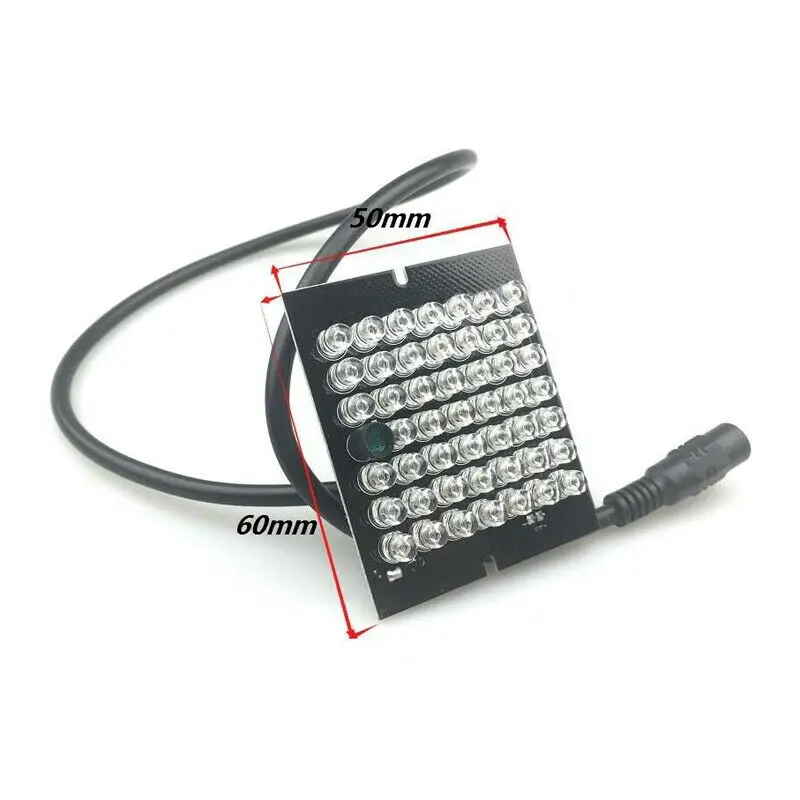
36*LED 850nm IR Infrared Panel
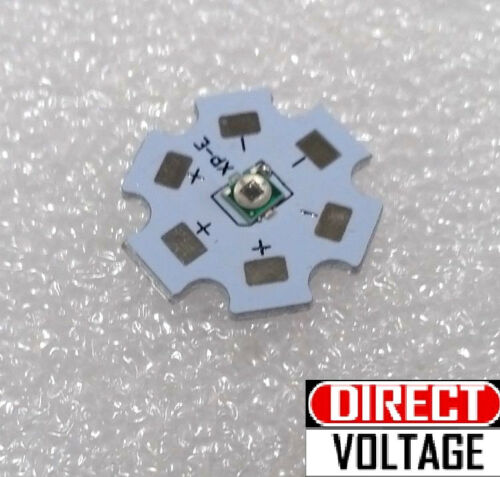
3W 850nm Infrared LED Light

SFH485P Infrared IR Emitter LED GaAlAs 5mm 880nm
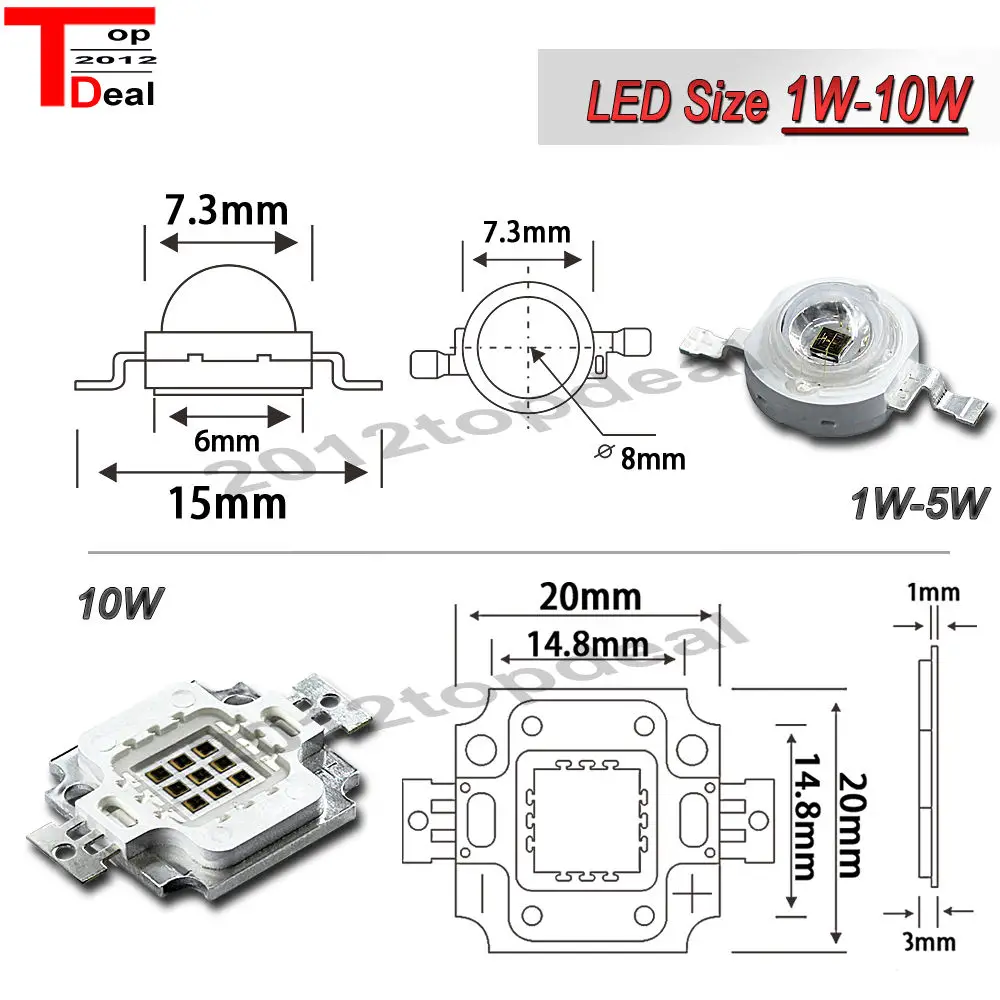
3W 10W 20W 50W 100W 200W 850nm/940nm/740 Infrared IR High Power LED
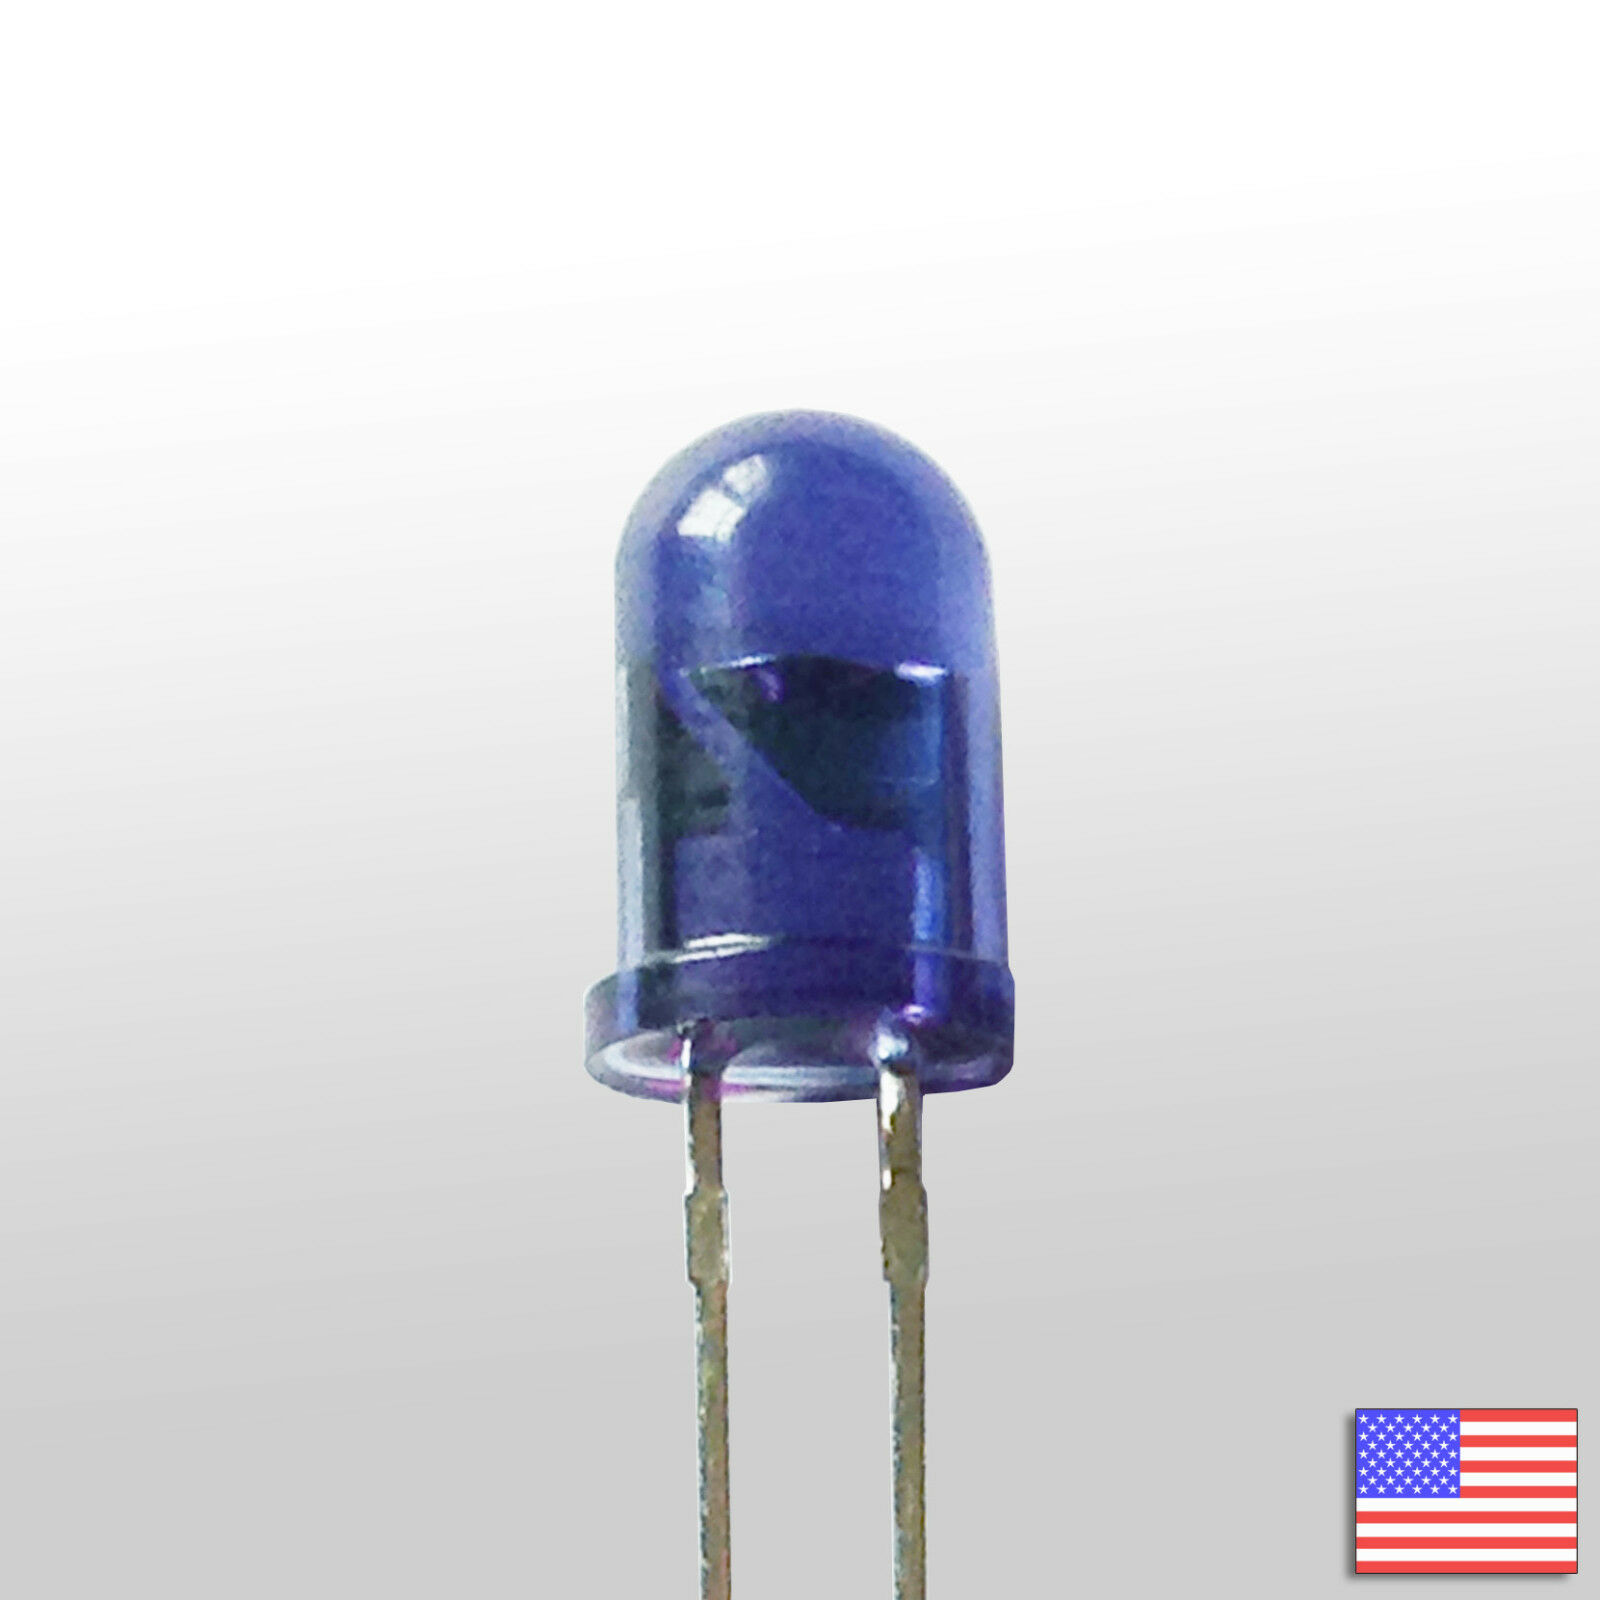
TSAL6200 Infrared LED - High Power 5mm 940nm
Building an illuminator device from LED's means soldering a string of LED's in series. With each of these there is one connector marked "+", or the positive terminal, and another marked "-", or the negative terminal. To construct a circuit we simply connect the "-" on one to the "+" on the next, and the "-" on that to the "+" on the next, to connect a set of LED's in series. The voltage required for such a circuit depends on the number of LED's you wire in series.
On eBay you can find these products at
Infrared LED
When building such a device it might be useful to have an adjustable DC-DC converter. The camera will have a battery pack, and it will be most convenient to tap that battery pack to drive the IR illuminator. The DC-DC converter is useful for matching the battery pack voltage to what's required to drive the LED string. On eBay some product names to search for are:
-
DC Adjustable Buck Module With Digital Voltmeter Display
-
-
-
Infrared illuminator products
Maybe you're looking at those LED's and thinking "not me". Fortunately for us there are pre-made products containing infrared LED's that you just connect to a power source.
On eBay search for
Infrared LED illuminator
Night Vision IR Infrared Illuminator Light lamp 60 degree 48 LED

INVISIBLE INFRARED LED ILLUMINATOR PANEL
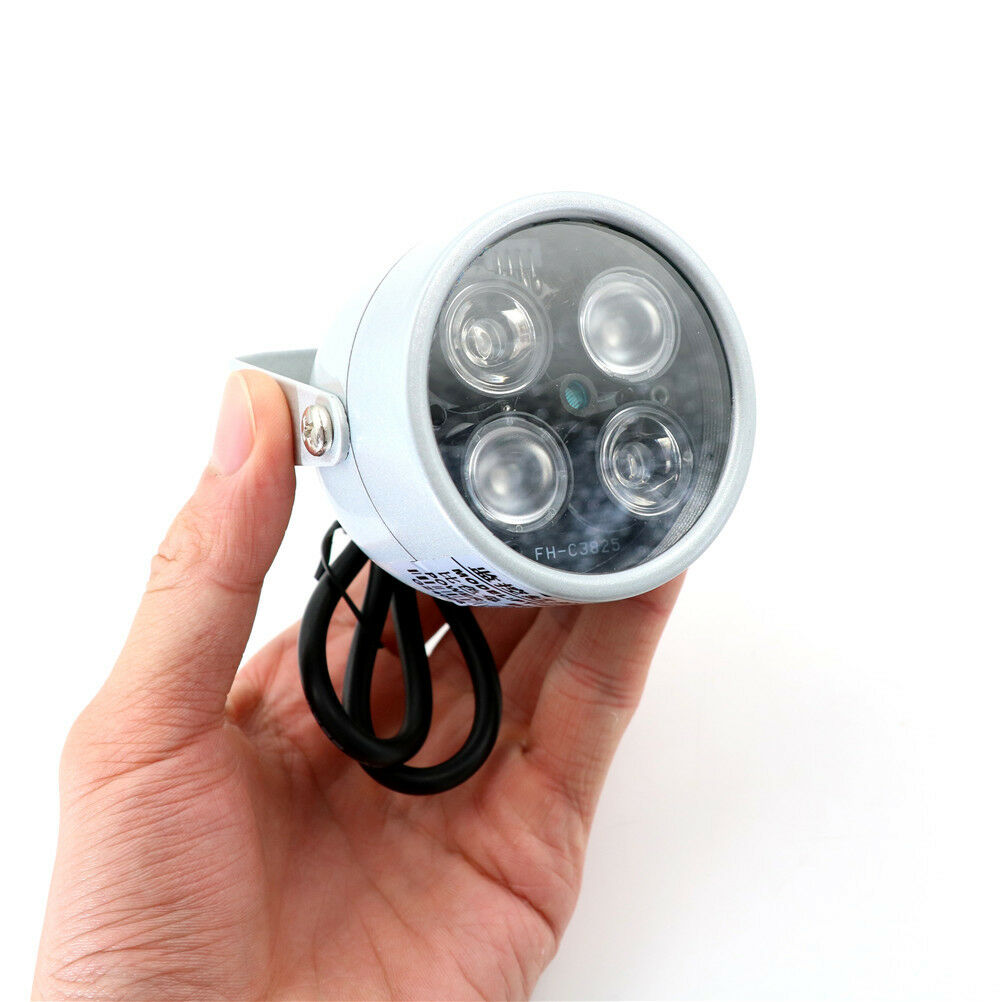
4Array IR LED Illuminator Light Infrared Nights Vision
Each of these devices requires a 12 volt input. To build up a system then might require a DC-DC converter to, as mentioned earlier, convert the camera battery pack voltage to the 12 volts required for these modules.
Another option is an infrared flashlight as shown in one of the videos linked below (IR Camera conversion - Convert your old camera for night vision & IR photography). An infrared flashlight is even simpler to use than the IR illuminator, since it is powered by a built-in battery. A suitable eBay search is
infrared flashlight.
Powering the IR Illuminator
The videos linked below kind of gloss over this issue, but of course the infrared illuminators require electricity. A simple method is to simply acquire a normal USB power bank, especially one that supports USB-C Power Delivery. Such things are inexpensive and compact and are easy to recharge and easy to use.
But it is also easy to build your own battery module, if desired.
To match up voltages - the battery pack you use might not have a compatible voltage that's required for the IR illuminator module you've chosen - it may be necessary to use a DC-DC converter. These devices have an input side supporting a range of voltages, and produce an output voltage. The actual output voltage is adjusted by turning a screw.
Putting the parts of the DIY Night Vision camera together
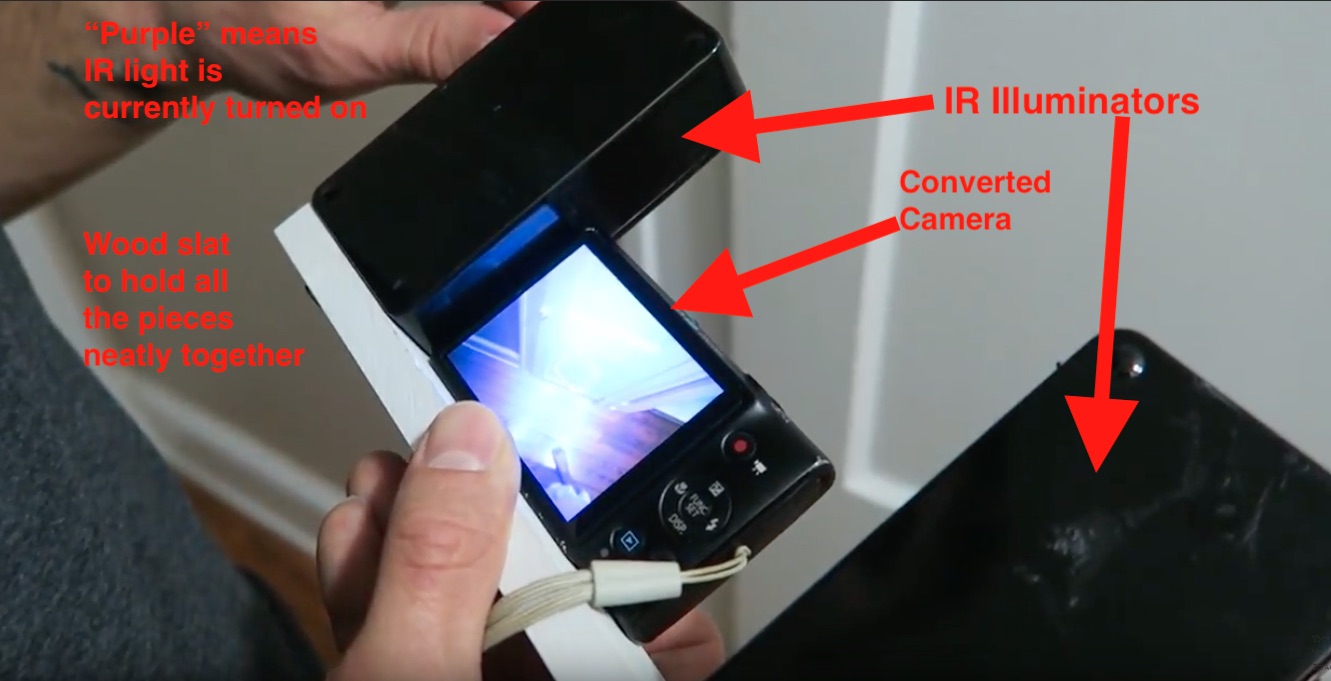
There are several pieces here, the camera, the IR illuminator, and possibly an external battery pack for the illuminator. How do you hold everything as a convenient unit? The video linked below (How To Make A Night Vision Camera Out Of A Regular Digital Camera DIY!!!) shows one possible method, and the images here are screen captures of their rig.
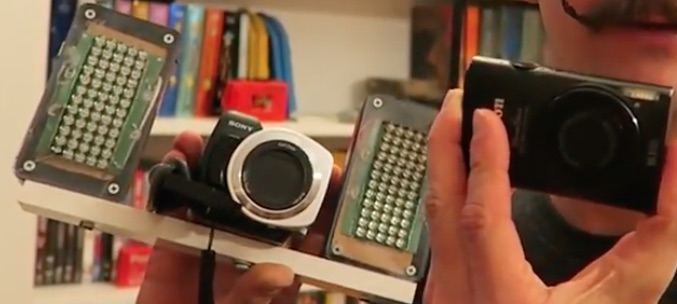
This image shows their previous night vision camera rig. The camera in the middle is an old-school camcorder that was modified to be IR sensitive, and the boxes on each side are the front side of the IR illuminators.
The key for this sort of rig is that every piece of camera equipment has a standard camera tripod mount. The screw thread for a tripod mount is a simple 1/4-20 size, and it is easy to get compatible screws at any hardware store.
Therefore to build this rig, you simply get a suitable piece of wood and some 1/4-20 screws and simply screw the camera and the equipment (IR illuminator, battery packs, etc) to the piece of wood. Voila, you have a nicely packaged unit that can be stashed in a bag, or held with one hand while working in the dark.
Videos
How to Make a Night Vision Camera From a Regular Digital Camera (Infrared IR) -- An amateur astronomer needed a way to see things while in the field at night with his telescope. He converted an old digital camera along with an IR illuminator, powering the whole rig off a 12 volt power supply.
IR Camera conversion - Convert your old camera for night vision & IR photography -- Converted an old Canon Digital Elph camera, removing the IR filter. Uses an IR flashlight as an IR illuminator and gets amazing range with the flashlight. This video also demonstrates you can use an IR camera to detect security cameras, since most security camera's have IR illuminators.
GoPro Hero infrared night vision modification with sample footage -- The GoPro Hero has a replaceable lens, and the default lens has the UV/IR Cut filter built-in. There are 3rd party lenses available for a variety of purposes, including ones that pass IR light. Then with a bit of ingenuity an IR panel similar to ones listed above can be mounted on the camera.
How To Make A Night Vision Camera Out Of A Regular Digital Camera DIY!!! -- Demonstrates conversion of a Canon Digital Elph, and a system for mounting two infrared illuminators.
Turn any Web Cam into an Infrared Night Vision web cam within 5 min -- Shows conversion of a simple USB webcam to view infrared.


