David Herron
Tags: Apple »»»» Mac Mini »»»»
The 2014/2015 Mac Mini is still, in 2018, the "current" Mac Mini model, and its biggest problem is the great difficulty to upgrade the device. While it is impossible to replace the memory it is possible to replace the hard drive, so long as you bought the upgradeable Mac Mini. Namely the version sold with an HDD. The other, with PCIe SSD, does not support upgrading the disk. You can save some money by purchasing the HDD version and upgrading to SSD on your own, however performance is higher with the PCIe version. The videos attached to this post document the overly unnecessarily difficult process for upgrading such Mac Mini's to have an SSD. You have to remove everything just to swap the disk? And you can't change the memory? The Intel NUC is in the same class of machine, and does not require this kind of over-the-top surgery.
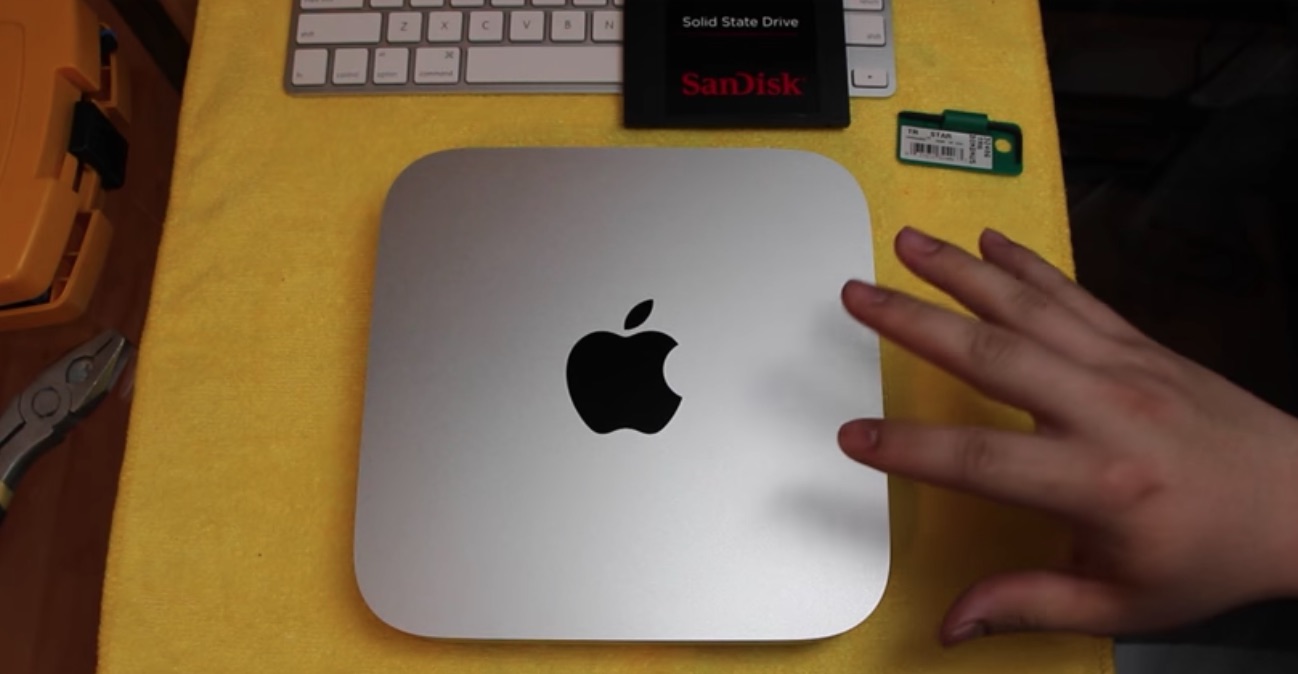
Start by removing the bottom of the machine. The Mac Mini 2014/2014 was a departure from previous models. In 2012 and before this round bottom easily twisted off and you had fairly easy access to the innards. In 2010 and before you were required to use a putty knife to open the machine. With this model you use a simple pry tool or some kind of stiff card. The bottom kind of simply snaps off as shown in the video.
Apple should be embarrassed over degrading the upgradability. With 2012 and earlier Mac Mini's you had fairly easy access to the innards. And of course the Intel NUC is a better Mac Mini than the Mac Mini.
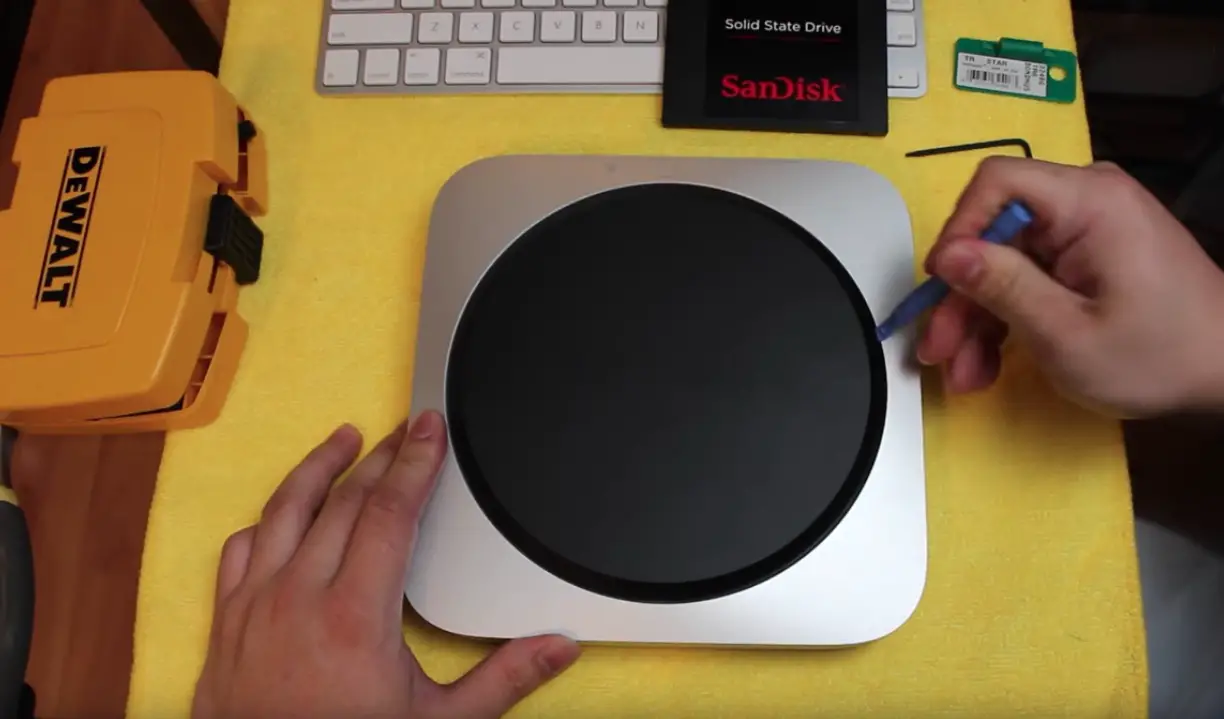
On the other hand this step is fairly straight-forward to perform.
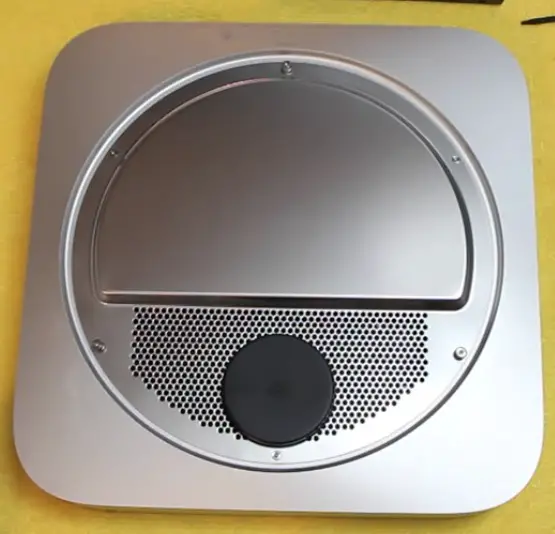
Now we are greeted by a metal wall. This is held down by "tamper-resistant" TR-6 screws.
While these are special screws, the corresponding tool is readily available and looks like a simple allen wrench.
There are six screws. Pay attention to which comes from what hole, since you have to put them back in the correct holes.
The black round part is the WiFi antenna. When removing the metal plate be careful because of the WiFi antenna wire.
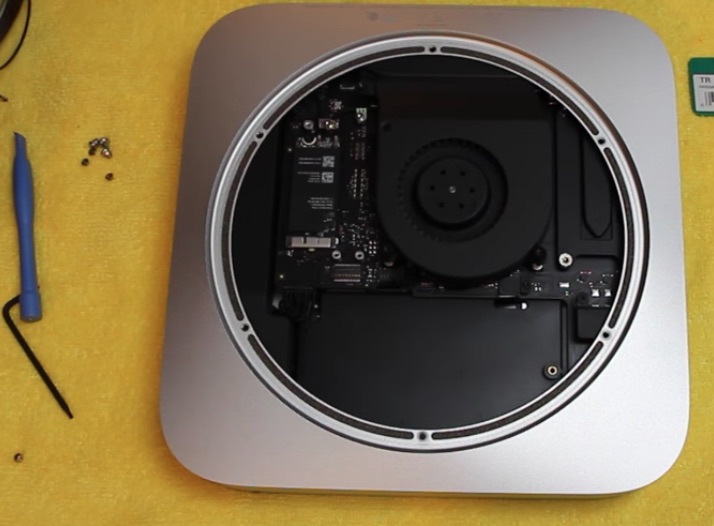
The innards are revealed. This is more tightly packed than I remember from the 2012 Mac Mini I owned once.
There are several pieces to remove in order to get access to the hard drive. At this point of the video the WiFi antenna was already removed.
Next is the Fan.
Following that is the cover over the hard drive.
All screws so far have been TORX screws.
However, getting to the hard drive requires an abomination in my opinion. The motherboard has to be slid out.
Sliding out the Mac Mini motherboard requires a special tool that's simply a U-shaped metal rod. Rather than buying a special tool, this video shows making one from a metal coat hanger. Since the motherboard is held tightly in place, removal requires a lot of force.
This looks to be utterly bonkers. Apple needs to study the Intel NUC machines, study the ease of dissassembly, ease of upgrade, and so on. It is utterly ridiculous what this video shows is required.
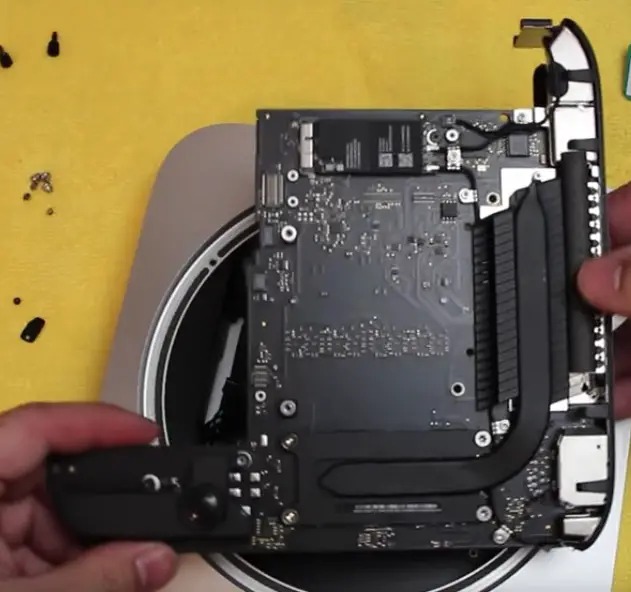
The Mac Mini 2014/2015 logic board
After removing the logic board -- and then after removing the power brick -- only then can one remove the hard drive tray.
Again, this is utterly bonkers. Apple, I now order you to study the Intel NUC design. Upgrading memory, M.2 SSD, or HDD units does not require this kind of extreme surgery. Why oh why would Apple do such a thing as this abomination of a design?
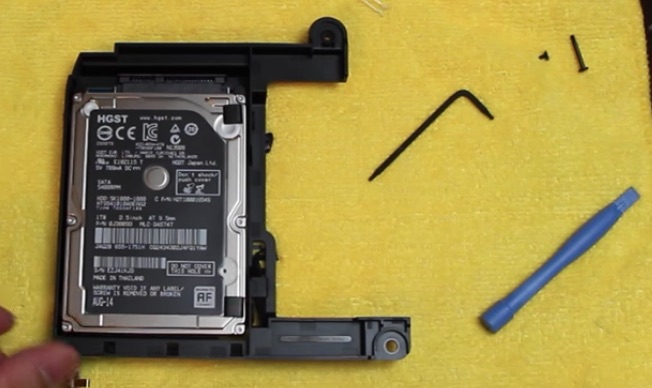
The Mac Mini 2014/2015 hard drive tray
Can you say "over-engineered"?
In any case - you first unscrew the drive from the tray. Then you remove the cable from the drive, which also requires removing an unnecessary piece of tape.
Upgrading New 2014/ 2015 Mac Mini to SSD (Solid State Drive)
Full Node project: Mac Mini 2014 Samsung Evo SSD 1TB upgrade


