David Herron
Tags: Photography »»»»
Taking pictures of the moon is challenging because of the huge contrast between the dark sky, and the brightness of the moon. The automatic exposure calculation will be completely wrong causing the moon to be an over-exposed blob of light, plus the camera might have a hard time with autofocus. The trick is to remember (or learn) some old school tips and tricks, and to put the camera in fully manual mode so you can get things just right.
A typical shot of the moon with a digital camera shows a white disk, with no detail, and might be blurry and shaky. Because we need an ultra-long zoom to get the moon to fill the shot, it's easy for the camera to shake while taking pictures. As we said in the intro, the dark sky contrasted with the bright moon makes it incredibly hard on the auto-exposure system. Finally the auto-focus system has a hard time with the focus.
It doesn't help to understand why our moon pictures come out bad, because what we want is a beautiful moon shot. Maybe we're staying in New Mexico and want to try and replicate that famous Ansel Adams picture. If we have only one chance in this lifetime to do that, we want to understand how to get the best shot.
The key old-school trick is the rule of thumb for taking sunlit scenes. The light from the moon is reflected sunlight, after all, so the Moon's surface is sunlit.
The rule of thumb I was taught in the 1970's was to set the lens aperture to f/16, and the shutter to match the ISO. So if the camera is set to ISO 400, then the shutter would be 1/400'th of a second. This is approximately the correct exposure for the moon, but you should open up the aperture a little bit since the light we receive is reflected from the moon and is therefore less bright than a normal sunlit scene.
But there is much more to it than just the exposure and aperture setting.
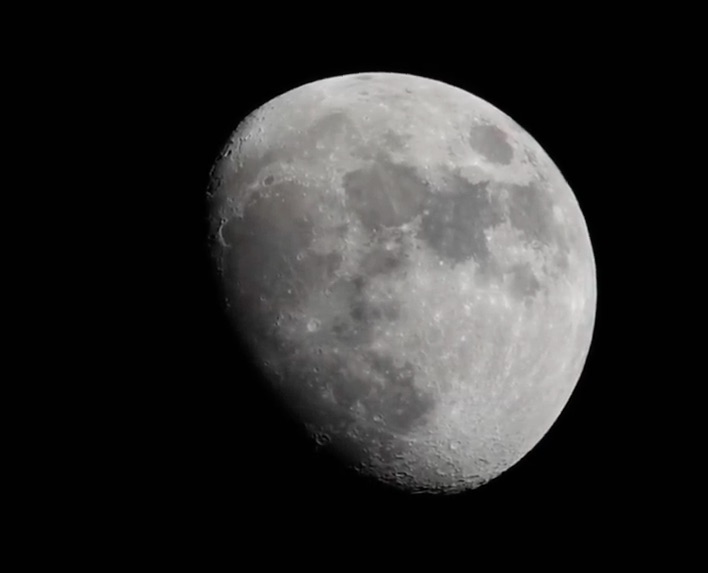
And - in case it's not clear - this tutorial is written primarily for folks looking to take shots like this. In other words, a night-time shot where the moon is seen full-frame and you hope to show lots of detail in a well-exposed sharply focused image.
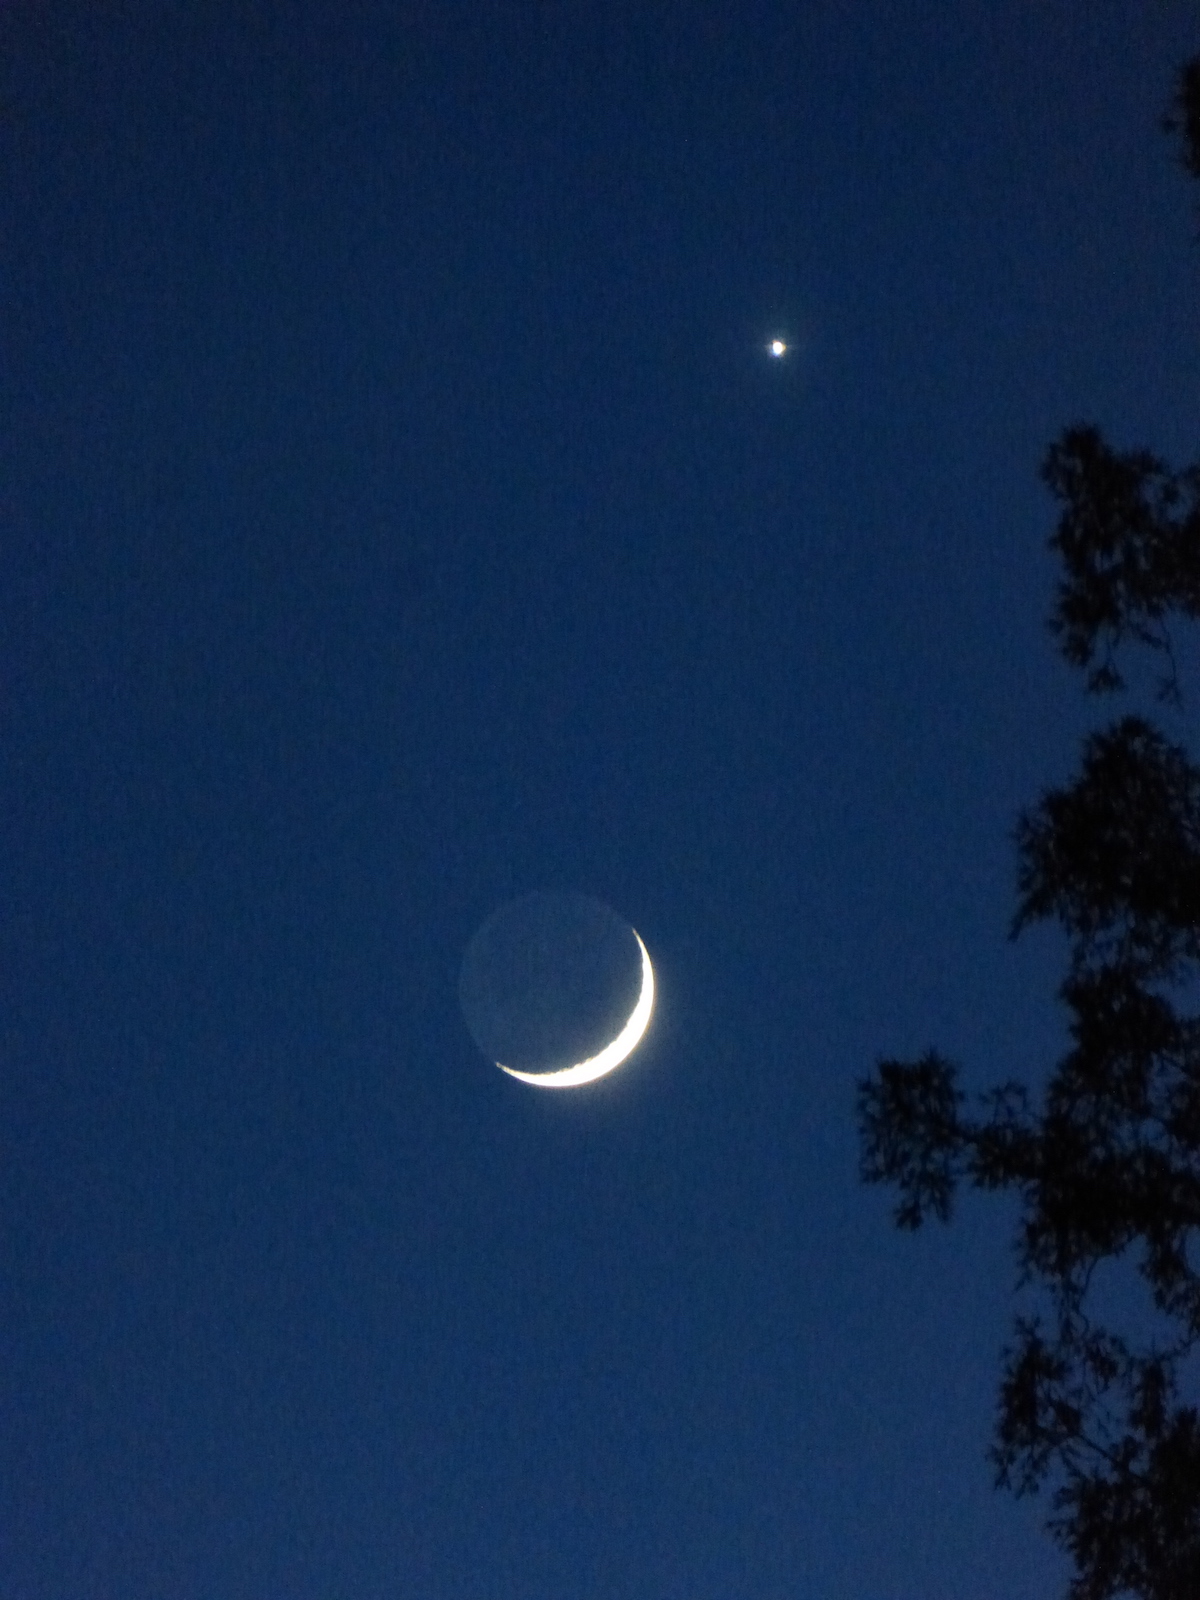
The image at the top is a different sort of moon photo, that has different considerations.
The type of camera to use
Many of the techniques we'll discuss require cameras with manual settings.
For that and other reasons it is best to use a Bridge Camera, Mirrorless Camera or a DSLR. These three camera types are first designed with features for those with higher skill level, and secondly have better lenses and sensors. The latter two types let you exchange the lens so you can get a long zoom. On the other hand many bridge cameras have an ultra long zoom range.
The image above was shot handheld with a compact camera and most of the automatic modes turned on. But the shot isn't fully zoomed in, and therefore doesn't have as much opportunity for camera shake. Further, this camera (a Lumix DMC-ZS25) has enough exposure overrides to satisfy the requirements outlined below. To get the shot I kept reducing and reducing the exposure until the shot came out right. Perhaps it helped that the moon was a sliver that night, which meant less contrast for the exposure system to get confused over.
Ensuring the camera is still
Since the camera will be at a long zoom, we must prevent all forms of vibration in the camera. The less the camera shakes during the exposure the sharper the image.
This means a good strong tripod. Adjust all the knobs and dials on the tripod so that everything is locked down tight. Do that after carefully pointing the camera at the moon and framing your shot. Remember that the moon moves through the sky, so you'll have to adjust the framing as the moon moves.
Another thing is avoiding camera shake when pressing the shutter button. Try as you might, the camera will shake from pressing the shutter. There are two ways to avoid this. First, all cameras have a self timer feature built-in, and you can use this. Second, some cameras allow you to use a remote shutter release. That lets you press a button in your hand rather than a button on the camera.
Clear sky
It perhaps goes without saying that the clearer the sky is the sharper the image.
If there is haze or fog or clouds, the moonlight will tend to scatter and cause fuzziness in the image.
Manual focus mode
You'd think that focusing the camera on infinity would be enough, but that's not correct for focusing on the moon.
Rather than let the camera try and work out the focus it is often best to do the focusing yourself. Set the camera in its auto-focus mode - and carefully read the users manual to learn how it works. There are so many different methods on different cameras that I cannot give a recommendation.
If you don't want to use manual focus mode, then set the autofocus to use a pinpoint focus point rather than a broad focus point. If the focus point in the frame includes both the black sky and the moon, this could throw off the autofocus. Instead, cameras have an autofocus mode that uses a small square focus point.
With a targeted focus point the autofocus system can focus just on the moon's surface without getting confused about the sky at the same time.
Adjusting ISO, shutter speed, and lens aperture
The exposure in any condition is a combination of these three factors: ISO, shutter speed, and lens aperture.
In the old (film) days - ISO determined what we called how fast the film was. The higher the ISO number the more sensitive the film, and the faster the shutter speed you could use. But the flip side was the higher ISO films often had lower image quality.
The ISO in a digital camera is the same - how sensitive the image sensor is. But unlike film, in a digital camera the ISO can be adjusted on the fly.
Since the moon is so bright, we can use a low ISO number to get better sharpness.
As we said, the rule of thumb for a sunlit scene is f/16 for the aperture, and 1/ISO for the exposure. Then for the moon, you open the aperture to f/11, and still use 1/ISO as the shutter speed.
In other words, we can set the ISO to ISO 100. Then the aperture should be f/11, and the shutter speed at around 1/100th or 1/125th of a second.
Those settings are good enough to stick with, but maybe you want to use a smaller aperture. Often lenses will produce a sharper picture at smaller apertures. This means adjusting either the ISO or the shutter speed to compensate. You probably want to adjust the shutter speed so that the ISO remains low.
Moving the aperture from f/11 to f/16 halves the amount of light. That's because f/16 is one stop smaller than f/11. A "stop" is a halving or doubling of the amount of light coming in. Moving the aperture from f/11 to f/22 is two stops.
Therefore one must adjust the shutter speed to be either one or two stops longer. For example, ISO 100, at f/16, means a shutter speed around 1/50th to 1/60th of a second, and at f/22 means a 1/25th to 1/30th of a second shutter speed.
Those guidelines are for shots where the moon fills the frame
What if we want a different shot? The shot at the top is an exception to these rule-of-thumb exposure settings, however.
In this case I did not attempt to zoom in enough for the moon to fill the frame. Instead this framing, with Venus alongside the Moon, was perfect. How did I get the exposure?
This was shot with a Lumix DMC-ZS25 which does have all the manual exposure settings one could want. But I did not use those settings.
Instead there is an exposure compensation setting. That feature tells the camera to over-expose or under-expose by a certain value. Namely, I set it to -1.3 EV, meaning 1 1/3rd stops underexposure. That resulted in ISO 1600, a 1/6th of a second exposure, at f/6.4. In other words, the camera exposed this based on the dark sky rather than the bright moon.
The camera was hand-held. I did my best to hold the camera still, plus it has a good image stabilization system built-in.


