David Herron
Tags: Apple »»»» MacBook Pro »»»»
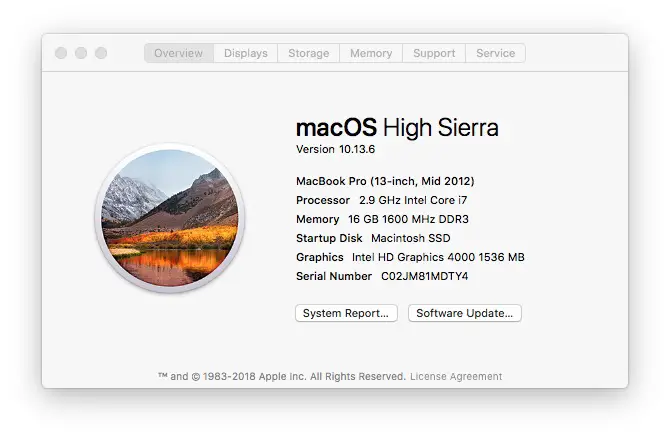
Why spend megabucks for the latest Mac when you can save a lot by buying an older machine? With a few simple upgrades (maxing-out the memory, using SSD) an older machine can perform similarly to the latest models. I am typing this on a 2012 MacBook Pro with 16 GB memory and a 500GB SSD, plus a 750GB HDD, that is satisfying all my needs from writing articles to heavy-duty software development. Just because the manufacturer wants you to buy the latest, doesn't mean you must do so.
The advantage of this upgrade is
- Faster boot time -- 15 seconds versus 1.5 minutes
- Faster app launch time -- "lightning fast"
- Overall faster performance -- SSD is a ton faster than HDD's, meaning when the OS reads data or applications from disk that happens much faster.
The 2012 MacBook Pro is the last model that was trivially easy to upgrade or repair. Following the 2012 models Apple has made it progressively harder to open the machine and replace things. My goal a couple years ago when setting up this machine was to have a reasonably powerful computer that will last for as long as possible and which I can repair as needed.
When selecting a 2012 MacBook Pro, strive for the Core i7 version. It was available with Core i5 and Core i7 CPU's, and of course the i7 is more powerful so pony up the extra bucks required for this machine.
The disadvantage is that you won't have the latest and greatest, with the key problem being a lesser grade of GPU. If your work requires a GPU -- like, for video editing -- you may be disappointed. Otherwise this older MacBook Pro handles even demanding software development tasks just fine.
In one of the embedded videos, the presenter found Final Cut Pro to be very usable, but Premier Pro was almost unusable. With Final Cut Pro, the upgraded machine even rendered videos faster than it did before the upgrade.
Upgrading the 2012 MacBook Pro
As seen in the embedded videos, the process is very simple. Basically you pop off the bottom cover, disconnect the battery, replace the RAM sticks, replace the hard disk, and optionally remove the DVD drive replacing it with a disk bracket containing another hard disk. Afterwords you install MacOS X on the new SSD, and perform a User Migration to bring over your files from the old disk.
First thing is to prepare a bootable flash drive with the MacOS X Installer. This is very easy, though requiring a slight deviation from the normal MacOS X upgrade instructions. Normally you go to the app store, tell it to download the MacOS X upgrader, and let it do its thing. Instead you must divert the process by not running the upgrader after downloading it.
Instead - once you've downloaded the upgrader, exit it, then head to the command-line terminal application to type a couple commands in the terminal. Once the MacOS X upgrader is installer it is available as a command in your /Applications folder.
Mojave:
$ sudo /Applications/Install\ macOS\ Mojave.app/Contents/Resources/createinstallmedia --volume /Volumes/MyVolume
High Sierra:
$ sudo /Applications/Install\ macOS\ High\ Sierra.app/Contents/Resources/createinstallmedia --volume /Volumes/MyVolume
Sierra:
$ sudo /Applications/Install\ macOS\ Sierra.app/Contents/Resources/createinstallmedia --volume /Volumes/MyVolume --applicationpath /Applications/Install\ macOS\ Sierra.app
El Capitan:
$ sudo /Applications/Install\ OS\ X\ El\ Capitan.app/Contents/Resources/createinstallmedia --volume /Volumes/MyVolume --applicationpath /Applications/Install\ OS\ X\ El\ Capitan.app
Depending on the OS version you downloaded, you'll run one of the above commands. For complete details see the Apple knowledge base:
https://support.apple.com/en-us/HT201372
Once you have the bootable flash drive ready, you can swap the parts. It's useful to test booting from the flash drive before swapping the parts. Simply reboot your computer while holding down the Option key, as outlined in this article:
https://support.apple.com/en-us/HT202796
Swapping the parts is very simple. First remove the bottom case -- this requires a 000 size Phillips head screwdriver. There are several screws, some are very tiny while a few are larger. Make sure to store the screws safely so you don't lose them.
Before removing any parts disconnect the battery using a plastic tool or credit card.
Replacing the RAM modules is easy. They pop right now, then the new ones pop right in.
Replacing the hard disk is similarly easy. There is a bracket holding the drive down. Then the old disk can be popped out easily using the plastic tab. Then remove the Torx screws from the sides of the old disk, installing them on the SSD. Then move the plastic tab from the old disk to the SSD. Then remove the drive cable from the old drive, connecting it to the SSD. Then install the SSD in place of the drive, and screw down the bracket.
The final upgrade is optional. Does anybody use the DVD drive any more? I felt the DVD drive was not necessary, and there are brackets available to let you install a laptop drive in place of the DVD drive. This upgrade is a little more involved. It boils down to disconnecting the cables from the DVD drive, unscrewing some screws, moving parts from the DVD drive to the bracket, installing the drive in the bracket, then installing the bracket+drive in place of the DVD, and replacing the screws and cables. See the attached videos for more details.
In my case I used the 750GB drive which came with the laptop in the drive bracket. As suggested in the attached video, it's possible to use two SSD's and set up a RAID configuration between them. I haven't done this, but the RAID configuration may provide more stability and speed.
Once the new parts are installed, boot the machine into the installer -- by holding down the Option key. Run the MacOS X installation.
There is a question of the best way to migrate your files and applications to the SSD drive. One way is to use the migration assistant during MacOS X installation. You can optionally wait until MacOS X is installed, and run the migration assistant afterward. Or, if you have a Time Machine backup, you can restore the system from the backup. All of these options are available during the installation.
The old drive must be installed in an external drive case. As a bonus you'll have a portable disk drive you can carry around after all this is done. But, currently the old drive has your operating system and files.
During the installation, you'll have the opportunity to migrate from this old drive. Simply plug the drive into a USB port, then use the migration assistant. Once the installation is finished, you'll be able to boot directly into the familiar environment you had before -- but it will be a lot faster.
Fastest 2012 MacBook Pro Ever! Upgrade Guide - in 4K
2012 MacBook Pro in 2018 | Can it handle 4k video editing?
Upgrading a 2012 Macbook Pro with a new SSD!


")


