David Herron
Tags: Screen Recording »»»»
Those of us who write software tutorials explaining how to use this or that software tool, we need to demonstrate using the software. I tend to create a static bit of text showing what I did and maybe the output. But there's something different about an animated display showing the commands as they were typed by a human. In this post we'll go over two ways to generate animated GIF's showing commands typed in a terminal window.

The basic idea is that animated GIF's are a cheap and easy way to put what amounts to a video on a web page. It's not exactly a video even though it is moving images, but because it is a moving image it is a video. Who thought we could be pondering a paradox in a software tutorial?
Turns out there's quite a lot of tools available for Mac OS X to capture desktop interactions as an animated GIF. Searching through the Mac App Store, I selected GIPHY Capture to try out. While it's easy to use, I decided against using it and went with a tool recommended by a co-worker.
GIPHY Capture
This seems to be a free app with a paid service, I didn't check to be sure. There is a service you can create an account with (which I did not do) and upload captured sessions there (which I did not do).
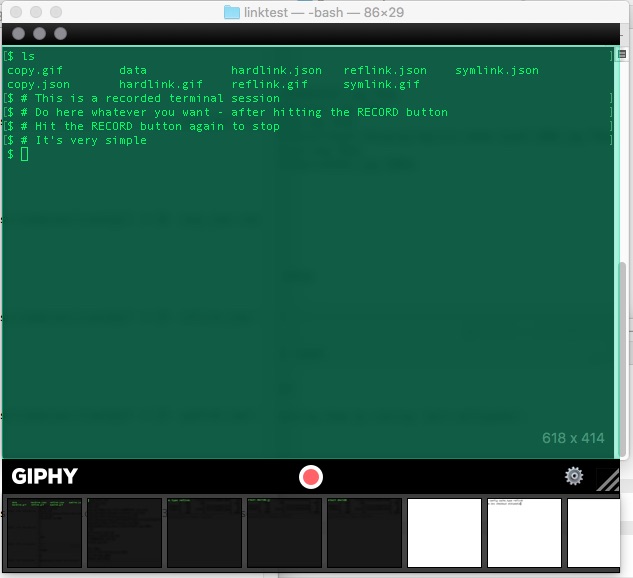
The recorder half of the application is this semi-translucent window you position over an area you want to record. When you click the red RECORD button, that window is the only place you can interact with and GIPHY records whatever you do. Clicking the RECORD button again stops the recording session.
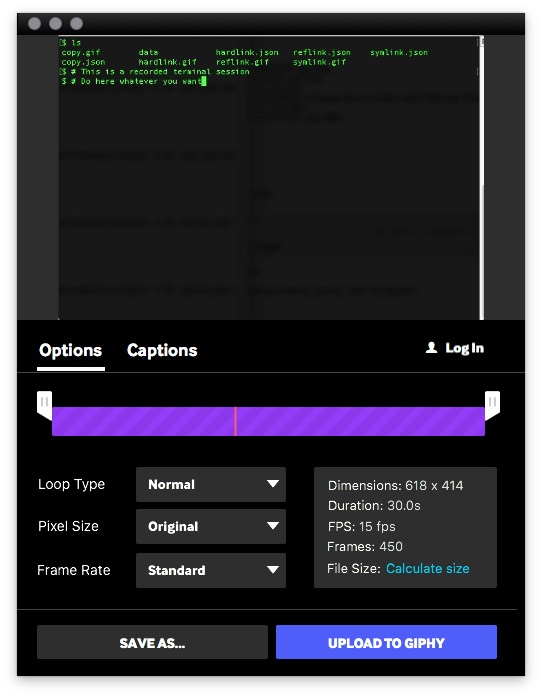
Clicking on one of the recorded sessions you have this window with which to process the recorded session, and then save it as a GIF.

And that's the result. Very simple and straight forward.
There are two big downsides ..
- Processing recorded sessions is very primitive.
- The resulting GIF is enormous - over 5 megabytes for this one.
Asciinema
This is an open source project (
asciinema.org) with some very interesting capabilities. For instance it supports a mode where the screen recording is not an animated GIF but instead ends up as text you can copy and paste.
To generate an animated GIF use a companion project
asciicast2gif
Installing Asciinema is pretty easy, there are prebaked packages for all kinds of operating systems. Well, not for Windows. It has design decisions that require a Unix-like environment .. e.g. it starts a subshell and records input and output with that shell.
Since I am on Mac OS X and use MacPorts, I did this:
$ sudo port selfupdate && sudo port install asciinema
To record a session, you run asciinema rec. This gives you a new command prompt, into which you type whatever commands you want to record. When finished you type exit to the shell or hit CTRL-D to end the shell. You'll then be returned to your original shell.
Playing a recorded session is as easy as asciinema play file-name.json. It plays in the terminal for you.
It's possible to upload a recorded session to Asciinema's server, and you can then embed that session into a web page for playback. For my purpose I wanted to embed a GIF instead.
That's where asciicast2gif comes to the rescue.
Unfortunately its installation is not so easy. It is easiest to run this tool as a Docker image. Well, if you have Docker installed on your computer. Docker is so convenient and useful that it should be part of your toolkit, and already be installed on your machine.
Installation:
$ docker pull asciinema/asciicast2gif
The basic execution instructions are:
$ docker run --rm -v $PWD:/data asciinema/asciicast2gif \
        [options and arguments...]
The --rm flag means to erase the container when it's finished executing.
The -v $PWD:/data flag mounts the current directory into the container as the directory /data.
Finally the asciinema/asciicast2gif says to execute the asciicast2gif container.
This much is typical of Docker containers that package a command you can run. There are lots of these. For example cross-compiling C/C++ code for single board computers is made easier with the GCC cross compiler toolchain that's distributed as a Docker container.
With tools packaged this way the command-line options appear on the command line after naming the Docker image.
In my case I ran it as so:
$ docker run --rm -v $PWD:/data \
        -e GIFSICLE_OPTS="--loopcount" \
        asciinema/asciicast2gif \
        -h 23  hardlink.json hardlink.gif
With -e GIFSICLE_OPTS="--loopcount" we're passing in an environment variable that sends command line options to one of the internal tools, GIFSICLE. This option says to make it an animated loop.
Which gives us a little thing to talk about. The README for asciicast2gif makes it clear this tool is built on top of several other tools, including PhantomJS. I figure it's probably on the complex side to successfully get it set up, and it's better to use the prepackaged Docker container instead.
The -h 23 option sets the vertical size of the terminal window to 23 lines. That's what I needed for the project I tried this on.
The final options are the input file and the output file.
The terminal session is recorded as a text file in JSON format. That makes it possible to edit the JSON to clean up the recording if you like. For example it captured a bit of text at the beginning, and at the end, that I did not want in the output. The key to editing the file is to understand that it records keystrokes sent to the child process, and records text bursts coming from the child process. Simply search through looking for the section you're interested in.
Conversion looks like this:
$ docker run --rm -v $PWD:/data \
>         -e GIFSICLE_OPTS="--loopcount" \
>         asciinema/asciicast2gif \
>         -h 10 foo.json foo.gif
==> Loading foo.json...
==> Spawning PhantomJS renderer...
==> Generating frame screenshots...
==> Combining 52 screenshots into GIF file...
==> Done.
And the result ...

Unlike GIPHY, the recorded GIF in this case is a very svelte 50kb or so.


